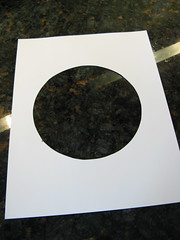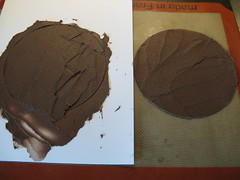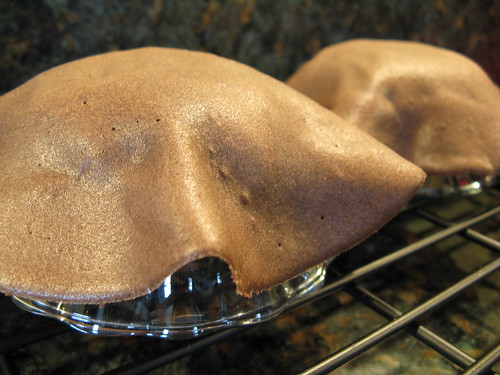
I chose to make my tuile into little cups to serve my homemade gelato (We were supposed to serve it with something light & I figured since my gelato has no egg in it, its lighter than normal). Since the gelato is vanilla I flavored the whole tuile dough with dark chocolate cocoa. I didn't really have anything to use as a stencil to shape the tuile circles before baking so I winged it & cut a 6" circle out of the piece of card stock.


I wasn't exactly sure how thick to spread out the dough but from what I've seen it should be pretty thin. I don't have an offset spatula so this was a little tricky with a kitchen knife. The second question was how long to cook them, the recipe says until the edges are golden brown but I couldn't really tell that with the chocolate dough. I guessed they were cooked when the dough looked set. I had a little bit of a tricky time with the shaping & they did crack in a few spots but not badly at all. Everything crisped up nicely except the bottoms of the cups. I think the center of my circles may have been a little thicker than the rest.

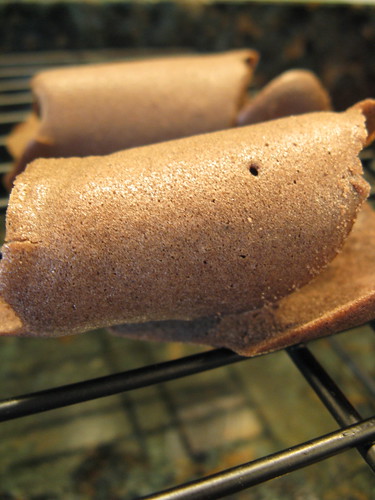
I also made some curls around a pen which we ate right away. The chocolate flavor was so good.

My only disappointment with these was how quickly they went soft. I made them after lunch, let them cool & put them in an airtight container. By dessert they were all ready chewy instead of crisp though they did retain their shape & the flavor was still great.

Following is the recipe taken from a book called “The Chocolate Book”, written by female Dutch Master chef Angélique Schmeinck, I have adapted it but cutting the recipe in half & making the whole thing chocolate flavored.
Tuile
Yields: I got 2 6" circles & 3 curls with my half batch
Preparation time batter 10 minutes, waiting time 30 minutes, baking time: 5-10 minutes per batch
2 T softened butter (not melted but soft)
1/4 c sifted confectioner’s sugar
a dash of vanilla extract
1 large egg white (slightly whisked with a fork)
1/4 c sifted all purpose flour
1/2 table spoon cocoa powder (I used Hershey's Special Dark)
Few drops of water
Preheat oven to 350 F
Using a hand whisk or a stand mixer fitted with the paddle (low speed) and cream butter, sugar and vanilla to a paste. Keep stirring while you gradually add the egg whites. Continue to add the flour in small batches and stir to achieve a homogeneous and smooth batter/paste. Be careful to not overmix. Mix in the cocoa & a few drops of water.
Cover the bowl with plastic wrap and chill in the fridge for at least 30 minutes to firm up. (This batter will keep in the fridge for up to a week, take it out 30 minutes before you plan to use it).
Line a baking sheet with parchment paper or a silicone mat and chill in the fridge for at least 15 minutes. This will help spread the batter more easily if using a stencil/cardboard template such as the butterfly. Press the stencil on the bakingsheet and use an off sided spatula to spread batter. Leave some room in between your shapes.
Bake shapes in preheated oven for about 5-10 minutes or until the edges turn golden brown (mine took about 7 minutes). Immediately release from bakingsheet and proceed to shape/bend the cookies in the desired shape. These cookies have to be shaped when still warm, you might want to bake a small amount at a time or maybe put them in the oven to warm them up again. Or: place a bakingsheet toward the front of the warm oven, leaving the door half open. The warmth will keep the cookies malleable.
If you don’t want to do stencil shapes, you might want to transfer the batter into a piping bag fitted with a small plain tip. Pipe the desired shapes and bake. Shape immediately after baking using for instance a rolling pin, a broom handle, cups, cones….
The tuile bowl is amazing! Great job!
ReplyDeleteThe chocolate tuile sounds like the perfect match for the gelato!
ReplyDeletePerfect combination. The sofness from the ice cream and crunchiness from the chocolate tuile, so perfect.
ReplyDeleteWell done for this month challenge.
Cheers,
Elra
That looks awesome Kat! What a delicious combo!
ReplyDeleteyum! you always have amazing food and amazing photos!
ReplyDeleteStunning! Great job with this month's challenge.
ReplyDeleteGreat job molding the tuiles,Kat... the flavor sounds delicious too :)
ReplyDeletehmmm. That looks great. Can you send that over to me. Yah know its cold enough that will stay solid...
ReplyDeleteLOVE that chocolate bowl, and your other creations. Wonderful job!
ReplyDeleteMmm, love the chocolate tuiles! The look amazingly good =D!
ReplyDeleteMmmm, a chocolate cookie cup with gelato - what could be better? Great job!
ReplyDeleteThese look amazing. Such pretty photos too! Nice job!
ReplyDeleteThat looks so delicious and comforting. Who says we can't have both: chocolate and vanilla are a great classical combo. Some of my leftover tuiles got chewy after I put them in a container, too, but tuiles I left out stayed crisp, so I think next time, I'll either leave them out, or pack them with a paper towel to suck up any possible moisture.
ReplyDeleteBeautiful, Kat!
ReplyDeleteWhat a nice change... I've been looking at pale tiles and the rare colored ones. all day... but this is really, really nice! Bravo!
I should have made chocolate tuiles! They look so yummy and paired with vanilla gelato, doesn't get any better! Looks great!
ReplyDeletei love the contrast of your dark tuile to the white of your gelato. i was concerned that my tuiles would go soft too so i ate them pretty much the second i was done taking pix of them!
ReplyDeleteThe bowl is perfect and the pic of the Tuile and Gelato..simply awesome! :)
ReplyDeleteThese look delicious. I agree with whoever said that the tuiles left out stayed crisp.
ReplyDeletea scrummy combo - chocolate & ice, sounds fab!
ReplyDeleteright. so i love bread bowls, and tortillas shaped into a bowl are always a treat, but this is clearly the best edible bowl of all time. bravo. :)
ReplyDeleteThey look good to me! It's nice to read the things that worked and didn't. Good job on the improvising.
ReplyDeleteHi Kat-- great job on the challenge.
ReplyDeleteYour tuiles look wonderful! I love the deep dark chocolate color you got. Nice to see more foodies from Minneapolis!
ReplyDeleteLove you bowls.
ReplyDeleteMine went pretty soft quick as well.
Nice bowl, all a uniform color. They look good.
ReplyDeleteYour tuiles look delicious! I found that both the savory and basic tuile recipe seemed to get soft pretty quickly. I guess that's typical for tuiles.
ReplyDeleteGelato has air incorporated, so I would consider it "light" even with a few eggs ;-)
ReplyDeleteI love this! It's like a work of art!
ReplyDelete