Friday, March 25, 2011

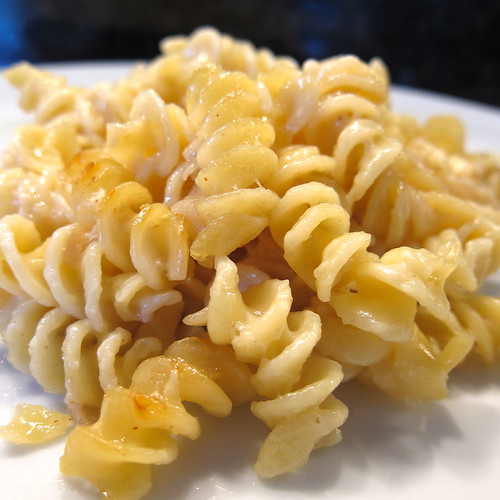
Whiskey and Smoke Mac and Cheese

Full of caramelized onions flavored with whiskey & smokey mozzarella, Matt calls this variation of our homemade mac & cheese the manly version.
Whiskey and Smoke Mac & Cheese
The St. Patrick's Day Burgers from Burb! Where Food Happens were on our menu for the week & they are topped with the whiskey caramelized onions. Then it hit me, "oh, those whiskey onions would be good in mac & cheese too!" Matt had picked up some smoked mozzarella to go on our pizza & we both realized that smokey flavor would be great with the whiskey. Thus, this dish was born.

The whiskey & smoke flavors were actually both pretty subtle. The whiskey aroma was definitely there in the onions & every now & then you got a nice little bite of its flavor in the pasta. Next time I would look for a smokier cheese as the one we bought was a little wimpy. Maybe we should try smoking our own?! Still this was a great batch of mac & cheese, actually Matt especially thought it was fabulous

Whiskey & Smoke Mac & Cheese
The alcohol gets cooked out of the whiskey & the flavors are subtle so this is still a mac & cheese you could serve to your kids.

Batch of Whiskey Onions from Burb! Where Food Happens
1 lb pasta, we use rotini but elbow or small penne would work too
1 T unsalted butter
2 T all-purpose flour
1 c milk
1/2 c heavy cream
5 oz smoked mozzarella, chopped
4 oz white cheddar, chopped
1 t spicy brown mustard
salt & pepper

Caramelize the onions according to the recipe. They'll take you about 45 - 60 minutes. You should end up with about 1/2 c onions.

Preheat oven to 350 F.

Cook the pasta according to directions. Drain & set aside.

In a large saucepan melt the butter over medium heat. Add the flour. Stir while cooking for 1 minute, do not let brown. Slowly whisk in the milk & cream. Continue whisking until the sauce is hot, smooth & slightly thicken. Reduce the heat to medium-low. Add the cheese & mustard. Stir until the cheese is melted.

Mix the cheese sauce, pasta & onions together. Make sure to mix well so the onions are not in one big clump.

Bake for 25 minutes until golden brown on top.

6 servings. (If you are being healthy with your serving size though Matt & I ate half a batch for dinner last night.)

If you are not reading this post in a feed reader or at http://agoodappetite.blogspot.com OR at http://agoodappetite.com then the site you are reading is illegally publishing copyrighted material. Contact me at katbaro AT yahoo DOT COM. All recipes, text and photographs in this post are the original creations & property of the author unless otherwise noted. © 2007-2011 Kathy Lewinski

Thursday, March 24, 2011

Pizza Night or the Search for the Perfect Crust

If you follow this blog at all you know we like to make pizza at home. It's a fun way to play with different flavor combinations or use up small amounts of things in the fridge. That has lead us to a search for the perfect crust for homemade pizza. I'm embarrassed to say when we first started making pizza at home we used the crust that came in a tube from the grocery store. It was quick & easy but nothing like real pizza crust, more like pizza toppings on bread. So, we started trying lots of different recipes we found around the web.
Pizza with Apricots, Red Pepper & Prosciutto
Our go-to crust for a long time as been this recipe from Wisebread. It was pretty easy to make though, you have to remember to get it rising 2 hours before dinner. We've found the recipe calls for way too much liquid & cut it down by a third. It's not very easy to work with when it came to making the pizza, very hard to spread out. It is an easy recipe to play with flavor-wise though, we've done a honey wheat version & a wheat bran version as well as adding different flavorings like roasted garlic. A good crust but almost too crispy (or some might say hard).
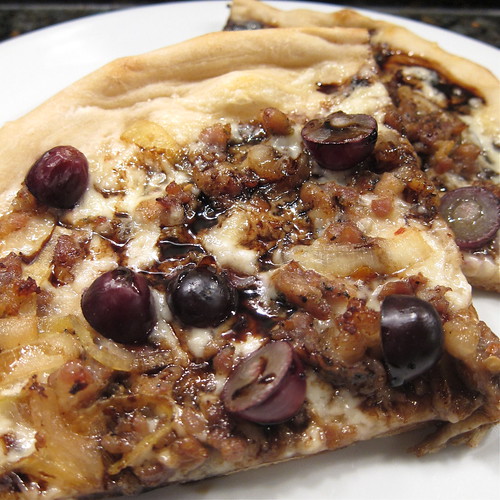
Sausage & Grape Pizza with Balsamic Reduction
Then we tried the Easy-At-Home Pizza Dough from Serious Eats. Talk about a basic dough, it doesn't even have olive oil in it. It needs to be made 3 - 24 hours before you plan on using it. We had to press it out very thin to get the size pizzas the recipe said it made. It got quite crispy & even stayed crisp with a good drizzle of balsamic on it. The texture was good, especially at the edge (my favorite part) but, it was boring on the flavor front.
Search for the Perfect Pizza Crust
This week we tried the New York Style Pizza also from Serious Eats. This recipe called for you to make the dough in a food processor 24 hours up to 5 days before using. Apparently, using a food processor keeps the dough from over-oxidizing which affects flavor. I did 2/3 of the recipe & I want to know how big a food processor the author had! I thought even this reduced amount was going to blow out the motor on mine. I ended up having to knead it a lot more than the 1 or 2 times the recipe called for (probably adding more of that evil oxygen). The end result though, was a dough that was a delight to work with once its time to make your pizza, so easy to get that thin crust we like. It cooked up a little more bread-like than cracker crisp still, it stood up fine to the toppings. It had a nice flavor which I think would only get better if we'd left it in the fridge for more than one day. Matt liked the way the crust had air pockets like a lot of the crust you get out. This my be the winning crust so far though I'll need a bigger food processor to make it again.

Maybe it's time to take what I've learned from all the crusts we've tried & create my own "perfect" crust recipe. Do you have a favorite pizza crust recipe? Share it with us in the comments & tell us why it's your favorite.

Pizza's pictured above Apricot, Red Pepper & Prosciutto on Wisebread Crust, Sausage & Grape on Easy-At-Home Crust and this week's Salami, Mushroom, Red Pepper & Smoked Mozzarella on New York Style Crust.

If you are not reading this post in a feed reader or at http://agoodappetite.blogspot.com OR at http://agoodappetite.com then the site you are reading is illegally publishing copyrighted material. Contact me at katbaro AT yahoo DOT COM. All recipes, text and photographs in this post are the original creations & property of the author unless otherwise noted. © 2007-2011 Kathy Lewinski

Tuesday, March 22, 2011

Crockpot Beef and Beans over Spanish Rice

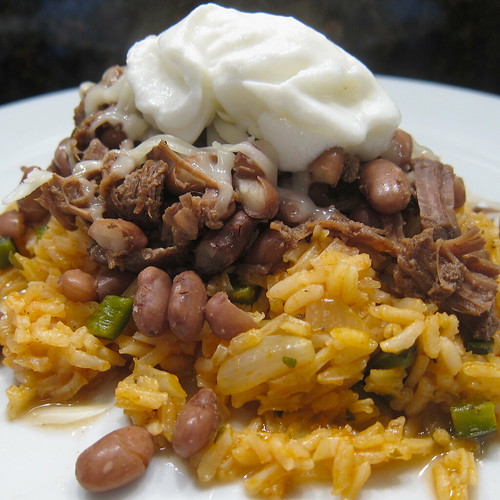
We made another big batch of our 24-Hour Crock Pot Beef last week which meant I was looking for ways to use all that shredded beef. My original plan was to use it in a Mexican inspired hotdish but, as I was formulating that plan I decided to just serve the meat over some Mexican rice. The result wasn't too far from eating a burrito without the tortilla.
Crockpot Beef & Beans over Mexican Rice
When we moved here from San Francisco a few years ago, we thought there would be a lot of food we would miss. We were happily wrong & found Minneapolis to be full of wonderful restaurants & markets. There was one thing that we sorely missed though, the Mission-style burrito. Sure we can get a burrito here & we've gotten used to them but, they are just not the same. As I see it there are two big differences. First, in San Francisco they melt the cheese on the tortilla when they steam it (this might be my favorite thing). Second, they use Spanish rice which adds a big boost of flavor. So, I guess you could call this my tortilla-less version of a Mission-style burrito.

Whatever you call it this was a dish that was full of flavor & super easy to make especially if you've got the leftover beef. We reheated the beef with some pinto beans & a little of their cooking liquid. Then added some shredded cheddar & sour cream (ok, it's actually plain yogurt). Matt also added some hot sauce & salsa.

Spanish Rice

1 T olive oil
1 c long grain white rice
1/2 c chopped yellow onion
1 clove garlic, minced
1/2 poblano pepper, seeded & chopped
1/2 t Mexican oregano
1/4 t epazote
1/4 t ground chipotle
1 heaping T tomato paste
2 c chicken stock (or combination of chicken stock & water)

In a large stock pot heat the olive oil over medium-high heat. Add the rice & toast for a minute, stirring to coat. Add the onion, garlic & pepper. Sauté until the onion is translucent. Stir in the oregano, epazote, chipotle & tomato paste. Add the chicken stock & stir to blend everything. Bring to a boil. Cover, reduce heat & let simmer for 20 - 25 minutes. Remove from the heat & let sit 5 minutes. The stock should all be absorbed & the rice tender.

Makes 4 servings.

Top the rice with any or all of the following; beef, chicken, beans, grated cheddar, hot sauce, salsa, lettuce, tomatoes, guacamole, and sour cream.

If you are not reading this post in a feed reader or at http://agoodappetite.blogspot.com OR at http://agoodappetite.com then the site you are reading is illegally publishing copyrighted material. Contact me at katbaro AT yahoo DOT COM. All recipes, text and photographs in this post are the original creations & property of the author unless otherwise noted. © 2007-2011 Kathy Lewinski
Monday, March 21, 2011

Sun Street Bread and Weekly Menu 3/21 - 3/25/11

Today was the day we'd been waiting for since the Kingfield Farmers Market closed for the season in October. Today was the opening of the Sun Street Breads bakery!
Sun Street Breads
Last summer we became quickly addicted to Solveig Tofte's bread, pastries & especially biscuits from her booth at the farmer's market. Soon the rest of Minneapolis caught on & she had lines before the market even opened on Sunday mornings. Lucky for us, she & her husband Martin Ouimet decided to open a new bakery & cafe in the neighborhood so we could get our fix all the time (this might actually be dangerous).


Created with flickr slideshow from softsea.

The new bakery is a bright, cheery place with lots of big windows to light up the fun mural & tiled walls. The kitchen is open, allowing you to see the bakers at work & Solveig to chat with all the customers as they come in for their morning treats. Of course, what we're here for is the food. The breads we love are back, Lunchbox, Figgy Rye & the classic baguette, as well as the famous biscuits & turnovers. But even better, Sun Street is serving breakfast & lunch. All summer we talked about what a great breakfast sandwich the biscuits would make & now that dream has come true. I had the basic biscuit sandwich with bacon, scrambled eggs & cheddar all on that buttery, flaky biscuit. Matt had a Juicy Piggy, a breakfast take on the Juicy Lucy with a pepper jack stuffed sausage patty, lettuce & tomato. He had them add some scrambled eggs to it for a really hearty breakfast. The bakery also offers full egg & potato, pancake & biscuit & gravy breakfasts until 2:00pm. I'm looking forward to having the biscuit with fried chicken & bacon soon.

With all that good bread Sun Street is also offering a lot of lunch sandwich options too. We need to go back to try the Porketta with fennel slaw & the really interesting sounding Susan, apple butter & fried shallot cream cheese. Since they have Wi-Fi it'll be easy for us to go & have a leisurely lunch plus get a little work done. We understand dinner plus beer & wine will be added to the menu later in the year. We couldn't have asked for a better addition to the neighborhood!

Sun Street is at the corner of 46th & Nicollet in South Minneapolis. It's open daily from 6:30 am to 2:30 pm.

On to Menu Planning Monday....

Crock Pot Beef & Beans over Mexican Rice

Pork & Hominy Stew

Mushroom & Salami Pizza

Whiskey & Smoke Mac & Cheese

Burgers with Whiskey Onions & Swiss

If you are not reading this post in a feed reader or at http://agoodappetite.blogspot.com OR at http://agoodappetite.com then the site you are reading is illegally publishing copyrighted material. Contact me at katbaro AT yahoo DOT COM. All recipes, text and photographs in this post are the original creations & property of the author unless otherwise noted. © 2007-2011 Kathy Lewinski

Friday, March 18, 2011

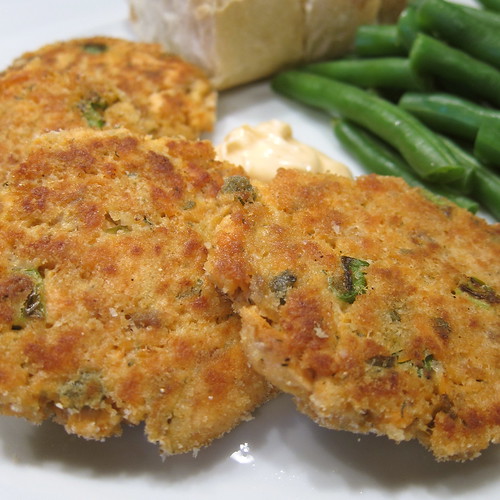
Salmon Cakes

We are working our way through all the wild Alaskan salmon in our freezer & I think these salmon cakes might be my new favorite way to serve them so far. (Do I say that about every new salmon dish I try?)
Salmon Cakes
They were moist & flavorful without too much breading (so often the problem with fish cakes). We poached the salmon which I think really helped keep the fish moist & easy to form into cakes. I almost baked it but am glad I didn't since, I think the texture would have been very different. Plus poaching takes almost no time which meant these cakes were done in about 30 minutes including prep time. The seasoning of dill & tangy capers complimented the salmon perfectly. We pan fired the cakes with just a small amount of olive oil. They got brown & crispy on the outside with a soft, tender middle. Very tasty on their own but these salmon cakes were even better with an easy spicy mayo, just some mayo mixed with crystal hot sauce. That little bit of heat mixed with the creamy mayo was the extra embellishment that really bumped up the flavor.

Salmon Cakes

3/4 - 1 lb salmon filet
1/2 t dried dill
cayenne
1 1/2 T capers, drained & roughly chopped
4 scallions, chopped
salt & pepper
2 eggs, beaten
3 T bread crumbs plus another 1/2 c or so for dredging
olive oil

Cook your salmon filet. We poached ours but bringing 1 cup of water to a simmer in a large skillet. We added the salmon filet skin down, covered & let it simmer until cooked through, 5 - 10 minutes. Keep an eye on it so it doesn't over cook. Remove from the skillet & let cool.

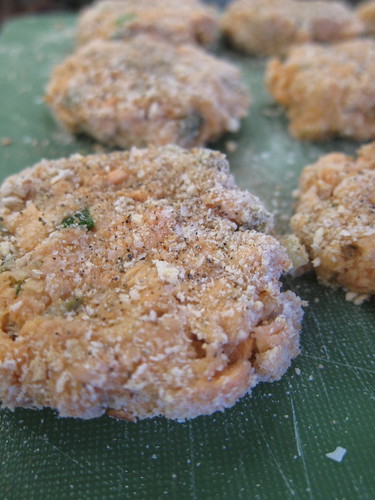
Flake salmon with a fork making sure to remove any pin bones & skin. Put in a bowl (you should have about 2 cups). Mix in the dill, a pinch or two of cayenne, capers and scallions. Season with a little salt & pepper. Mix in the beaten eggs & 3 tablespoons of bread crumbs. Form the salmon mixture into 2 inch patties & dredge in the remaining bread crumbs.
Salmon Cakes
Coat the bottom of a large non-stick skillet or griddle with a thin layer of olive oil. Heat over medium-high. Place the patties on the skillet & press down with the back of a spatula to flatten a little. Let cook until golden brown, about 3 - 4 minutes. Flip & cook the other side until brown, another 2 - 3 minutes.

Serve with a little hot sauce mixed into mayonnaise.

Makes 12 patties

If you are not reading this post in a feed reader or at http://agoodappetite.blogspot.com OR at http://agoodappetite.com then the site you are reading is illegally publishing copyrighted material. Contact me at katbaro AT yahoo DOT COM. All recipes, text and photographs in this post are the original creations & property of the author unless otherwise noted. © 2007-2011 Kathy Lewinski
Wednesday, March 16, 2011

Italian Sausage and Bean Soup

We like to make a big pot of chili or soup during the week so we can have it for weekday lunches. During the winter it is so much more appealing than a cold sandwich or salad. Matt came up the the idea for this soup as a way to use up a pound of Italian sausage in the freezer. It made about 6 - 7 servings so, we are set for a couple days anyway.
Italian Sausage & Bean Soup
Oh my, was this a flavorful soup & we didn't even use any stock in it. A lot of the flavor comes from the seasoning in the sausage so, make sure your pick a really good one or even better grind & spice your own. The red pepper, which was a last minute addition, is also a prominent flavor. Finally, we use the cooking water from beans in the soup as well. In the last couple of months we've really come to love the flavor the pot liquor from cooking beans adds to soups & stew, don't throw it out! It probably helps that we use really good Rancho Gordo beans.

Italian Sausage & Bean Soup

1 c dried white beans (we used Rancho Gordo snocaps)
1/2 T olive oil
1 lb bulk Italian sausage
1/2 red pepper, seeded & chopped
1/2 c chopped yellow onion
1 14/5 oz can diced or crushed tomatoes, juice included
1 T tomato paste
1/4 c red wine
1/2 t dried basil
1/2 t dried oregano
salt
Parmesan rind (optional)

About 3 hours before you want to make the soup start your beans. Rinse the beans & put them in a pot or crockpot with about 3 cups water. Let simmer for 2 - 3 hours until almost completely tender (I like to under cook mine a little since they will cook a little more in the soup).

In a large soup pot or Dutch oven heat the olive oil over medium-high heat. Add the sausage & cook through, breaking up with a spoon while cooking. Add the peppers & onions. Cook until the onion is translucent. Add the tomatoes with juices, beans with their cooking liquid, tomato paste, red wine, basil, oregano & two cups water. If you are adding a Parmesan rind do it now as well. Let simmer for about 30 minutes. Taste & season with salt as needed.

Serve with a good crusty bread. If you haven't used Parmesan rind you may want to sprinkle a little grated Parmesan on top.

Makes 6 - 7 servings

If you are not reading this post in a feed reader or at http://agoodappetite.blogspot.com OR at http://agoodappetite.com then the site you are reading is illegally publishing copyrighted material. Contact me at katbaro AT yahoo DOT COM. All recipes, text and photographs in this post are the original creations & property of the author unless otherwise noted. © 2007-2011 Kathy Lewinski
Tuesday, March 15, 2011

Chicken Liver and Mushroom Paté

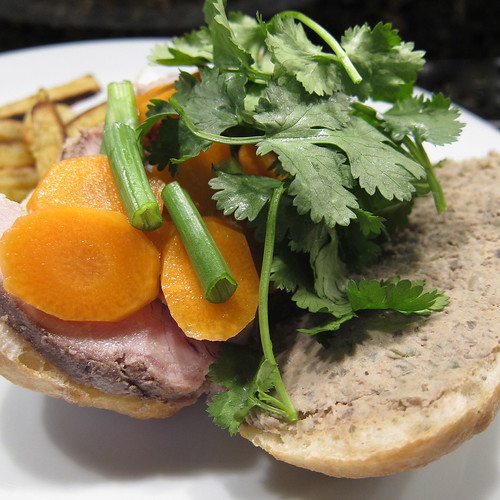
We love a good banh mi. That mixture of meat, creamy paté, pickled vegetables& fresh herbs on French bread is such a festival of flavors & textures. We tend not to make them at home because they do take a little of a lot of different ingredients but, since we had some leftover roasted pork in the fridge I decided to add them to the menu.
Banh Mi with homemade pate
In order to not buy a whole bunch of things we would only use a little of, we kept the topping for our sandwiches down to just what we felt was most important; mayo, pork, paté pickled carrots, cilantro & jalapenos. Though not traditional, I threw on some chopped scallions too since we had them. The main thing we skipped was the pickled radishes because we didn't want to buy a whole bunch to use just one or two.

I pickled the carrots myself using Emeril's quick pickle recipe. I just used a third of the brine & pickled one carrot. The only problem ingredient was the paté. The grocery store had a few choices but they were pretty expensive & way more paté then we needed. Ok, time to make our own. It was something we'd been wanting to do for awhile anyway.

I chose a very basic chicken liver paté recipe, which just also happened to be from Emeril, because other than the chicken livers I already had all the ingredients (ok, most of the ingredients). Even though it was my first time making paté I went ahead & made a few changes to the recipe, substituting some of the livers with brown mushrooms & green peppercorns with capers. I think both were good substitutes. The mushrooms tempered the liver flavor a little & the capers added a nice tang. At first taste Matt wasn't so sure he thought it was great but after a day or two letting the flavors meld in the fridge he really liked it & ate a whole bunch on bread with some cornichons.

Chicken Liver & Mushroom Paté
(adapted from Emeril Lagasse)
The livers have to soak for 2 hours before using them so plan ahead.

5 oz chicken livers, cleaned
1/2 c milk
4 T cold unsalted butter, cut into pieces
1/2 c chopped yellow onions
1 t minced garlic
3 oz brown mushrooms, sliced
1 T capers, drained
1 bay leaf
1/2 t chopped fresh thyme leaves
1/4 t salt
1/4 t freshly ground black pepper
2 T brandy

Soak the chicken livers in the milk for 2 hours. Drain well.

In a large skillet, melt 2 tablespoons of the butter over medium-high heat. Add the onions & cook until translucent. Add the garlic & cook another 30 seconds. Stir in the chicken livers, mushrooms, capers, bay leaf, thyme, salt & pepper. Cook until the livers are browned on the outside, about 5 minutes. Add the brandy. Cook until almost all the liquid is gone. The livers should be cooked through. Remove from heat & let cool.

Remove the bay leaf & put the liver mixture into a food processor & puree. The paté will not get completely smooth but have a more rustic texture. Add the remaining 2 tablespoons of butter a little at a time, pulsing with each addition. Put the paté into a bowl or ramekin & cover. Refrigerate for at least 6 hours before serving (We found it was better after a day or two).

Makes about 1 1/2 - 2 cups

If you are not reading this post in a feed reader or at http://agoodappetite.blogspot.com OR at http://agoodappetite.com then the site you are reading is illegally publishing copyrighted material. Contact me at katbaro AT yahoo DOT COM. All recipes, text and photographs in this post are the original creations & property of the author unless otherwise noted. © 2007-2011 Kathy Lewinski

Thursday, March 10, 2011

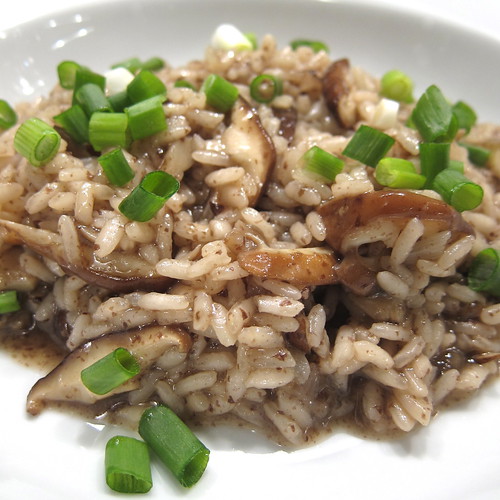
Asian-Inspired Mushroom Risotto

This dish is an example of the compromises that help make a marriage work. Matt wanted a udon noodle mushroom soup for dinner & I wanted a hearty mushroom risotto. So, to make us both happy, I made a mushroom risotto full of the flavors of an Asian soup & it totally worked.
Asian-Inspired Mushroom Risotto
I added the typical Asian components of soy sauce & ginger but, the ingredient that really brought this dish home was dried seaweed I cooked in the chicken stock. What we ended up with was a dish that was just full of umami, that pleasant savory flavor. And bonus, it's a creamy hearty risotto that isn't full of cream & cheese! Don't skip the Sriracha in this dish, it doesn't make it spicy but adds a little zing.

Asian-Inspired Mushroom Risotto

1 T of olive oil, divided
5 oz mushrooms, sliced (we used a mix of shiitake, oyster & brown mushrooms)
salt
3 c chicken or vegetable stock
1/4 c dry dulse seaweed, chopped (you could also use kombu)
1/2 T unsalted butter
1/2 c minced white or yellow onion
1 clove garlic, minced
1 t minced fresh ginger (or 1/4 t dried)
3/4 c arborio rice
1/4 c white or rice wine
1 T low sodium soy sauce (you may want to start with 1/2 T & taste, especially if your stock is salty)
1 t (more or less to taste) Sriracha
4 scallions, chopped

Heat 1/2 T of the olive oil in a skillet over medium heat. Add the mushrooms. Sauté until the mushrooms are tender. Set aside

Put the chicken stock & seaweed into a saucepan & bring to a simmer. Keep simmering the whole time you are cooking.

Put the remaining olive oil & butter into a heavy saucepan over medium heat. When the butter is melted add the onions, garlic & ginger. Cook until the onion is translucent. Add the rice & stir while cooking for a minute. Reduce heat to medium-low. Add the wine. Cook, stirring often, until the liquid is absorbed. Start adding the broth & seaweed about 1/4 cup at a time, stir often while cooking. Add each addition of broth after the one before it is absorbed. The rice should get creamy tender but still have a slight bite in the middle. After all the broth is used up stir in the reserved mushroom, soy sauce & Sriracha.

Serve topped with the chopped scallion.

Makes 2 servings.

If you are not reading this post in a feed reader or at http://agoodappetite.blogspot.com OR at http://agoodappetite.com then the site you are reading is illegally publishing copyrighted material. Contact me at katbaro AT yahoo DOT COM. All recipes, text and photographs in this post are the original creations & property of the author unless otherwise noted. © 2007-2011 Kathy Lewinski
Wednesday, March 9, 2011

Citrus Spice Pork with Honey Spice Sweet Potatoes

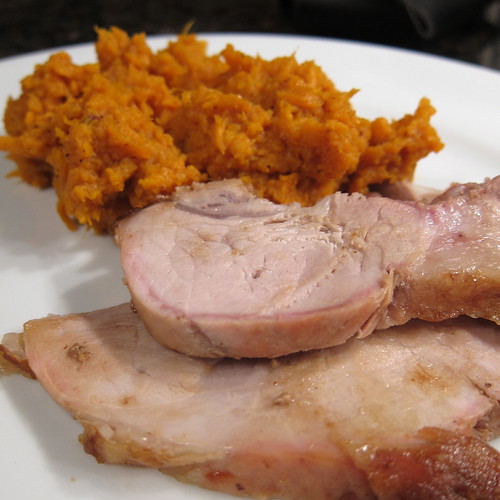
Sunday night I had a girlfriend over to knit, quilt & watch Downton Abbey while my manservant (um, yeah, Matt) prepared a wonderful feast for our dinner. He served us a pork roast that had been brined in a mixture of orange juice & chiles with a side of sweet & spicy mashed sweet potatoes. It was good so, I decided to keep him on a while longer.
Citrus Spice Pork Roast
It was really amazing how much the flavor from this brine came through in the pork. The chiles give it a smoky, pepper flavor but really no heat. The orange juice adds a wonderful brightness. This might be my favorite of the pork brines Matt has tried so far.

Citrus Spice Pork Brine

1 c orange juice
2 c water
1 heaping T kosher salt
1/2 t ground cumin
1/2 t ground ancho
1/2 t ground chipotle
1/2 t ground cinnamon

Mix everything together in a microwave safe dish. Microwave on high for 2 minutes.

Enough brine for a 3 pound pork roast

We brined our roast for about 6 hours in the fridge in a plastic bag. Then it was roasted for about 1 1/2 hours. Matt says he's looking forward to doing a pork tenderloin with this same brine & then grilling it this summer.

These sweet potatoes were the perfect side dish with the pork. I know it may seem like sweet potatoes are sweet enough but the honey really balances the little bit of heat from the chipotle.

Honey Spice Sweet Potatoes

3 sweet potatoes
1 oz unsalted butter
1 T honey
1/4 t ground chipotle
salt

Bake or microwave the sweet potatoes until soft. Remove the skins. Put the hot potato meat in a bowl with the butter, honey & chipotle & mash. Season to taste with salt.

3 - 4 servings.

If you are not reading this post in a feed reader or at http://agoodappetite.blogspot.com OR at http://agoodappetite.com then the site you are reading is illegally publishing copyrighted material. Contact me at katbaro AT yahoo DOT COM. All recipes, text and photographs in this post are the original creations & property of the author unless otherwise noted. © 2007-2011 Kathy Lewinski
Tuesday, March 8, 2011

Chili Verde Hotdish

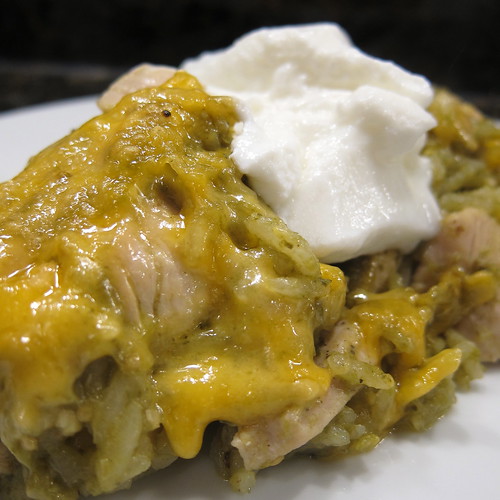
Typically, we spend Saturdays running all sorts of errands and don't feel like cooking once dinner time comes around. This weekend though, Matt suggested we make something simple using the chili verde sauce that was in the freezer & the chicken breasts in the fridge. I had forgotten all about that fantastic chili verde sauce, I was sold. Our original thought was to get some tortillas but then, Matt asked if there was anyway to turn it into a hotdish...I think he's become a true Minnesotan.
Chili Verde Hotdish
If you have some prepared chili verde sauce, you cannot get much simpler than this dish. (Well, I guess if you have some leftover cooked chicken, it would even be simpler.) You could also buy jarred chili verde sauce or substitute tomatillo salsa instead of making your own. The resulting dish is pure comfort food with a Mexican twist.

Chili Verde Hotdish

1/2 T olive oil
2 chicken breasts, cut into bite-sized pieces
salt & pepper
1 c uncooked white rice
2 c chili verde sauce
1/2 c water
cheddar cheese, grated

Preheat oven to 350 F.

Heat the olive oil in a skillet over medium-high heat. Add the chicken & sauté until cooked through.

Mix the chicken with the rice, chili verde sauce & water. Put into a baking dish. Cover with tin foil or top, if the dish has one, & back for about 40 minutes, until the rice is tender. Remove cover & sprinkle the grated cheese over the top. Bake for 10 more minutes until the cheese is melted & bubbly.

Serve with sour cream & hot sauce.

Makes 4 - 5 servings.

If you are not reading this post in a feed reader or at http://agoodappetite.blogspot.com OR at http://agoodappetite.com then the site you are reading is illegally publishing copyrighted material. Contact me at katbaro AT yahoo DOT COM. All recipes, text and photographs in this post are the original creations & property of the author unless otherwise noted. © 2007-2011 Kathy Lewinski
Monday, March 7, 2011

Weekly Menu 3/7 - 3/12/11

We are settling in for another week of snow here in Minnesota. (Yeah, Mr. Groundhog, what was that about an early spring?) Luckily, we seem to have gotten our desire to cook back so, we have a week full of interesting meals planned to make at home.
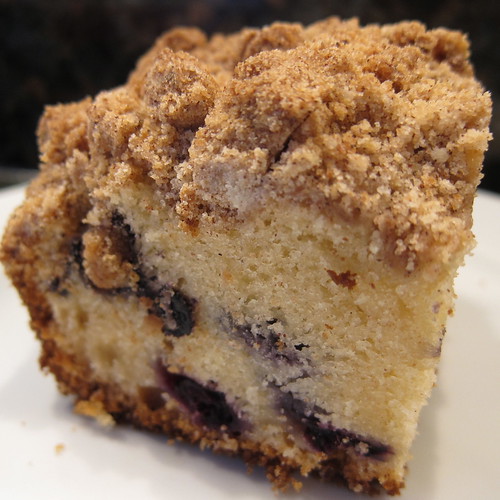
Blueberry Crumb Cake
I started off this Saturday morning by making this NY Crumb Cake from Bon Appetite. I changed the recipe just a little bit by substituting the sour cream with yogurt & adding a cup of frozen blueberries to the batter. Really is there anything better than the smell of cinnamon baked goods in the morning? The recipe was really good but ours took almost 10 minutes longer to bake through than the recipe called for (probably because of the yogurt substitute) & next time I'd make about half the crumb. Then Matt dreamed up a tasty & super simple Chili Verde Hotdish for Saturday night which we'll be sharing with you tomorrow. I'm looking forward to a week of good food even if we are stuck inside again watching the snow.

On to Menu Planning Monday...

Citrus & Spice Brined Pork Roast with Honey Spiced Sweet Potatoes

White Bean & Sausage Soup

Pork Banh Mi with homemade chicken liver paté

Asian-Inspired Mushroom Risotto

Sea Salt & Thyme Turkey Burgers

If you are not reading this post in a feed reader or at http://agoodappetite.blogspot.com OR at http://agoodappetite.com then the site you are reading is illegally publishing copyrighted material. Contact me at katbaro AT yahoo DOT COM. All recipes, text and photographs in this post are the original creations & property of the author unless otherwise noted. © 2007-2011 Kathy Lewinski
Thursday, March 3, 2011

Is It Beer Yet? - Yes, It Is!

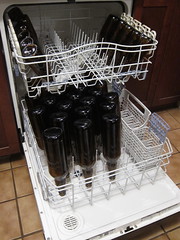
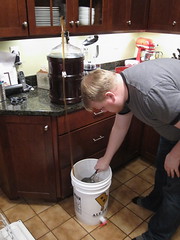
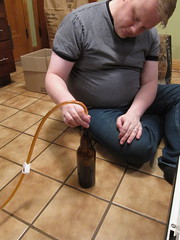
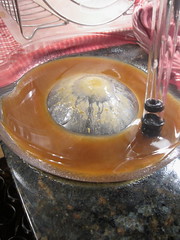
Oh, I'm a little behind documenting our beer making experiment but I'm happy to say the first batch is successfully done! First we had to add a little more sugar & get the beer into bottles.
Is It Beer Yet? Is It Beer Yet?
       Sanitizing the bottles         Moving the beer to the bottling bucket & adding melted sugar
Is It Beer Yet? Is It Beer Yet?
            Filling the bottles                           Sediment
Is It Beer Yet? Is It Beer Yet?
                Capping                  Ready to sit for two or more weeks to carbonate
It's Beer
Enjoying the fruits of his labor. It worked & it's really beer. It is pretty much exactly like we thought it would be so, the kit was pretty spot on. It's the hoppy sort of beer Matt really likes though I find a little too hoppy. Next we are making a raspberry beer for me.

If you are not reading this post in a feed reader or at http://agoodappetite.blogspot.com OR at http://agoodappetite.com then the site you are reading is illegally publishing copyrighted material. Contact me at katbaro AT yahoo DOT COM. All recipes, text and photographs in this post are the original creations & property of the author unless otherwise noted. © 2007-2011 Kathy Lewinski
Tuesday, March 1, 2011

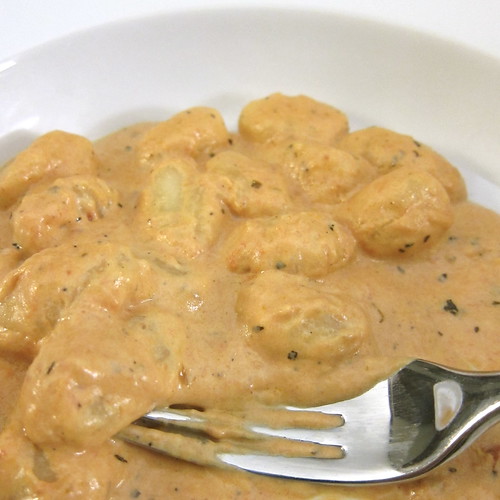
Matt's Busy Saturday Vodka Cream Sauce

As I mentioned yesterday, we had a bit of a fender bender Saturday. We were both a little exhausted by the day but, still needed dinner. With no car we couldn't just run out to eat so, Matt whipped up this tasty sauce & served it over a half package of gnocchi we had lingering in the fridge.
Matt's Busy Saturday Vodka Cream Sauce
His inspiration for the sauce was a leftover half package of Philadelphia Cooking Cream*. Have you tried this stuff yet? It's got the flavor of cream cheese but the texture is more like that of mascarpone cheese. We bought it to use in our smoked salmon chowder & it made the chowder even better than the original version (richer, creamier) plus it incorporates so easily. After that success, Matt said he wanted to experiment with it in pasta sauce. It added a nice bit of tang that you wouldn't get from just cream & a luxurious thickness. I think this might be the perfect cream cheese to use in frosting, no waiting for it to reach room temp!

Matt's Busy Saturday Vodka Cream Sauce

1 T salted butter
1 clove garlic, minced or pressed
1/4 t crushed red pepper flakes
few grinds black pepper
1/4 t dried basil
8 oz basic tomato sauce
splash of vodka
5 oz Philadelphia Cooking Cream

Melt butter in a small saucepan. Add the garlic, red pepper, black pepper & basil. Sauté for about a minute. Stir in the tomato sauce & vodka. Whisk in the cooking cream until incorporated. Heat through. Serve with your favorite pasta.

Makes 2 - 3 servings

* We did not receive the Philadelphia Cooking Cream for free or receive any sort of payment for writing about it. We just happened to pick it up at the store & liked it so, thought we'd share our thoughts about it with you.

If you are not reading this post in a feed reader or at http://agoodappetite.blogspot.com OR at http://agoodappetite.com then the site you are reading is illegally publishing copyrighted material. Contact me at katbaro AT yahoo DOT COM. All recipes, text and photographs in this post are the original creations & property of the author unless otherwise noted. © 2007-2011 Kathy Lewinski