Friday, October 29, 2010

Easy Pumpkin Turnovers

Here's another treat perfect for Halloween.  A bunch of family were coming for dinner & I wanted a quick, easy dessert that I could make ahead of time.  I had some leftover pumpkin purée from the Chai-Spiced Pumpkin Cake & a sheet of puff pastry in the freezer so turnovers seemed like perfect solution. Assembled in the afternoon, they just need to be popped in the oven during dinner for a fresh from the oven dessert.
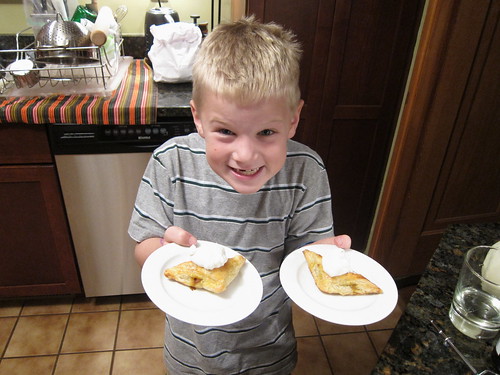
Look who made the whipped cream
They're like little pumpkin pies with super flaky crusts.
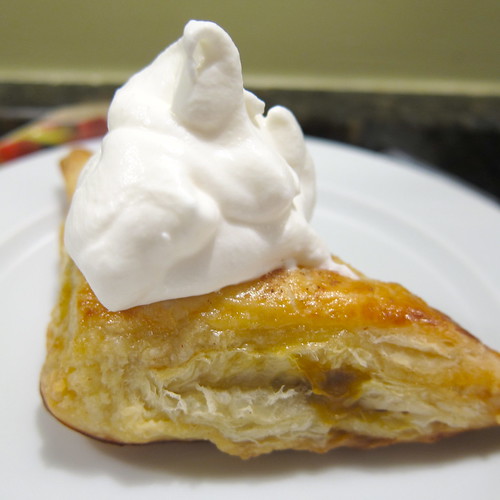
Easy Pumpkin Tarts
Easy Pumpkin Turnovers

3/4 c or so pumpkin purée
1/4 t cinnamon
pinch nutmeg
pinch clove
pinch all spice
1 T brown sugar
1 sheet of puff pastry, thawed
flour
1 egg beaten with a little water

Preheat oven to 400 F. Prepare a baking sheet with parchment paper or a silcon pad.

Mix the pumpkin purée with the spices & sugar. Taste & adjust to your preference.

Roll the puff pastry out on a lightly floured surface until its about 1/8 inch thick. Cut into 9 squares.

Put a tablespoon or so of the pumpkin mixture in the center of each square. Use your finger or a brush to put a little of the egg wash around the edge of the squares. Fold over to form a triangle & press to seal shut. I like to also fold the edges up a little to really seal them. Brush the tops with more of the egg wash. (You can sprinkle with a little more sugar if you want.) Cut a slit into the top of each turnover with a sharp knife.

Refrigerate until ready to bake.

Bake for 15 minutes. Turn the heat down to 350 F & bake until gold brown, about 10 more minutes.

Serve warm with whip cream.

Makes 9 small turnovers.

Make sure to check out the rest of the Halloween Tricks & Treats at the #GreatHallowTweet Halloween Blog Hop by checking out all the blogs listed in my left column.

If you are not reading this post in a feed reader or at http://agoodappetite.blogspot.com OR at http://agoodappetite.com then the site you are reading is illegally publishing copyrighted material. Contact me at katbaro AT yahoo DOT COM. All recipes, text and photographs in this post are the original creations & property of the author unless otherwise noted. © 2007-2010 Kathy Lewinski

Thursday, October 28, 2010

Chai-Spiced Pumpkin Cake

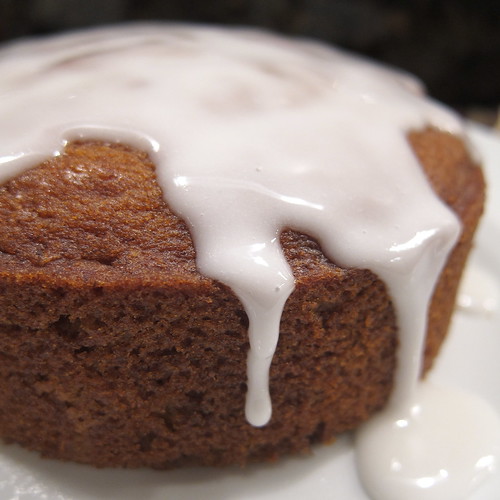
This is the cake I made recently for the Kingfield Farmers Market Pumpkin Bake-off. It didn't win but I still think it was one great cake. The texture was surprisingly light & moist. The addition on the Asian spices was a nice change up from the typical pumpkin pie spices. The cayenne was my mother-in-laws idea, it doesn't add heat but brightens up all the other flavors. She says that is her trick with for a lot of recipes.
#279 - Chai-Spiced Pumkpin Cake
I was originally going to create my own chai spice mix for this but then read somewhere (I can't find where now) that Asian five spice powder mixed with cardamon made an easy chai spice blend. That seemed like a pretty easy way to go so I started there & then added a little more cinnamon because I felt like the flavor needed it.

I did a basic sugar/milk glaze for the icing but a cream cheese frosting would be good too. Want to make it a little spookier for halloween drizzle the glaze on in a spider web pattern though I really like it all drippy like this.

Since I was making cake for just Matt & me, I baked it up in two little 4" springform pans to give us each a little cake. I think this would probably be enough batter for an 8" cake too. The recipe can easily be doubled too & then you can just use the whole egg instead of only the white. For the bake-off I made two sheetpans but increasing the recipe quite a bit using whole eggs & it was still nice & light.

Chai-Spiced Pumpkin Cake

3 T unsalted butter
1/2 t Asian five spice powder
1/4 t cardamon
1/8 t cinnamon
pinch of cayenne
1/4 c and 2 t white sugar
1/8 t vanilla extract
1/4 c and 2 t pumpkin purée (check out He Cooks She Cooks for great post on making Pumpkin Purée from scratch)
1 egg white
1/4 c and 2 t all-purpose flour
1/2 t baking powder
1/4 t baking soda
1/8 t salt

Preheat oven to 350 F. Butter two 4" individual springform cake pans.

Put the butter, five spice powder, cinnamon & cayenne in a small saucepan over medium heat. Cook slowly until the butter is brown & has a nice nutty smell. Be careful not to burn it. Put into a small mixing bowl & let cool.

Whisk the sugar, vanilla & pumpkin into the butter. Then mix in the egg white.

Stir the flour, baking powder, baking soda & salt together. Then slowly mix into the wet mixture until everything is combined.

Divide the batter between the prepared cake pans. Bake for 30 minutes or until a toothpick inserted into the center comes out clean. Let cool on a rack before icing.

Makes 2 small cakes

Powdered Sugar Glaze

Powdered sugar
Milk

I really don't have a recipe for this. Typically, I start out with about 1/4 c of powdered sugar & then slowly add milk to it until I get a nice drizzly consistency. You can flavor it with vanilla or other extracts if you want too.

Check out all the other great Halloween post during the #GreatHallowTweet Halloween Blog Hop by clicking on the blogs listed on the left.

Tomorrow I'll give you an easy way to use up any pumpkin purée you have left....

If you are not reading this post in a feed reader or at http://agoodappetite.blogspot.com OR at http://agoodappetite.com then the site you are reading is illegally publishing copyrighted material. Contact me at katbaro AT yahoo DOT COM. All recipes, text and photographs in this post are the original creations & property of the author unless otherwise noted. © 2007-2010 Kathy Lewinski
Wednesday, October 27, 2010

Setting the Scene for Halloween

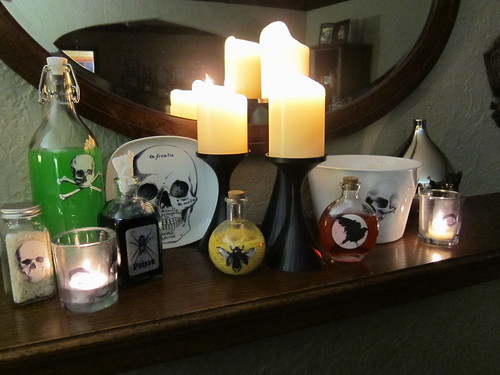
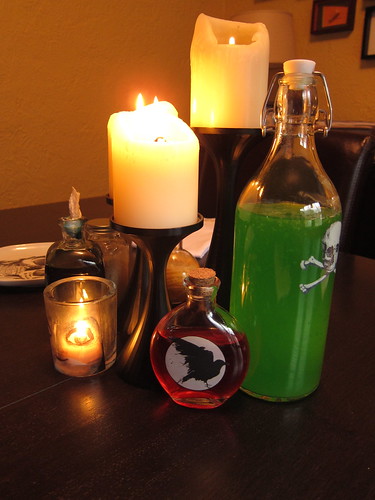
Some of you may know that I enjoy crafting as much as I enjoy cooking. Luckily, Holidays like Halloween give me an opportunity to do both things. Here's some of the spooky things I created to decorate the house & set our Halloween table this year.
Halloween Mantle
I created a collection of creepy potion bottles, candle holders, plates & bowls just using my computer printer & some waterslide decal paper. (See tips for making these later in this post.) The bottles, plates & bowls were all picked up very cheaply at IKEA, Michael's & Joann's. Some of the coolest bottles were only $.99.
IMG_6593 IMG_6594
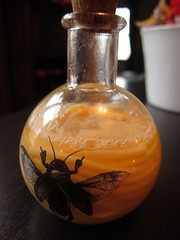
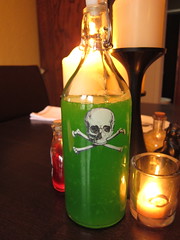
The bottles were then filled. Just using colored water looks great but just a few other additions makes them look even creepier. For the cockroach bottle I added some cooked spaghetti to look like guts. In the large green bottle I added just a splash of milk to give make the liquid opaque plus if you let it sit a few days it'll also get a little chunky (make sure to have a bottle that closes somehow so you don't get the bad smell). Spices & dry goods also make good fillings, rice as maggots or brown mustard seeds as eyes.
IMG_6596
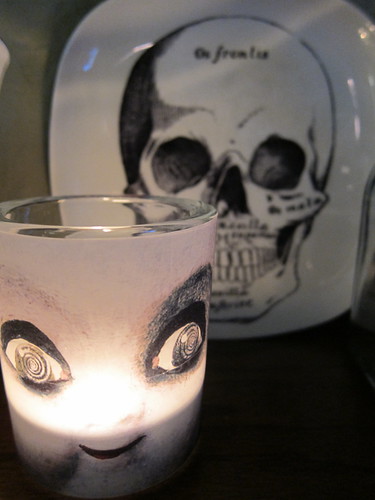
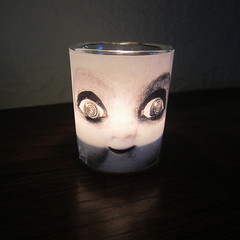
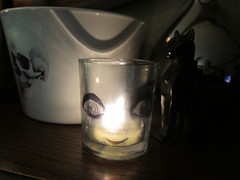
The whole collection looks great on the mantle or as a centerpiece on the table. My favorite pieces have to be the creepy doll face candle holders.
#293 - Creepy Doll Candle & Skull Plate

One other really quick & easy project I did this year were napkins with Halloween sayings on them.
Halloween Napkins
I picked up some $1.50 white bandanas from the craft store & then printed some appropriate sayings on iron-on transfer computer paper. (Make sure the sayings are printed on the paper backwards so when you print them they are the right way.) The only tricky part was making sure the sayings were set up to fit on the napkin when folded.

Tips on making dishes & jars with waterslide decals....
  1. I couldn't find the decal paper in a store so I bought it online at Lazertran. It's a little pricey but you   can get a lot of things on one sheet. We followed the directions with the paper for printing images we found online. 
  2. Other than the paper all you need is some cheap white dishes, bottles, vases, candle holders, etc.., water, a sponge & varnish if you want. 
  3. The decals will dry white so if you are placing the decal on something other than a white dish make sure to pick an image you can completely cut out.
  4. We were confused as to which way the decal went on the dish, was the side between the backing & the paper the sticky side or was the top? There were really no clear instructions about that anywhere & the decals stuck on both ways. Here's what we discovered. If you stuck the decal on by flipping it over & pasting the top down when it dried it had a shiny, almost plastic appearance. If you stuck the decal on using the side between the backing & the decal then it dried with a very flat paper appearance.
  5. At this point the decals are not permanent & can easily be peeled off. But you can varnish over them if you want to. The easiest varnish to use is clear water-based varnish from the craft store. But if you put the decal on something clear & stuck it on so it dried more papery you can seal it with oil-based varnish & the white areas will become clear.
Creepy Doll Candle Creepy Doll Candle Varnished
Here is the doll candle before varnishing & after. You can see how all the white became almost clear.

I wouldn't recommend eating off of these dishes as a fork & knife would scratch them up but they make great display & serving pieces. It was also a really fun project. My cousin & I did tons of pieces for both of our houses in one evening. Thanks to Wise Craft for this great idea.

Don't forget to check out all the other wonderful Halloween posts in the #GreatHallowTweet Halloween Blog Hop from the links on the left of this page!

If you are not reading this post in a feed reader or at http://agoodappetite.blogspot.com OR at http://agoodappetite.com then the site you are reading is illegally publishing copyrighted material. Contact me at katbaro AT yahoo DOT COM. All recipes, text and photographs in this post are the original creations & property of the author unless otherwise noted. © 2007-2010 Kathy Lewinski
Tuesday, October 26, 2010

Pumpkin Guts

Gooey, oozy & oh so tasty...
Pumpkin Guts
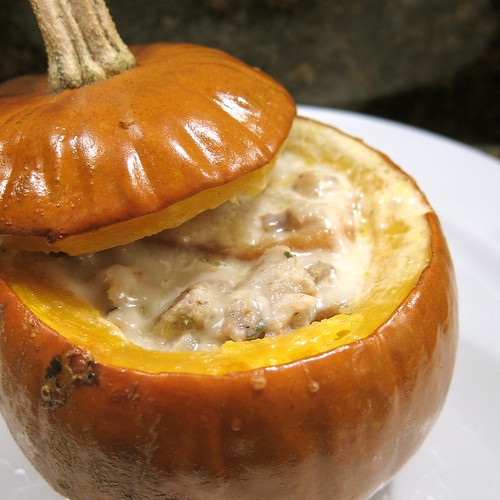
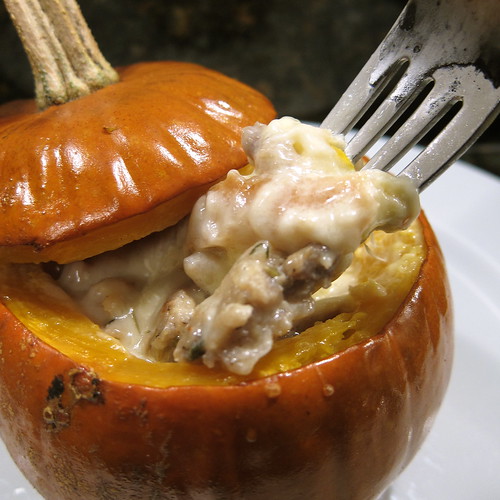
Pie pumpkins are the perfect individual sized serving dish especially when stuffed with bread, cheese & sausage. Plus, how cute are these to serve on your Halloween table?
Pumpkin Guts
The pumpkin flesh softens during roasting so it can be mixed into the filling when it comes time to eat creating a yummy one dish (ok, one pumpkin) meal. It's almost like having a cheese fondue with all the dippers mixed in.

We'd actually made this before a couple years ago using one large kabocha squash & then scooping out all the filling to serve. With the larger squash we found we had a lot of squash leftover after eating all the filling. With these smaller pumpkins there seemed to be a much better ratio of squash flesh to filling. I also changed the filling slightly this time by adding white wine to it.

Pumpkin Guts
(Since every pumpkin is going to be a different size you may use a little less or a little more cheese & sausage than this recipe calls for.)

8 oz bulk Italian sausage (spicy or mild, your choice)
2 pie pumpkins (about the size of a large soup bowl)
vegetable oil
3/4 c heavy cream
1/4 c white wine
pinch of nutmeg
8 slices french bread, preferably day old, about 1/2" thick
3 oz grated cheese, emmental, swiss or gruyere would be good

Cook up the bulk sausage & set aside.

Preheat oven to 400 F.

Cut off the top of the pumpkins as if you were going to carve them into a jack o'lantern. Clean the pulp & seeds from the inside & top. (Save the seeds to roast!). Lightly oil the outside of the pumpkins including the top. Oil a baking pan with sides & place the pumpkins in it.

Mix the cream, wine & nutmeg together.

Put two slices of bread in the bottom of each pumpkin. Then layer in 1/4 of the cheese & 1/4 of the sausage into each pumpkin. Top with 1/4 of the cream sauce. Press down. Repeat the layers using all the remaining bread, cheese, sausage & cream sauce. Do not go over the edge of the pumpkin. Put the tops on the pumpkin.

Place in the oven& bake for about 1 hour until the pumpkin is soft & the filling is bubbling.
Pumpkin Guts
They may ooze over a little bit. Let sit a few minutes before serving.

2 servings.

Don't forget to click through & read the other blogs in the GreatHallowTweet on the left over there & to enter to win a yourself a treat from Ghiradelli chocolate.

If you are not reading this post in a feed reader or at http://agoodappetite.blogspot.com OR at http://agoodappetite.com then the site you are reading is illegally publishing copyrighted material. Contact me at katbaro AT yahoo DOT COM. All recipes, text and photographs in this post are the original creations & property of the author unless otherwise noted. © 2007-2010 Kathy Lewinski
Monday, October 25, 2010

Farmers Market Finds, Weekly Menu and a Treat to Giveaway

Since I've been slowly stocking up on things like garlic & squash from the farmers market we didn't need that much this week.
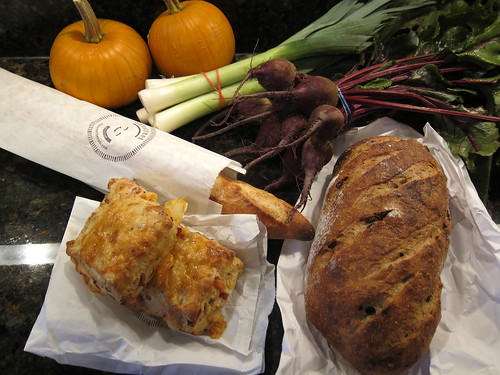
Farmers Market Finds 10/24
Pie Pumpkins - These will get stuffed
Beets - Not sure how I'll use them yet but couldn't resist them
Leeks - Might go in the pumpkins
Figgy Rye Bread - For sandwiches
Ham & Swisscuits - These made a find breakfast sandwich this morning
French Bread - Had some last night with soup & the rest will go in the pumpkins

Our market, the Kingfield Farmers Market, is one of the latest running farmers markets in our area but we only have one weekend left & the holiday market on November 13th before it is over for the year.

On to Menu Planning Monday...
Smoked Salmon Chowder - trying finishing it off with a little cream cheese this time.
Pumpkin Guts - You've got to come back for this one.
Sausage & Peppers over Grits - Our typically recipe for the sausage & peppers but trying it over grits is new for us.
Bison & Butternut Squash Chili - Because we need to use that ground bison in the freezer
Sweet Potato Hash with Eggs - Based on some amazing hash we had at Corner Table.

Halloween Mantle
Most importantly, today begins the Great HallowTweet Halloween BlogHop. All the blogs you see listed in the banner on the left side here will be featuring Halloween themed posts all week. Click through for some fun. I thought I'd start the week off with a treat! (The tricks come later.)


Recently, we were sent some coupons to try Ghirardelli's new Luxe Milk chocolate for free. We tried both the hazelnut & almond. Even though I prefer dark chocolate, this is some of the best milk chocolate I've had. Now we have some coupons to share with you because chocolate is the perfect halloween treat, right?

1. Two winner will each receive a coupon to get either a box of Luxe Milk squares or a Luxe Milk bar for free as well as two more coupons for $1 off another box or bar.
2. Comment on this post to be entered to win.
3. Twitter this giveaway & let us know you did in a comment.
4. We must be able to email you if you are picked as the winner so make sure to leave an email address!
5. The coupons are only good in the US, sorry.
6. The winner will be picked on Halloween.

Disclaimer: We were sent coupons from Ghirardelli to use ourselves & to giveaway. We were also sent some of the Luxe Milk squares through the Foodbuzz Tastemakers Program. We were not paid in any other way to write about this product.

If you are not reading this post in a feed reader or at http://agoodappetite.blogspot.com OR at http://agoodappetite.com then the site you are reading is illegally publishing copyrighted material. Contact me at katbaro AT yahoo DOT COM. All recipes, text and photographs in this post are the original creations & property of the author unless otherwise noted. © 2007-2010 Kathy Lewinski
Related Posts with Thumbnails

Get Email Updates!

Enter your email address:

Delivered by FeedBurner

Measurement Abbreviations

T = Tablespoon
t = teaspoon
c = cup
lb = pound
oz - ounce

Labels

Blog Archive

Contributors

Blog Directory for Minneapolis, Minnesota