Saturday, May 16, 2009

Grilled Flat Bread Sandwiches

We had such success last week with our grilled pizzas Matt wanted to try using the same dough & technique for making a grilled flat bread sandwich.
Grilled Flat Bread Sandwich
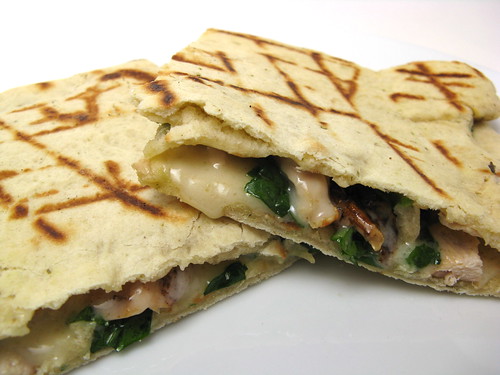
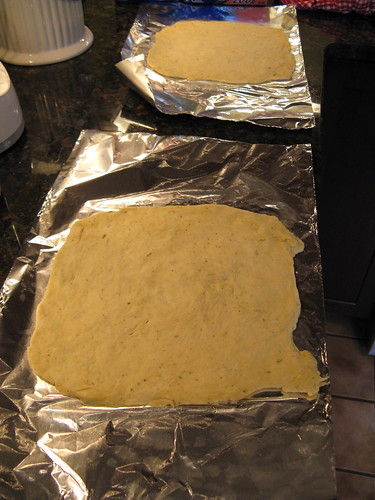
It worked really well & made for a nice warm, melty sandwich. He made basically the same dough as for the pizza though only half a batch. To the dough he added some extra olive oil & some dried rosemary for flavor. He shaped the dough into two 15" squares.
Grilled Flat Bread Sandwich
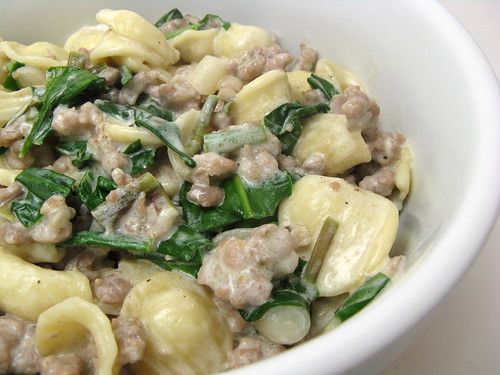
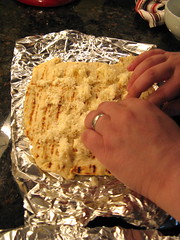
Then grilled those on both sides until cooked then turned the grill to low. Next he put toppings on one of the grilled bread squares. We went with a grated creme casa cheese, cooked chicken & spinach. A good melting semi-soft cheese is our recommendation here as you want something that will melt quickly on the grill. Put the second piece of grilled bread on top & press.
Grilled Flat Bread SandwichGrilled Flat Bread Sandwich
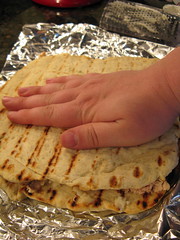
Then the sandwich goes back on the grill over low heat just until the cheese melts, about 3 - 4 minutes, careful not to burn it. Cut into four pieces & serve.
Grilled Flat Bread Sandwich
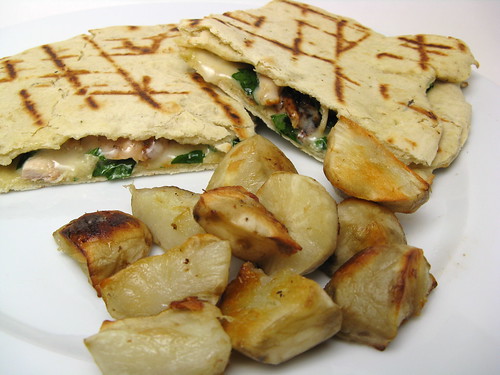
We served our sandwiches with sunchokes that were just roasted with a little olive oil & salt, yum!

Pizza Dough
(from Mastering the Grill)

1/2 c warm water (110 to 115 F)
1 1/4 t active dry yeast
1/4 t sugar
2 1/2 T olive oil
1 1/2 c all-purpose flour, plus more if needed
1 t kosher salt
1 t dried rosemary

Combine the water, yeast & sugar in a bowl & stir until mixed. Let sit 5 minutes until it gets foamy. Stir in 2 tablespoons of the olive oil.

Using a mortar & pestle grind the salt & rosemary together. Mix the flour & salt/rosemary mixture together in a large bowl. Add the yeast mixture & stir until the dough forms a ball. Turn out onto a floured surface & knead until smooth & elastic, about 5 minutes. The dough should be slightly sticky, not dry. If more flour is needed, add it in 1 tablespoon at a time.

Coat the inside of a large bowl with the remaining 1/2 tablespoon of olive oil. Put the dough in the bowl & turn to coat with oil. Cover & let rise until doubled about 1 hour.

Makes enough for one big sandwich which served two of us

If you are not reading this post in a feed reader or at http://agoodappetite.blogspot.com OR at http://agoodappetite.com then the site you are reading is illegally publishing copyrighted material. Contact me at katbaro AT yahoo DOT COM. All recipes, text and photographs in this post are the original creations & property of the author unless otherwise noted.
© 2007-2009 Kathy Lewinski

Thursday, May 14, 2009

Creamy Sausage and Ramp Pasta

It's a grey day that feels like it's always just on the verge of raining & I've been tried all day. All I want is something easy for dinner that is creamy, warm & comforting.
Creamy Sausage & Ramp Pasta
Ah, that hit the spot.

Creamy Sausage & Ramp Pasta

4 - 6 oz pasta
1/2 T olive oil
8 oz bulk Italian sausage
10 ramps
2/3 c half & half
1/4 c paced, grated parmesan cheese
salt & pepper

Cook pasta according to directions. When cooked drain & set aside.

Meanwhile, heat the olive oil in a large skillet over medium-high heat. Add the sausage & cook through. Slice the ramps; bulbs, stems & leaves, keeping the leaves separate from the bulbs & stems. Add the bulbs & stems to the skillet & sauté for 2 -3 minutes until slightly softened. Add the half & half and cheese. Bring to a simmer & stir for 1 minute. Add the cooked pasta & ramp leaves. Stir until the ramp leaves wilt slightly, you still want them to have a little crunch, and everything is heated through. Season with salt & pepper.

2 servings

If you are not reading this post in a feed reader or at http://agoodappetite.blogspot.com OR at http://agoodappetite.com then the site you are reading is illegally publishing copyrighted material. Contact me at katbaro AT yahoo DOT COM. All recipes, text and photographs in this post are the original creations & property of the author unless otherwise noted.
© 2007-2009 Kathy Lewinski

Wednesday, May 13, 2009

Rhubarb Phyllo Nests

This little individual tart-like dessert came about because I had an open package of phyllo left over from making the Potato, Parsnip & Ramp Tart plus some fresh rhubarb from our latest CSA box.
Rhubarb Phyllo Nest
I'd seem Kris at To be Mrs. Marv make a crust like this once but didn't remember exactly how she did it. So, I kind of winged it. I knew it would need butter to get the crusts to stay together & that I wanted to flavor it with cinnamon & sugar. From there I just sort of eyeballed the amounts. I was worried the crust would be soggy under the rhubarb but it got really crispy & was great with the soft rhubarb. These go together really quickly for a quick, cute dessert. I'll be experimenting with this again next time I have left over phyllo.

Rhubarb Phyllo Nests

4 - 5 oz phyllo dough
3 - 4 T unsalted butter, melted
1 T + 1 t sugar, plus more for sprinkling over the top
1 t cinnamon
1 t lemon juice
3 stalks of rhubarb, sliced into 1/2-inch pieces (if rhubarb is out of season, thinly sliced apple would be good)

Preheat oven to 350 F.

Roll phyllo up & cut into 1/2-inch pieces creating strips. Fluff the strips to separate them & then toss with the melted butter, 1 tablespoon sugar & 1/2 teaspoon cinnamon. Form the phyllo into four individual nests or one large one on a baking sheet covered with a silicon pad or parchment paper.

Mix the rhubarb with 1 teaspoon sugar, 1/2 teaspoon cinnamon & the lemon juice. Put in the center of the nests. Sprinkle with a little more sugar.

Bake for 35 - 40 minutes. The phyllo should be golden brown & the rhubarb soft.
Rhubarb Phyllo Nest
Serve with vanilla ice cream.

4 servings

If you are not reading this post in a feed reader or at http://agoodappetite.blogspot.com OR at http://agoodappetite.com then the site you are reading is illegally publishing copyrighted material. Contact me at katbaro AT yahoo DOT COM. All recipes, text and photographs in this post are the original creations & property of the author unless otherwise noted.
© 2007-2009 Kathy Lewinski

Tuesday, May 12, 2009

Moroccan Spiced Rotisserie Chicken with Sorrel Couscous

A few weeks ago with made Moroccan Chicken with Lemon & Olives which was incredibly tasty. So good in fact I've been craving that mix of spices & lemon again but this time I decided to make it work for the grill.
Moroccan Spiced Rotisserie Chicken
We got a rotisserie for our grill recently & had yet to use it so this was the perfect opportunity to try it out. The whole chicken cooked perfectly & looked gorgeous with the spice rub & honey glaze.
Moroccan Spiced Rotisserie Chicken
In the inspiration dish, the chicken is cooked with lemon which adds a ton of flavor. For this version, I decided to add the lemony flavor to the couscous by mixing wilted sorrel into it. Sorrel has such a wonderful tanginess to it that it made a great substitute for lemons while still getting a leafy green on your plate. I put in the green olives because we so liked them in the original dish but really this version didn't need them so leave them out if you wish.
Moroccan Spiced Rotisserie Chicken

Moroccan Spice Rub

1 T paprika
2 t cumin
1t cinnamon
1 t ground ginger
salt & pepper
4 t lemon juice
4 t olive oil

4 lb chicken

Honey Glaze

1 1/2 T butter, melted
1 1/2 T honey

Mix together all the ingredients for the rub creating a paste.  Truss chicken, put on rotisserie & coat with spice rub. Cook over indirect heat at about 300 F (your grill may have special instructions on which burners to use with a rotisserie). Cook until about 1/2 hour of cooking time left, for us that was one hour. Mix together the honey & butter for the glaze. Then brush the chicken with the glaze a couple times during the last 1/2 hour. Let rest for 5 - 10 minutes before carving.

Moroccan Spiced Rotisserie ChickenMoroccan Spiced Rotisserie Chicken
Couscous with Sorrel & Olives
(this can be made in the time your chicken is resting)

1/2 c water
2 1/2 t olive oil
salt
1/2 c couscous
2 c loosely packed sorrel leaves
10 or so green olives

Put the water, 1/2 t olive oil & a pinch of salt in a small saucepan & bring to a boil. Quickly stir in the couscous. Remove from heat, cover & let sit for 5 minutes.

Meanwhile, heat 1 1/2 t olive oil in a skillet over medium heat. Add the sorrel & olives. Sprinkle with a little salt. Stir until the sorrel is wilted. 

Stir the sorrel & olives into the cooked couscous.

2 servings of couscous (can be easily doubled)

Serve the chicken over the couscous. 

I think the spice rub & glaze could also be used with good results on chicken breast or chicken parts on the bone if you don't have a rotisserie, just change the cooking time.

Other Sorrel Ideas...

If you are not reading this post in a feed reader or at http://agoodappetite.blogspot.com OR at http://agoodappetite.com then the site you are reading is illegally publishing copyrighted material. Contact me at katbaro AT yahoo DOT COM. All recipes, text and photographs in this post are the original creations & property of the author unless otherwise noted.
© 2007-2009 Kathy Lewinski

Monday, May 11, 2009

Weekly Menu 5/10 - 5/15

We used the new rotisserie to make Moroccan-Spiced Chicken on the grill this weekend.
Moroccan Spiced Rotisserie Chicken
So, you'll be seeing those chicken leftovers in some of our dishes this week, along with the original recipe. While chicken is such a great deal for us because it ends up being at least four meals. We love how the chicken cooked on the rotisserie & can't wait to try it with other meats like lamb & beef.

Menu Planning Monday!

Lots of grilled things, let's hope the weather humors us....

Chicken Fajitas

Blue Cheese Stuffed Hamburgers with Grilled Spring Onions, Spinach Salad & Roasted Potatoes

Grilled Flat Bread Sandwiches - Using more of the leftover chicken & the dough from the grilled pizza

Molasses Brined Pork Chops with Corn Salsa - This one is such a winner. We'll be using corn we froze last summer in the salsa

Ramp & Sausage Risotto (or perhaps pasta I haven't decided)

We'll also be making a rhubarb tart & trying our hand at homemade farmhouse cheddar.
Related Posts with Thumbnails

Get Email Updates!

Enter your email address:

Delivered by FeedBurner

Measurement Abbreviations

T = Tablespoon
t = teaspoon
c = cup
lb = pound
oz - ounce

Labels

Blog Archive

Contributors

Blog Directory for Minneapolis, Minnesota