

My dad told us it wouldn't work, he was sure the dough would just melt through the grates & made a mess. I have to admit that thought was at the back of my mind too. But we just followed the directions in Mastering the Grill
The flavor was pretty darn great too. We tried making the crusts really thin & a little thicker & found we both preferred it thin. It's nice & crisp with a little bit of char. Its the closest we'll ever get to making a true Neapolitan pizza at home without a pizza oven. Plus it was really fun to do. Next time we have people over for a bbq I'll do this instead of pizzas or as an appetizers.
Here's how we did it...
Pizza Dough
(from Mastering the Grill
1 c warm water (110 to 115 F)
2 1/2 t active dry yeast
1/2 t sugar
4 T olive oil
3 1/4 c all-purpose flour, plus more if needed
2 t kosher salt
Combine the water, yeast & sugar in a bowl & stir until mixed. Let sit 5 minutes until it gets foamy. Stir in 3 tablespoons of the olive oil.
Mix the flour & salt together in a large bowl. Add the yeast mixture & stir until the dough forms a ball. Turn out onto a floured surface & knead until smooth & elastic, about 5 minutes. The dough should be slightly sticky, not dry. If more flour is needed, add it in 1 tablespoon at a time.
Coat the inside of a large bowl with the remaining 1 tablespoon of olive oil. Put the dough in the bowl & turn to coat with oil. Cover & let rise until doubled about 1 hour.
Enough for 4 ten-inch pizzas
Making The Pizzas
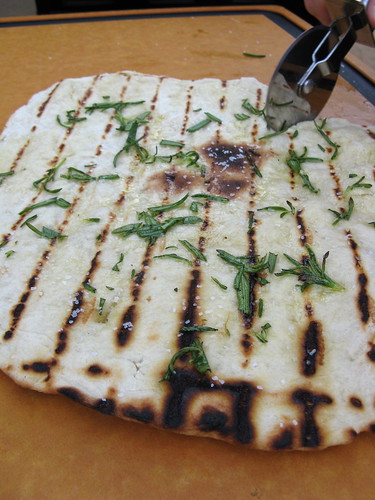
Prepare your toppings. We did three different pizzas; olive oil, rosemary & kosher salt (my favorite) - tomato sauce, mozzarella & fresh basil - tomato sauce, mozzarella, salami & oregano.
Heat the grill to about 400 F.
Cut four piece of aluminum foil about 12" x 12". Spray the foil with non-spray or olive oil. Divide the pizza dough into four pieces. Stretch each piece of dough out to about a 10" circle on the prepared pieces of foil.

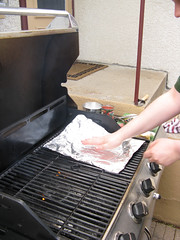
Coat the grill grate with vegetable oil.
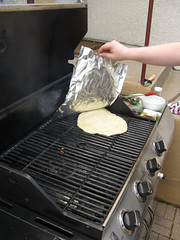
Pick up one piece of dough on foil & flip it onto the grill dough side down. Then peel away the foil. Repeat for as many pizzas as you can fit on the grill. Close the lid & let cook 1 - 2 minutes, the top of the dough should be bubbly & the bottom should be grill-marked.
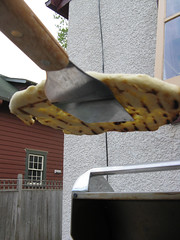
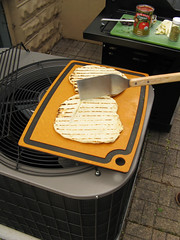
Take the dough off the grill & invert so the grilled side is facing up.
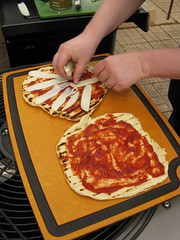

Add the toppings (its best to go light for this type of pizza) and return the pizza to the grill. Close the grill lid & let the pizza cook until the bottom is browned & the cheese is melted, about 5 minutes.

Enjoy!
If you are not reading this post in a feed reader or at http://agoodappetite.blogspot.com OR at http://agoodappetite.com then the site you are reading is illegally publishing copyrighted material. Contact me at katbaro AT yahoo DOT COM. All recipes, text and photographs in this post are the original creations & property of the author unless otherwise noted.
© 2007-2009 Kathy Lewinski
© 2007-2009 Kathy Lewinski


17 comments:
Those look pretty darn good. I make pizza all the time and need to try this! Who needs Pizza Hut? (No one)
We actually grill pizzas all the time and what works well for us is to use the bottom of a cookie sheet instead of the foil and then flip the crust onto the grill that way. Also, turns out that our largest cookie sheet makes a rectangular shaped crust that fits perfectly onto our grill.
Did you use the airconditioning unit to dry the dough?
I love the last photo.
I have never grilled pizza before, but hey, if I tried chicken parmesan, then why wouldn't I try this? It looks great Kat!
Your BBQ pizza looks fantastic! I tried it for the first time last year and LOVED it! Now with being gluten-free, I guess I'll have to figure something else out. The flavour of grilled anything makes it all worth it! :)
I love grilled pizza! So good! I was worried the first time too, Kat! LOL!
We did this last year and it worked out. I, like you was concerned about the dough and the grates, but it worked out just fine. I love your toppings. They pair nicely with the grilled flavor that comes with this method.
That pizza looks awesome. I would love to crunch into it right now.
Guess what I have in my fridg? SOme radishes and carrots marinating in rice wine vinegar. Now guess whats on my agenda.
I've never grilled pizza, but I've promised myself that this year will be the year!
the flavors hidden in those black lines are my favorite part of anything grilled. i think you've made a superior pizza here!
Looks very yummy plus the added bonus of proving Dad wrong.
OMG! THis looks outrageously good!
Grilling pizza is a great thing. One of my favorite things to do with it plus gets that great smokey flavor.
Plus for parties everyone can make their own pizza.
I have been wanting to try this! The foil thing is a great idea - the thought of needing peels and whatnot put me off.
This is soooo awesome. In the summer, I only grill pizzas, nothing is cooked inside. And, I've got a new grill the other day, so I'm definitely going to use your foil tip. Thanks so much for the great photos and info!
Thank you, thank you! I'm going to try it out with these instructions. They look amazing!
We do just about everything on our grill but we use the pizza stone to do our pizzas as they are a very thin crust. My hubby will want to try this tho as it is right up our alley!
Thanks for the idea!
Yum, Yum and YUM!!!!! I love pizza so much. I made this for tea party tonight for my guest, and it was delicious! I was a little nervous but it turned out scrumptious. my mouth is watering looking at your pictures. thank you for shearing your post.
Post a Comment