Showing posts with label dessert. Show all posts

Monday, October 29, 2012

Easy Kanelsnegle

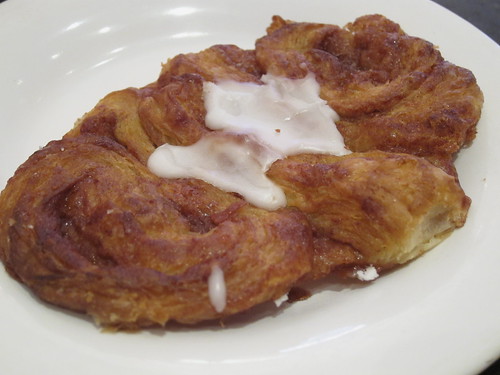
We have our fair share of good bakeries in the Twin Cities. One of them, Patisserie 46, was recently called one of the best patisseries in the world! But none of the ones we've tried have the Austrian-style pastries we had gotten just a little addicted to in Denmark. In particular, I find myself craving a kanelsnegle around 4:00 in the afternoon.
Copenhagen 2012
(Kanelsnegle at a Copenhagen bakery.)

So, it was time to make my own. Kanelsnegle is a cinnamon roll, but unlike the bready rolls we tend to see here in the states, these are flaky, like a danish. Now, I could make my own butter laminated bread like I did for the Daring Bakers Danish Braid Challenge, but I wanted something that I could make quickly in the morning for fika in the afternoon. This called for that time saver, frozen puff pastry.
Easy Kanelsnegle
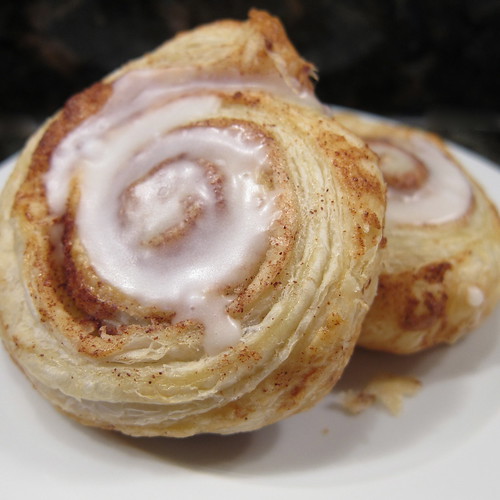
What an easy way to whip up a fresh batch of light, flaky cinnamon rolls. Are they exactly like what we got in Copenhagen? No, of course not, but they were close enough to satisfy. Plus, since they were much smaller, they don't feel like such a huge indulgence.

Easy Kanelsnegle (flaky cinnamon rolls)

1/2 package of frozen puff pastry (1 sheet), thawed
unsalted room temperature butter
1 T sugar
cinnamon
1 egg
powdered sugar
milk

Preheat oven to 400 F.

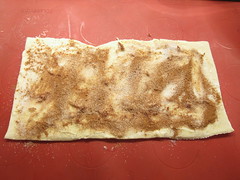
Place a silicone mat on a baking sheet. Unfold or roll the puff pastry out on top of the mat. Spread with a light coat of butter, leaving about 1/2 inch on one short side unbuttered. Sprinkle on the sugar and a generous amount of cinnamon (I didn't measure the cinnamon, I just sprinkled until it looked well covered.)
Easy Kanelsnegle
Whisk the egg together with about 1 tablespoon of water. Roll the pastry up with the unbuttered side being last. Put a little of the egg and water mixture on that unbuttered end to seal the roll.
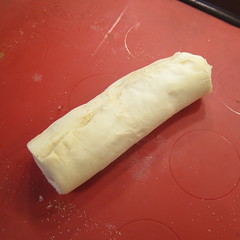
Easy Kanelsnegle
Slice the roll into 1/2 - 3/4 inch discs. Place flat side down on the baking sheet. I pressed them down slightly. Brush with the egg and water mixture.
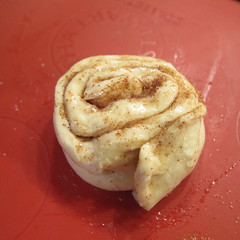
Easy Kanelsnegle
Bake for 15 minutes or until risen and brown. Move to a rack to cool.

Make a glaze by stirring a little milk into some powdered sugar. Just a couple tablespoons of sugar should be enough. You want a thick glaze and will need much less milk than you think. Start with 1/4 teaspoon and add more as needed. Spoon the glaze on top of the cooled rolls and let harden.

I think these rolls are best served at room temperature.

Makes 8 small rolls. (I actually only used 1/2 of a sheet of puff pastry which made 4 rolls which were the perfect sweet with coffee for Matt and I.)


If you are not reading this post in a feed reader or at http://agoodappetite.blogspot.com OR at http://agoodappetite.com then the site you are reading is illegally publishing copyrighted material. Contact me at katbaro AT yahoo DOT COM. All recipes, text and photographs in this post are the original creations & property of the author unless otherwise noted. © 2007-2012 Kathy Lewinski

Tuesday, October 9, 2012

Chocolate Covered Pretzel Skulls

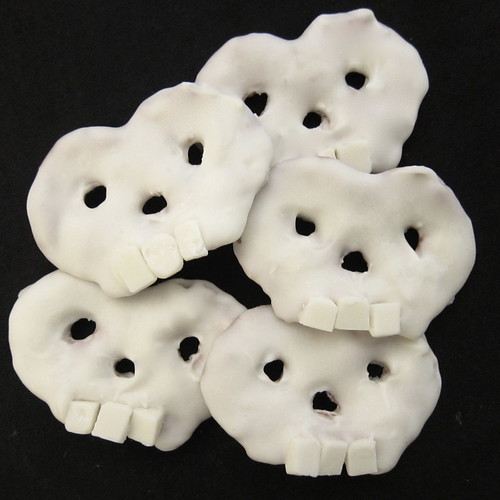
This week my craft challenge group, Iron Craft, is making edible crafts. I went with a Halloween theme and made up some chocolate covered pretzel skulls.
Iron Craft Challenge #20 - Chocolate Covered Pretzel Skulls
Get all the details on making them on Just Crafty Enough.


If you are not reading this post in a feed reader or at http://agoodappetite.blogspot.com OR at http://agoodappetite.com then the site you are reading is illegally publishing copyrighted material. Contact me at katbaro AT yahoo DOT COM. All recipes, text and photographs in this post are the original creations & property of the author unless otherwise noted. © 2007-2012 Kathy Lewinski
Friday, July 27, 2012

Going for the Gold Ice Cream

I love the Olympics, especially the spectacle that is the opening ceremonies. Typically, I have a party where I ask people to bring food and drink from various countries. This year we are keeping things a little more low-key, but I still wanted to make something special to enjoy while watching. With the hot weather we've been having, ice cream seemed to be the way to go.
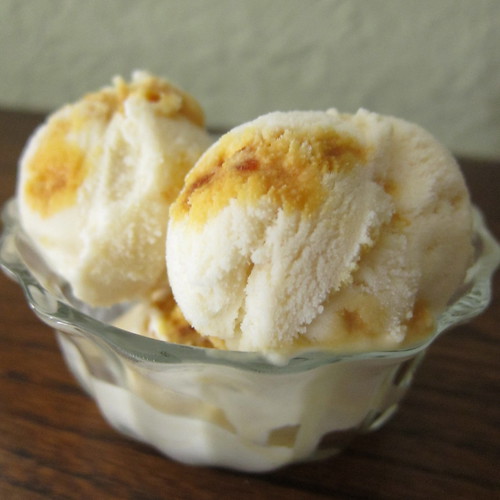
Going for the Gold Ice Cream
I wanted to celebrate England with this ice cream, so the base is flavored with Hobgoblin Dark English Ale and then studded with pieces of honeycomb candy (what you'd find inside a Cadbury Chunchie bar). The ice cream has a nice strong malty beer favor (with just a hint of banana from this beer). The honeycomb candy melts into sweet, golden caramel/toffee flavored bites. Together they make a winning team.

I use the ice cream base recipe from Jeni's Splendid Ice Creams. Jeni's is in Columbus, Ohio, but our local higher end grocery store has recently started carrying her small batch ice creams (all the pints are hand labeled in Sharpie). We fell in love with flavors like Brambleberry Crisp and Brown Butter Almond Brittle. When we saw that she had a book out on how to make her ice creams at home we grabbed it! You can get her basic ice cream base recipe on Saveur too.

Going for the Gold Ice Cream
The beer is not cooked down in this recipe, so the final ice cream does have a small alcoholic content.

Ice Cream Base:

2 c whole milk
1 1/2 T cornstarch
1 1/2 oz cream cheese
1/8 t fine salt
1 1/4 c heavy cream
2/3 c sugar
2 T light corn syrup
1/2 c Dark English Ale (a stout or porter would be good too)

Make the ice cream base:

Mix 2 tablespoons of the milk with the cornstarch and set aside

Put the cream cheese and salt into a large bowl, whisk and set aside.

In a large heavy saucepan, add the remaining milk, cream, sugar and corn syrup. Bring to a rolling boil over medium-high heat. Let boil for 4 minutes. Remove from the heat and whisk in the cornstarch mixture. Return to heat and bring to a boil again. Let boil whole stirring, for one minute. It should be smooth and slightly thickened.

Slowly whisk the hot mixture into the cream cheese. Stir in the ale.

Cool in the fridge overnight or put into an ice bath to chill completely.


Honeycomb Candy:
from Wikihow though I added the bits about reaching the proper candy temperature.

5 T white sugar
2 T golden syrup (I've seen some recipes that just use honey, but golden syrup is traditional in England)
2 T honey
2 t water
1 T baking soda


Make the Honeycomb:

Have you water and baking soda measured out and ready to go. Grease a baking sheet or cover the bottom with a silicone mat or parchment paper.

Put the sugar, golden syrup and honey into a heavy saucepan. Melt over medium-heat. Bring to a low boil, stirring quite often. Boil until the mixture reached the hard crack point, just above 300F. The mixture should caramelize to a slightly darker brown. Remove from the heat and add the water and baking soda. Stir in quickly. The mixture will foam up (this created the honeycomb). Pour out on to prepared baking sheet. Let cool completely. Break into small pieces, smaller than a nickel. (Don't worry if your honeycomb isn't completely crisp, mine wasn't. It'll melt in the ice cream so just needs to be stiff enough to break up.)

Freeze the Ice Cream:

Freeze the ice cream according to the directions on your ice cream maker. Package it in an air tight container, layering in pieces of honeycomb candy. Let sit in the freezer for at least a couple of hours to let the candy to soften.

Makes 1 quart

If you are not reading this post in a feed reader or at http://agoodappetite.blogspot.com OR at http://agoodappetite.com then the site you are reading is illegally publishing copyrighted material. Contact me at katbaro AT yahoo DOT COM. All recipes, text and photographs in this post are the original creations & property of the author unless otherwise noted. © 2007-2012 Kathy Lewinski

Friday, March 16, 2012

Chocolate Whisky Cake

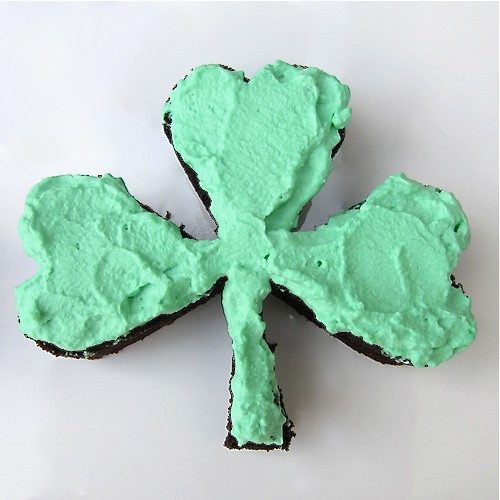
Continuing in this week's St. Patrick's Day theme, I give you our dessert for Saturday night.
Shamrock Whiskey Cake
This cake is rich and slightly fudgy, almost but not quite a brownie. It is my favorite dark chocolate cake recipe taken to a higher level with a good shot of Irish Whiskey. The nice thing is you can really taste the whiskey in this cake and oh man, is it every good. Matt and I ate every scrap that was leftover from cutting it into shamrocks. I was afraid the whiskey would be harsh in it (especially as I am not a huge whiskey fan), but it is quite mellow. It goes well with the bittersweetness of the chocolate and oakiness of the vanilla.
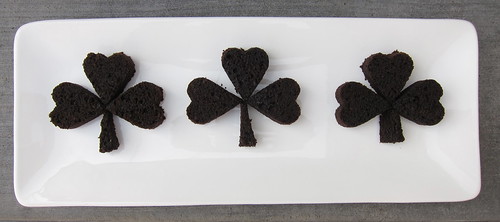
To make it even more fun, I cut the cake into small shamrock cakes using a heart cookie cutter I had in my collection.
Chocolate Whiskey Cake

1/2 c (4 oz) unsalted butter
1/4 c Hersey's Special Dark Cocoa (or other Dutch processed cocoa)
6 T Irish Whiskey
1 c white sugar
1 egg
1 T vanilla
1/4 c buttermilk (or if you don't have buttermilk, mix a little lemon juice into regular milk)
1 c all-purpose flour
1/4 t baking soda
1/2 t baking powder
1/8 t salt

whipped cream
green food coloring

Preheat oven to 350 F. Prepare a round 8" cake pan by greasing and flouring it well. (If you are picky about this type of thing you can dust it with cocoa instead of flour.)

In a saucepan, melt the butter over low heat. Whisk in the cocoa until smooth. Whisk in the whiskey, again until smooth. Remove from heat. Then one at a time whisk in the sugar, egg, vanilla and buttermilk. Stir in the flour, baking soda, baking powder and salt, it will be slightly lumpy.

Pour into the prepared pan and bake for 20 - 25 minutes until a toothpick inserted into the center comes out relatively clean. Cool on a rack before flipping out of the pan.

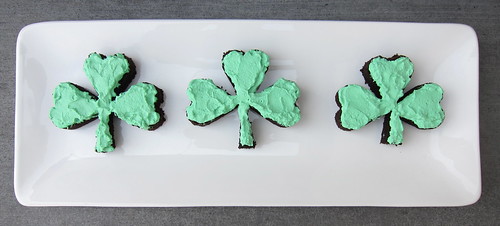
Served with whipped cream that has been dyed green.

Makes a single layer 8" cake.

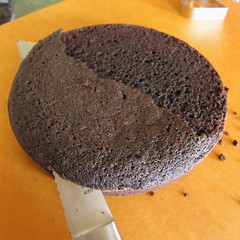
How to make the cake into shamrocks:

8" round single layer chocolate cake (brownies would work good too)
long serrated knife
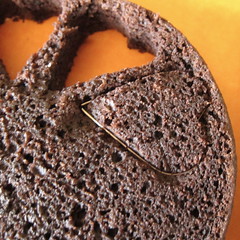
2" heart cookie cutter

Trim the cake so it is flat and not much thicker than your cookie cutter. A long serrated knife works well for this.
Shamrock Whiskey Cake
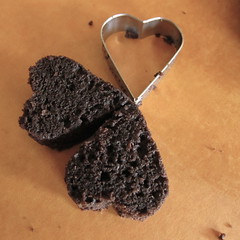
Using the cookie cutter cut out eight hearts along the outer edge of the cake and one in the center. Make sure you are pressing the cutter all the way through the cake so the hearts don't get stuck an break. Save three of the little triangle pieces between the hearts for stems. Eat the scraps.
Shamrock Whiskey Cake Shamrock Whiskey Cake
Arrange the hearts into a shamrock shape.
Shamrock Whiskey Cake
Before serving top with the green whipped cream.
Shamrock Whiskey Cake
You will get three shamrocks out of one 8" cake. Matt says each shamrock is one serving and I say they could easily be two.

If you are not reading this post in a feed reader or at http://agoodappetite.blogspot.com OR at http://agoodappetite.com then the site you are reading is illegally publishing copyrighted material. Contact me at katbaro AT yahoo DOT COM. All recipes, text and photographs in this post are the original creations & property of the author unless otherwise noted. © 2007-2012 Kathy Lewinski

Friday, February 10, 2012

Sweets for the Sweet

Matt and I don't usually go out for Valentine's Day. (Though this year we are going to Blackbird's Black Hearted Beer Dinner the weekend before.) When we have we find that you often get stuck with a set prix-fixed menu and rushed servers trying to get the crowds through. Instead we prefer to go out another night and make a special dinner at home. To me, sharing dessert can be one of the most romantic parts of the meal. Here's a few favorites from us, most of which have recipes sized just for two!

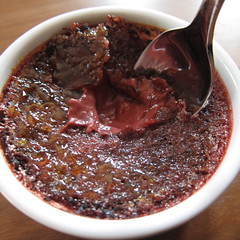
Red Velvet Creme Brulee Red Velvet Creme Brulee for Two

IMG_5012 Dobos Torte

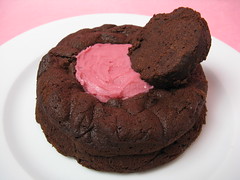
Chocolate Valentino Chocolate Valentino with Raspberry Ice Cream

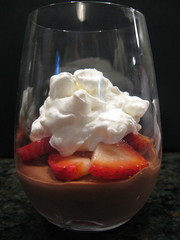
Chocolate Mousse Chocolate Mousse for Two

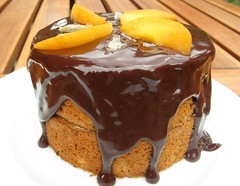
#165 - almond brown butter cake with apricot ginger filling Almond Brown Butter Cake with Apricot Ginger Filling

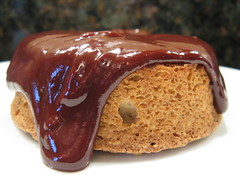
Hazelnut Brown Butter Cake Hazelnut Brown Butter Cake with Chocolate Sauce

Of course, there are lots of small batch cupcake recipes throughout the site too that would work perfectly!


If you are not reading this post in a feed reader or at http://agoodappetite.blogspot.com OR at http://agoodappetite.com then the site you are reading is illegally publishing copyrighted material. Contact me at katbaro AT yahoo DOT COM. All recipes, text and photographs in this post are the original creations & property of the author unless otherwise noted. © 2007-2012 Kathy Lewinski

Wednesday, February 8, 2012

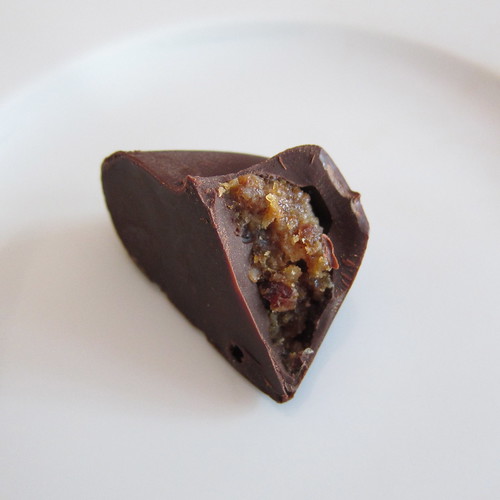
Drunken Pig Chocolates (and other Valentine's treats)

Recently, I picked up some heart-shaped silicone ice cube trays from IKEA and Target which inspired me to try my hand at making filled chocolates.
Filled Chocolate Hearts
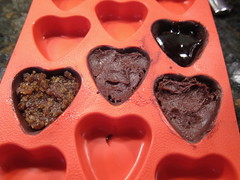
I did a bit of research online and it didn't look like too tricky a process. Basically, just use a brush to coat the molds with chocolate, let set, fill and top with more chocolate. I learned a few tricks along way, like freezing your molds makes it easer to coat them with chocolate. For a complete step by step on assembling the chocolates visit my craft blog, Just Crafty Enough.
Filled Chocolate Hearts
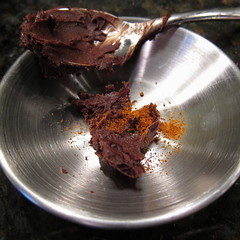
The main reason I wanted to try making my own filled chocolates was so I could fill them with whatever I wanted. I was thinking bacon and Matt suggested bacon jam. Then I though bacon jam made with bourbon and drunken pig chocolates were born.
Filled Chocolate Hearts
The salty, meaty jam with just a touch of heat works perfectly inside the sweet chocolate.

Drunken Pig Jam
Filled Chocolate Hearts
3 strips bacon, chopped
1/4 c thinly sliced onion
1/4 t cinnamon
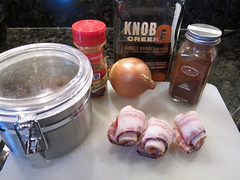
1/4 t cayenne (yes, the picture shows ancho chili powder, but we changed our mind)
1 T packed brown sugar
1/4 c bourbon

In a small skillet cook the bacon over medium-high until it renders its fat and it just cooked but not crisp. Remove to paper towel cover plate to drain. Leave about 1/2 tablespoon of bacon fat in the pan. Add the onion and cook until it becomes translucent but not brown. Turn the heat to low. Stir in the cinnamon and cayenne. Add the brown sugar and bourbon. Let cook on low until everything is sticky and brown. You want your onions to look caramelized.
Filled Chocolate Hearts
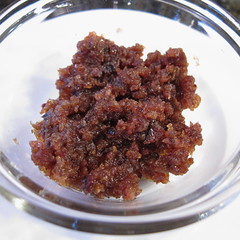
Put into a small food processor and purse until you get a chunky paste. Let cool before using to fill chocolates.
Filled Chocolate Hearts
Makes about 1/3 cup.

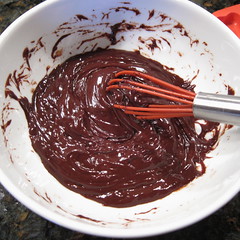
For the rest of my fillings I started with a basic chocolate ganache recipe from Joy of Cooking. I brought 3/4 cup heavy cream to a boil. Removed it from the heat and then stirred in 4 ounces of chopped bittersweet chocolate. My pan must have been too hot because my ganache broke and became an oily mess, luckily that is an easy fix. I whisked in a little more cold cream, about 1 tablespoon at a time, until the ganache came back together and became the smooth, shiny filling I wanted.
Filled Chocolate Hearts
Let the ganache cool to room temp before using it as a filling. You can put it in the fridge to help speed that process.
Filled Chocolate Hearts
Once you have the finished ganache, you can flavor it with anything you have on hand. I made three different flavors, cayenne, salt and cherry bitters. Just mix the flavoring with the ganache and taste until you get the flavor you like. I have to say I was really surprised at how good the cherry bitters were, it tasted like a chocolate covered cherry. Other thoughts I had for flavorings were lavender and St. Germain.
Filled Chocolate Hearts
The ganache filling worked really well in the chocolate because it set up stiff enough to help make the chocolates easy to press from the molds.

I also tried using caramel made from our Apple Cider Syrup as a filling, but it wasn't very successful. I had to heat it a bit to make it soft enough to get in the molds. Problem is then in was warm enough to melt the chocolate. When I tried to press it out of the mold it just fell apart. Maybe it I let it set up longer it would have worked out.


If you are not reading this post in a feed reader or at http://agoodappetite.blogspot.com OR at http://agoodappetite.com then the site you are reading is illegally publishing copyrighted material. Contact me at katbaro AT yahoo DOT COM. All recipes, text and photographs in this post are the original creations & property of the author unless otherwise noted. © 2007-2012 Kathy Lewinski

Thursday, September 8, 2011

Apples of my Eye

We are starting to see the first of the fall apples in the farmers markets here in MN. Apparently, local growers are expecting a bumper season with 50% more apples than usual! That is a lot of apples. Sweetango Apple
With that in mind we thought we'd share some of our favorite apple recipes from the last couple of years to get you ready to use these fall favorites to their fullest.
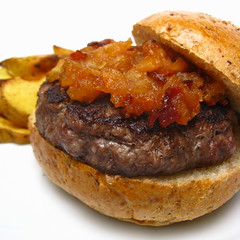
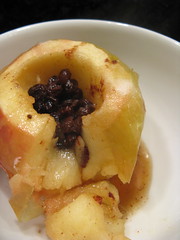
Stuffed maple burger with spicy apple bacon compote Stuffed Maple Burger with Apple Bacon Compote Baked Apple with Currants Baked Apples
Apple Waffles Apple Waffles
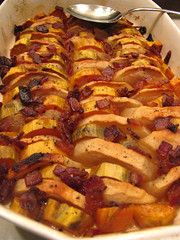
Maple-glazed sweet potatoes & apples with bacon Maple-Glazed Sweet Potatoes and Apples with Bacon
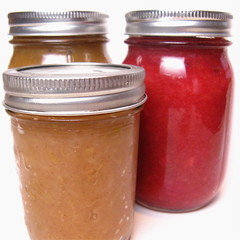
#308 - Applesauce three ways Applesauce Three Ways
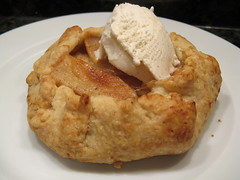
Apple Galette Apple Galette
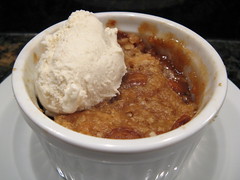
caramel apple crisp Matt's Caramel Apple Crisp
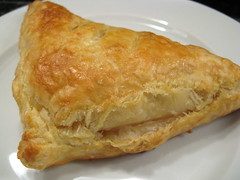
Apple Turnovers Easy as Pie Apple Turnovers
#308 - Cheddar, Apple & Bacon Tart Cheddar Apple Bacon Tart
Apple Bread Pudding Apple Bread Pudding

If you are not reading this post in a feed reader or at http://agoodappetite.blogspot.com OR at http://agoodappetite.com then the site you are reading is illegally publishing copyrighted material. Contact me at katbaro AT yahoo DOT COM. All recipes, text and photographs in this post are the original creations & property of the author unless otherwise noted. © 2007-2011 Kathy Lewinski

Tuesday, August 9, 2011

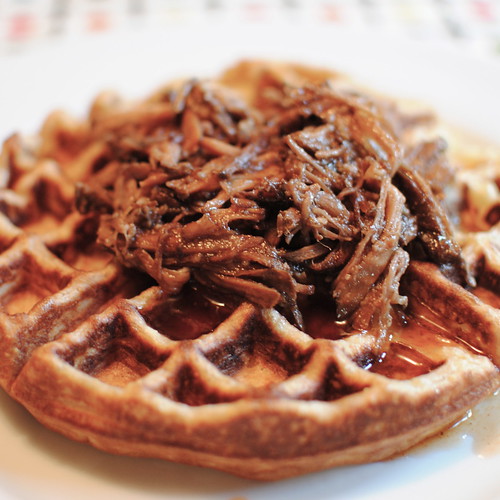
Sweet Corn Waffles with Pulled Pork

Look another sweet corn recipe! This time I've added it to waffles along with some grits to make the perfect vehicle for crock pot pork. Top it all with spicy maple syrup and this one is a winner.
Corn Waffles Topped with Pulled Pork
I made the crock pot pork just like I've made crock pot beef in the past. A couple of pork steaks went in the crock pot with a sliced onion, a can of beer, 1/2 cup barbecue sauce, 1 tablespoon of malt vinegar and a tablespoon of horseradish mustard. Let it cook on high until the pork is fall apart tender, mine took about 4 hours. Remove the pork from the pot and shred.

Matt came up with the idea for the spicy maple syrup and it couldn't be easier. Just mix maple syrup with Sriracha to taste. I was skeptical, but man it was the perfect sweet and spicy topper for this dish.

Sweet Corn Waffles

2 ears of corn (or about 1 cup of frozen corn kernels, thawed)
3/4 c all-purpose flour
1/4 c grits
1/2 t baking powder
1/4 t baking soda
1/2 t salt
2 eggs, beaten
2 T unsalted butter, melts & slightly cooled
1 c milk

Husk the corn and cook in a pot of boiling water for 5 minutes. Let cool. Cut the kernels from the cobs.

Mix the flour, grits, baking powder, baking soda and salt together in a bowl.

In another bowl mix the eggs, butter, milk and corn kernels. Pour into the dry mixture and stir until just combined. Let sit 5 minutes.

Cook according to your waffle maker instructions.

Makes 3 Belgium waffles

Top waffles with pork and drizzle with spicy maple syrup. Dig in!

If you are not reading this post in a feed reader or at http://agoodappetite.blogspot.com OR at http://agoodappetite.com then the site you are reading is illegally publishing copyrighted material. Contact me at katbaro AT yahoo DOT COM. All recipes, text and photographs in this post are the original creations & property of the author unless otherwise noted. © 2007-2011 Kathy Lewinski

Friday, July 22, 2011

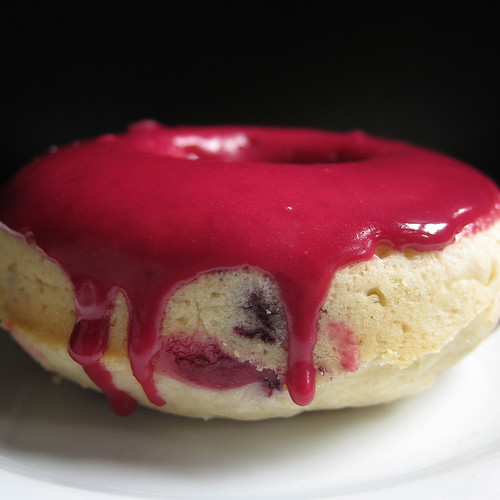
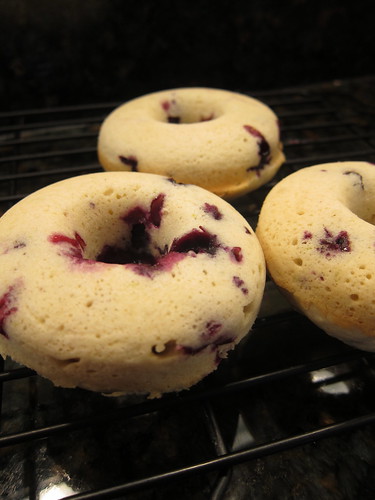
Blueberry Lime Donuts

Since I got my donut pan I've been thinking about making blueberry donuts. It's been so hot though I haven't wanted to turn on the oven even for a little bit. Yesterday though, the heat and humidity dropped, so I had my chance.
Blueberry Lime Donuts
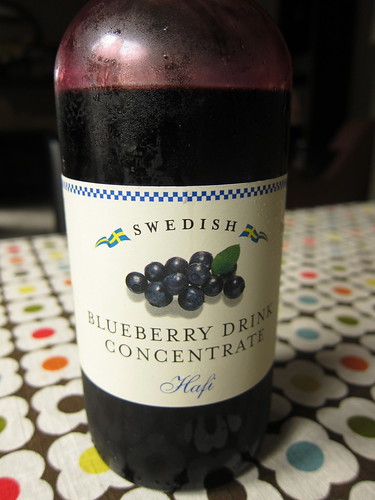
The thing that got me thinking about blueberry donuts was this Swedish Blueberry Drink Concentrate I had picked up at Ikea.
Blueberry Lime Donuts
We'd used it to make blueberry soda in our Soda Stream and have ideas for cocktails, but I thought it might be a good baking ingredient too. I went back and forth about whether to make a citrus donut with blueberry glaze or a blueberry donut with a citrus glaze. Since I had fresh blueberry from the farmers market I thought I'd mix it up and put whole blueberries in a citrus donut with a blueberry glaze.
Blueberry Lime Donuts
I would say the results are about 80% there. The donut tasted lot like a blueberry muffin, though it was a little denser. Matt really liked them. One of them had way too many blueberries in it and sort of fell apart. I was planning on doing lemon as my citrus, but had a lime in the fridge so went with that. It was a little old, so the zest was kind of dried out and didn't give the flavor kick I had hoped for. The glaze was stunning, but watch out that blueberry concentrate will stain anything!

I share the recipe as I made it as a starting point for someone else who might be interested in trying it or improving on it.

Blueberry Lime Donuts

3/4 c flour
1/4 c sugar
3/4 t baking powder
pinch of salt
2 T fresh lime juice
zest from half a lime
2 - 3 T milk
1/2 t vanilla
1 egg
1 t shortening
handful of frozen blueberries (just enough for a couple per donut) (I think you could also use fresh)
1/3 c powdered sugar
3 T blueberry drink concentrate

Preheat oven to 325F. Lightly grease three mold in a donut pan.

In a small bowl stir to together the flour, sugar, baking powder and salt. Add in the lime zest, lime juice, 2 tablespoons of milk, vanilla, egg and shortening. Combine until just blended. If it seems dry add the rest of the milk. Fold in the blueberries.

Fill the donut molds about 3/4 full. Bake for 11 - 15 minutes or until a toothpick inserted into a donut comes out clean (They will probably cook quicker if you use fresh instead of frozen blueberries). Let cool in the pan for a few minutes and then move to a rack to finish cooling.

Mix the powdered sugar and blueberry concentrate together until smooth in a shallow bowl. Dip the cooled donuts in the glaze. Put back on the rack for a few minutes to let the glaze dry. I recommend putting a paper towel or something until the rack to catch the drips of glaze.

Makes 3 donuts

If you are not reading this post in a feed reader or at http://agoodappetite.blogspot.com OR at http://agoodappetite.com then the site you are reading is illegally publishing copyrighted material. Contact me at katbaro AT yahoo DOT COM. All recipes, text and photographs in this post are the original creations & property of the author unless otherwise noted. © 2007-2011 Kathy Lewinski

Wednesday, July 6, 2011

Creamy Strawberry Pie

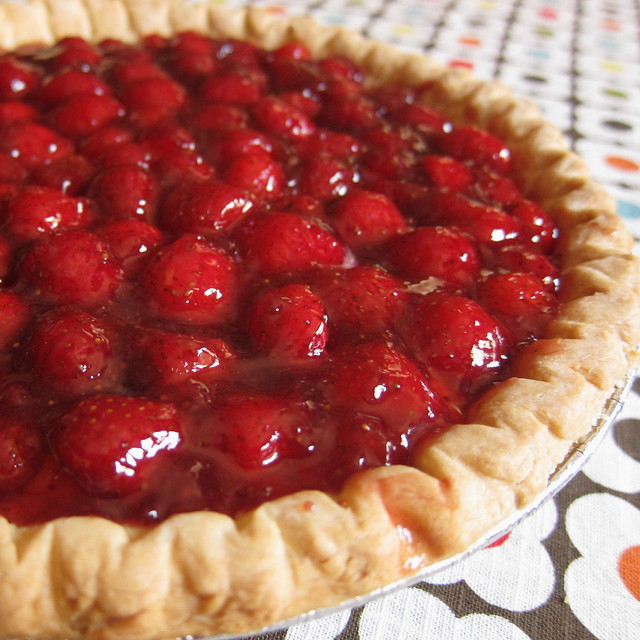
Strawberries are in season here in Minnesota so, I knew I wanted to use them my Fourth of July dessert. Since I had a lot of things to cook that day, it had to be pretty simple dessert. This pie was just the ticket, easy and quick to make plus fresh and cool for a hot summer night.
4th of July
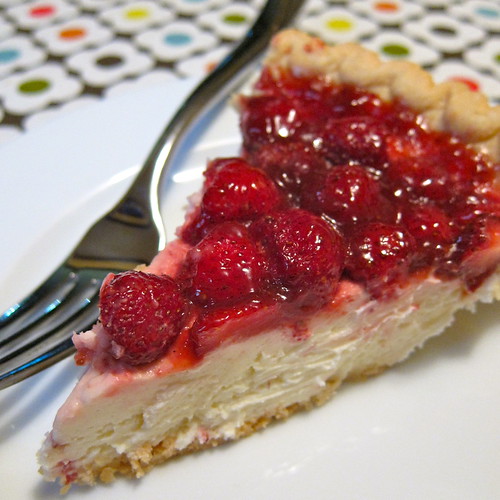
The only thing baked here is the crust which, ok shoot me, I bought at the store. The base is made just by whipping together cream cheese and mascarpone with vanilla, sugar and lemon juice (oh, that lemon juice really brightens the whole thing). Then it's just a matter of adding some sliced strawberries and a little melted jam. It firms up a bit with chilling but remains really creamy. I can't believe how much it tasted like a cheese cake without the baking, water bath or worrying about cracking. This is one we'll have all summer with different fruits as they come into season.
Creamy Strawberry Pie

Creamy Strawberry Pie
I used a store bought pastry pie shell for this pie, it would also be fantastic with a graham cracker or shortbread crust.

9-inch pie shell
8 oz cream cheese, softened at room temp
8 oz mascarpone cheese, softened at room temp
1 t vanilla
3 T heavy cream
1/4 c white sugar
2 t lemon juice
strawberries, hulled and halved (amount will depend on the size of your berries)
1/4 - 1/2 c red jam such as currant or strawberry (I used my homemade strawberry vanilla jam.)

Cook your pie shell according to directions. Let cool.

Whip the cream cheese, marscarpone, vanilla, heavy cream, sugar and lemon juice together until blended and light. Spoon into the cooled crust and spread into an even layer. Let chill in the refrigerator for about 30 minutes.

Top the chilled pie with halved strawberries. Put the jam into a small microwavable bowl. Microwave until the jam in warmed and slightly liquid, about 30 seconds. Brush all over the top of the berries letting it fill in the spaces between berries.

Chill for at least another hour before serving. We actually thought it was better after being in the fridge overnight.

Makes 1 pie

If you are not reading this post in a feed reader or at http://agoodappetite.blogspot.com OR at http://agoodappetite.com then the site you are reading is illegally publishing copyrighted material. Contact me at katbaro AT yahoo DOT COM. All recipes, text and photographs in this post are the original creations & property of the author unless otherwise noted. © 2007-2011 Kathy Lewinski

Wednesday, June 29, 2011

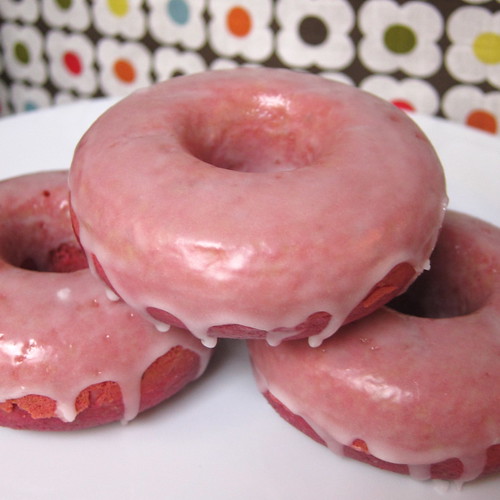
Glazed Beet Donuts

When I mentioned on Facebook that I was going to try making beet donuts today, Amy from Green Your Plate told me I was "talking crazy talk." But you see, I think beets, especially roasted beets, have a mild sweetness that makes them perfect for this type of application. And let's not forget about the color they add. Last summer, we made a Vanilla Beet Gelato that we really enjoyed so, it wasn't so crazy for us.
Beet Donuts
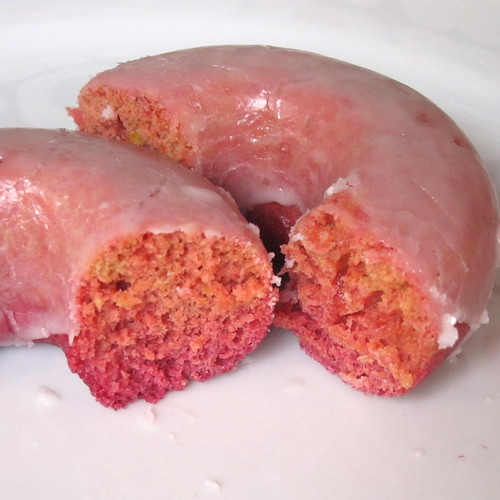
This was my first go at making real cake donuts (the shortcake ones from yesterday don't count) and I wasn't sure what to expect from the texture. I have to say, they were surprisingly close to what you'd buy at a donut shop, firm and springy but, not too dry. I have a feeling they are best eaten the day made but, that isn't a big deal since you could mix these up and bake then in about 15 - 20 minutes.
Beet Donuts
Of course, you want to know how they taste. They were very good, sweet but, not too sweet, with hints of vanilla and cinnamon. The beet flavor is there but it is subtle, perfectly balanced with the other flavors. If you served these to someone without telling them they were made with beets, I'm betting they would have a hard time putting a finger on what the flavor is. I should mention Matt thought the cake could be sweeter but, I thought it was totally sweet enough, especially with the glaze.

Glazed Beet Donuts
adapted from the recipe on the Norpro Donut Pan package

3/4 c all-purpose flour
1/4 c sugar
3/4 t baking powder
pinch salt
pinch cinnamon
pinch cayenne
1/4 c chopped, roasted beets
1/4 c milk
3/4 t vanilla
1 egg
1 t shortening

Glaze
1/2 c powdered sugar
1 T milk

Preheat oven to 325 F. Lightly grease three donut forms in a donut baking pan.

In a small bowl, mix together the flour, sugar, baking powder, salt, cinnamon and cayenne.

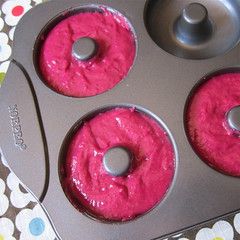
In a small food processor or chopped, purée the beets with the milk. It won't be smooth. Mix into the flour mixture. Stir in the vanilla, egg and shortening. Divide between the three greased donut forms.
Beet Donuts - Ready to go in the Oven
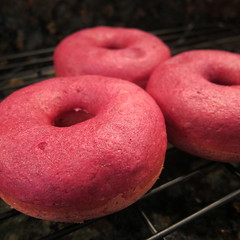
Bake for 8 - 11 minutes (mine took all 11) until the donuts spring back when touched. Let cook for a few minutes in the donut pan before removing to a rack to finish cooling.
Beet Donuts
Once cool, make the glaze by mixing the powdered sugar and milk in a bowl you can easily dip the donuts into. I like to start with the water and add the sugar a little at a time until I get a thickness I like. You may need more or less sugar. Dip the cool donuts carefully into the glaze. Remove to a rack where the glaze can drip off. Let set for a few minutes to harden.
Beet Donuts
Makes 3 donuts.

Now, how's that for a way to get some more vegetables into your kids?
Beet Donuts

If you are not reading this post in a feed reader or at http://agoodappetite.blogspot.com OR at http://agoodappetite.com then the site you are reading is illegally publishing copyrighted material. Contact me at katbaro AT yahoo DOT COM. All recipes, text and photographs in this post are the original creations & property of the author unless otherwise noted. © 2007-2011 Kathy Lewinski
Related Posts with Thumbnails

Get Email Updates!

Enter your email address:

Delivered by FeedBurner

Measurement Abbreviations

T = Tablespoon
t = teaspoon
c = cup
lb = pound
oz - ounce

Labels

Blog Archive

Contributors

Blog Directory for Minneapolis, Minnesota