Showing posts with label cheese. Show all posts

Wednesday, April 20, 2011

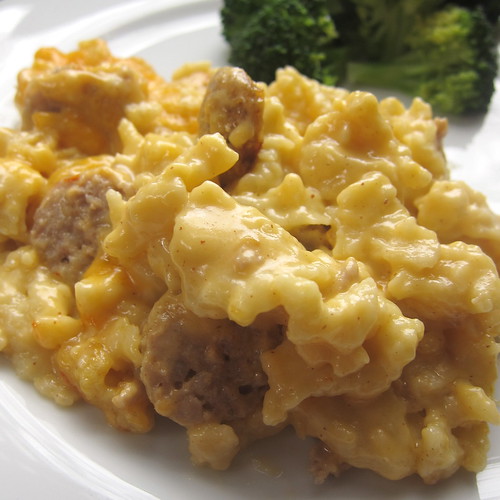
Wisconsin Spaetzle and Cheese

Remember when you were a kid and your mom made you Kraft mac and cheese with hotdogs cut up into it? Well, here's your grown up version of that with a little bit of a German-American twist.
Wisconsin Spaetzle & Cheese
A few days ago Lara over at Wandering Fork posted a spaetzle dish and it totally gave me a spaetzle and cheese craving. Then I started thinking spaetzle, cheddar...aha brats. We had some Gigawatt Brats in the fridge from Bar 5 Meat. They had a nice heat from jalapenos and red pepper which I think added a lot to the dish. At the last minute, we decided to add some spicy brown mustard to the sharp cheddar sauce which added another perfect flavor layer.

So, why do we call it Wisconsin Spaetzle and Cheese? Well, to us, it just seems like a combination of foods we relate with our neighbor state all rolled into one big helping of comfort food. All it needs is a cold bottle of New Glarus Beer and I think you have a meal that would make any one from the Dairy State happy.
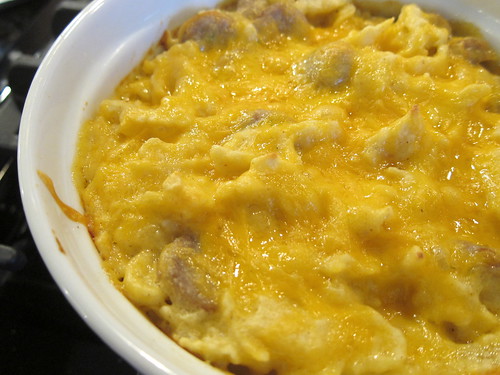
Wisconsin Spaetzle & Cheese
A note on making the spaetzle: The original Tyler Florence recipe says to push the dough through a large sieve or grater to make the spaetzle. There was no way this was happening with this loose sticky dough. Matt even tried pushing it through the garlic grater which just made a huge glob. I ended up just using my hands and dropping small pieces of dough into the boiling water. Try to keep the pieces thin an about 1/2-inch long.

Wisconsin Spaetzle and Cheese

Spaetzle
(adapted from Tyler Florence)

1 1/2 c all-purpose flour
3/4 t salt
pinch of pepper
1/2 t dry mustard
pinch of nutmeg
3 large eggs, beaten
1/4 c + 2 T milk

Mix the flour, salt, pepper and mustard together. Mix in eggs and milk until you get a thick, smooth batter. Let sit 10 minutes.

Meanwhile, bring a big pot of salted water to a boil. Drop the spaetzle dough in a little at a time in small pieces. When they float to the top scoop out of the water with a strainer. Rinse with cool water and drain. You'll have to do this in a few batches and may have to add more water to the pot as you go.

Mustard Cheese Sauce

1/2 T unsalted butter
1 T all-purpose flour
1/2 c milk
1/4 c heavy cream
4 1/2 oz sharp cheddar, cut
pinch of salt
few grinds of fresh pepper
1 T spicy brown mustard

In a small saucepan, melt the butter over medium heat. Add the flour and cook while stirring for 1 minute. Whisk in the milk and cream. Whisk while cooking until smooth and slightly thickened. Add the cheese & stir until completely melted. Stir in the salt, pepper and mustard.

Assembly and Cooking

2 brats, cooked and sliced into rounds (we used a spicy brat & I highly recommend that bit of spice)
a little grated cheddar (optional)

Preheat oven to 350 F.

Mix the spaetzle, sliced brats and cheese sauce together. Pour into a casserole dish. Top with the grated cheese.

Bake for 25 minutes until the cheese is melted and the top is golden.

Makes 4 servings.

If you are not reading this post in a feed reader or at http://agoodappetite.blogspot.com OR at http://agoodappetite.com then the site you are reading is illegally publishing copyrighted material. Contact me at katbaro AT yahoo DOT COM. All recipes, text and photographs in this post are the original creations & property of the author unless otherwise noted. © 2007-2011 Kathy Lewinski

Friday, June 19, 2009

Ricotta Gelato

Last week I was looking for interesting recipes using ricotta for our cheesemaking day with Cooking Minnesota when I stumbled across this recipe on Epicurious. I was very intrigued by the idea of making an ice cream type dessert with cheese, would it be good or would it be gross.
IMG_3996 
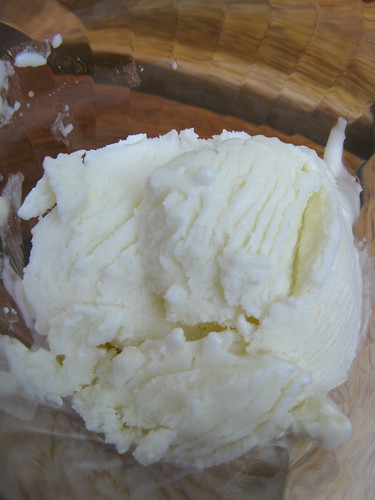
It was very simple to but the base together & when I tasted it before freezing I was really happy with the flavor, sweet with just a subtle cheese taste (ricotta doesn't have a strong flavor to start with). I think it's really important to get the base really smooth (which is why I used a blender & not a food processor), I think chunks of cheese curd in this would not have been good. This gelato froze really quickly in the ice cream maker & froze very hard in the freezer. It needs a little time at room temperature before serving.

The final result was a hit. The cheese flavor remained really subtle. The thing that really strikes you as different is the mouth-feel, the best way to describe it is slightly sticky which is unexpected but not unpleasant. We served it with a fresh strawberry balsamic sauce which was a great pairing. I think a strawberry red wine sauce would be wonderful too. I don't think I'd necessarily rush to make this again but it was fun to try & I think my guests over this past weekend have enjoyed trying it too.

Ricotta Gelato 
(from Bon Appetit Sept' 07) 

4 c fresh whole-milk ricotta 
1/2 c whole milk 
1 1/2 c chilled simple syrup** 

Put the ricotta & milk in a blender & process until smooth. Add the simple syrup and continue to process until completely smooth. Put in an airtight container & chill. Transfer to an ice cream maker & process according to the machine's directions. Put into an airtight container & freeze until firm, about 3 hours. Can be keep for 2 days.

** Simple Syrup
1 1/2 c water
1 1/2 c sugar
Put the sugar & water into a saucepan & bring to a boil to dissolve sugar. Turn down to simmer. Let simmer for 3 minutes. Chill. Can be kept in an airtight container in the refrigerator for 1 week.

If you are not reading this post in a feed reader or at http://agoodappetite.blogspot.com OR at http://agoodappetite.com then the site you are reading is illegally publishing copyrighted material. Contact me at katbaro AT yahoo DOT COM. All recipes, text and photographs in this post are the original creations & property of the author unless otherwise noted.
© 2007-2009 Kathy Lewinski

Thursday, June 18, 2009

Fresh Chive Cheese

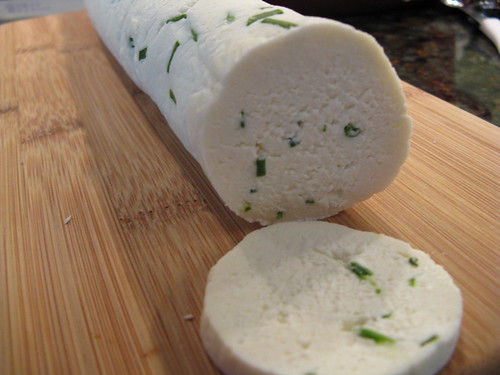
Matt printed out this recipe when we first started getting into making our own soft cheeses. We had done mozzarella & ricotta so he wanted to see what else was out there to expand our repertoire. Based on Indian chenna, this cheese log is full of the flavor of chive & a touch of lemon. It was super easy to make especially with a stand mixer with a dough hook. 
IMG_3984
As we were making it we had a hard time believing this mass of cheese curd was going to turn into a dough like texture but we let the dough hook do its work & like magic the curds became a soft dough. The final chilled texture comes out beautifully firm yet creamy. I was pretty proud to bring this lovely appetizer out & be able to say we'd made it from scratch. Matt absolutely loved it & is ready to make more right away. I think the possible additions for flavoring it are pretty wide though I'd stay away from anything oily (like sundried tomatoes packed in oil) as it will effect the texture of the cheese.

Fresh Chive Cheese
(from Sunset Magazine)

1 gallon whole milk
1/2 c lemon juice
1/2 t salt
2 T fresh chives, chopped

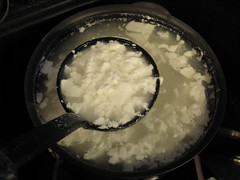
In a large pan heat the milk over medium-high heat until boiling, stirring frequently to prevent scorching. (This will take a long time, it took us close to 45 minutes.) Once the milk is boiling remove it from the heat & stir in the lemon juice. Stir until the white curds separate from the green whey. Let sit for 10 minutes while the curds settle to the bottom of the pan.

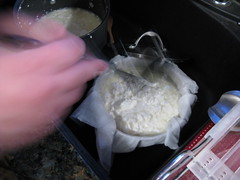
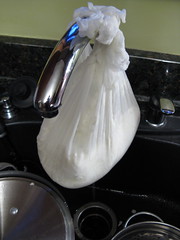
Line a large colander with four layers of cheesecloth. Pour the curds & whey into the colander. Rinse with lukewarm water for 5 seconds. Bring the corners of the cheesecloth together & tie them in a knot. Squeeze the curds to form a ball pushing out the whey (be careful not to burn yourself, gloves work good here. Place the cheesecloth wrapped curds back into the colander & top with a plate. Set a 5 pound weight on top (we used a brick). Let sit for 45 minutes.

Unwrap the curd & place in the bowl of a stand mixer with a dough hook. Knead for 10 - 15 minutes until the curds become dough-like, silky & not grainy at all. (You can also do this part by hand though it might take a little longer.) Add the salt & chives & blend to combine. Roll the cheese into a 2-inch log. Wrap in wax paper & chill for at least two hours up to 3 days. Slice to serve

If you are not reading this post in a feed reader or at http://agoodappetite.blogspot.com OR at http://agoodappetite.com then the site you are reading is illegally publishing copyrighted material. Contact me at katbaro AT yahoo DOT COM. All recipes, text and photographs in this post are the original creations & property of the author unless otherwise noted.
© 2007-2009 Kathy Lewinski

Thursday, May 28, 2009

Making Farmhouse Cheddar

This is a long one folks...

After we made our own Mozzarella & Ricotta, Matt decided it was time to step our cheese making up a bit & try some firmer cheeses. First thing he did was purchase Home Cheese Making: Recipes for 75 Delicious Cheeses by Ricki Carroll. He'd done a lot of research & thought this one would suit our purposes best. Then he decided we'd start with a relatively easy cheese, Farmhouse Cheddar. If you are interested in trying this yourself I recommend getting the book but here's a little photo journal of our experience.
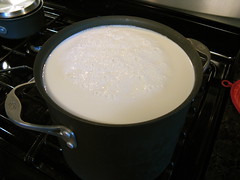
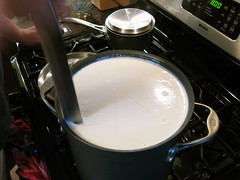
Heating the milk to 90 F
First we start with 2 gallons of whole milk which is slowly heated to 90 F. Then a starter is added. The milk is held at 90 F & sits for 45 minutes. Then rennet is stirred into the milk & it sits covered for another 45 minutes. At this point the milk will have turned to curd.
Cutting the Curd
The curd then needs to be cut. We used a long sharp knife. The curd gets cut straight in to directions & the diagonally to the bottom of the pot twice.
Bring Curd Up to 100 F in a Water Bath
Then over 30 minutes the curd is brought up to 100 F in a water bath very slowly. Then drain the water & let it sit 5 minutes.
CurdDraining the Curd
Then the curd is drained from the whey in a cheesecloth covered colander.
Hanging the curd to dry
The cheesecloth is tied up & hung so that the curd can drain.
Drained CurdCrumbling Curd & Adding Salt
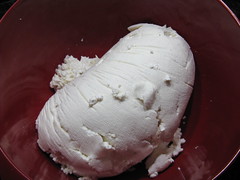
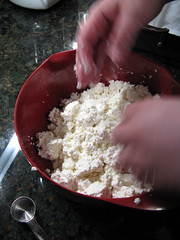
The curd is then put into a bowl & crumbled into walnut size pieces & tossed with flake salt. At this point it tastes like salty cottage cheese.
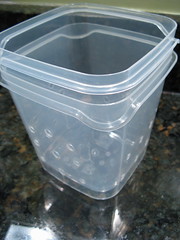
Homemade Cheese Mold
Then you need a cheese mold. Matt made ours by using two identical size plastic containers from IKEA. One container gets holes drilled into it to drain more whey.
Adding curd to the moldPressing Curd
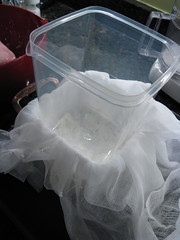
The container with the holes drilled in it is draped with cheese cloth & then filled with curds. The cheesecloth is wrapped over the top of the curds. The other container goes on top to press down on the curds.
First Curd Press about 10 lbs
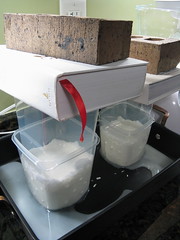
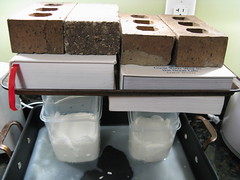
Now you start pressing. Put the cheese mold into a pan to catch the draining whey. The first pressing should be about 10 lbs & last 10 minutes.
Cheese after first pressing
Remove the cheese from the mold, unwrap it from the cheesecloth. Tune it over, rewrap it & return it to the mold.
Second Press about 20 lbs
Then it gets pressed for another 10 minutes with 20 lbs. The cheese is turned over again & then pressed with 50 lbs for 12 hours at room temperature/
Cheese after 3rd press
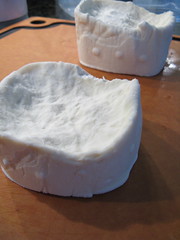
After 12 hours the cheese is removed from the mold & unwrapped. It is much firmer now & tastes a bit sour.
Cheese Trimmed & Ready to Ripen for 2 days
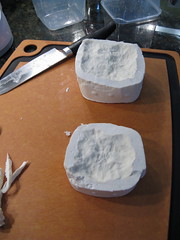
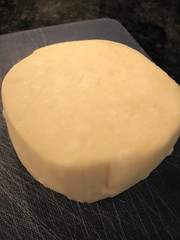
Because our plastic containers had a rounded bottom we trimmed them up a bit for a flatter surface. The cheese now sits uncovered at room temperature for 2 to 4 days to ripen & form a rind. We flipped it a couple times a day.
Cheese after sitting for 2 days
After two days the cheese has a nice rind & is ready to be waxed. We chilled it in the fridge a bit first. Now it is starting to smell like cheddar & not sour milk.
Waxing the cheeseWaxing the cheeseWaxing the cheese
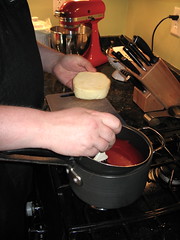
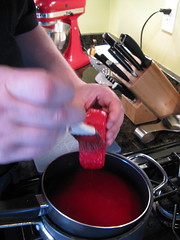
We bought cheese wax & then melted it in a double boiler. Using a natural bristle paint brush the cheese is coated with two thin coats of wax. We double check for any air holes as that causes mold. Now the cheese rests for 4 weeks at a temp between 46 & 68 F before it is ready to be tasted. Stay tune...

We got our cheesemaking supplies from the New England Cheesemaking Supply Co & Leener's online.
If you are not reading this post in a feed reader or at http://agoodappetite.blogspot.com OR at http://agoodappetite.com then the site you are reading is illegally publishing copyrighted material. Contact me at katbaro AT yahoo DOT COM. All recipes, text and photographs in this post are the original creations & property of the author unless otherwise noted.
© 2007-2009 Kathy Lewinski

Thursday, April 30, 2009

Emeril at the Grill - Blue Cheese Glaçage

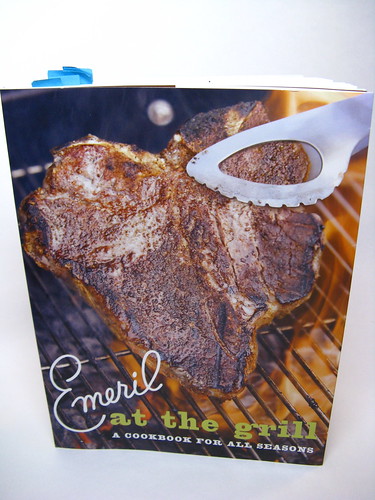
Recently, we were sent a copy of Emeril Lagasse's newest cookbook Emeril at the Grill: A Cookbook for All Seasons. So, we've decided to test & write about various recipes from it for the next week or so.
IMG_3093
Matt started going through it immediately & marking recipes he wanted to try (as you can tell by the little blue post-its). I was drawn to the really interesting side dishes in the book as I'm always looking for new side dishes especially for summer. We were both impressed by the amount of different ethnic dishes included as well. Since it's finally starting to warm up here in MN the timing on getting this book was perfect for us as we were itching to try new things on the grill.
Steak with Blue Cheese Sauce
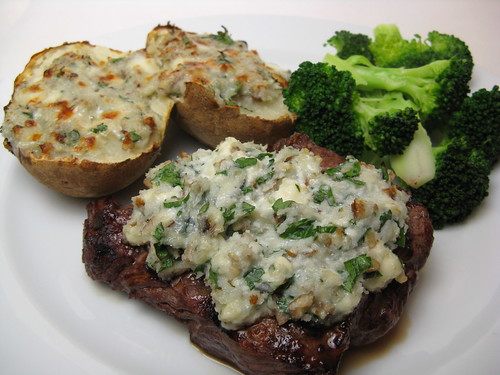
The first dish we tried was Buffalo Rib-Eyes with A Blue Cheese Glaçage. Our local store didn't have buffalo rib-eye so we went with a really nice beef rib-eye but really the star here was the glaçage. We loved how you cooked it right on top of the steak on the grill. The crunchy pecans are a great unexpected ingredient. We made a full batch which was more than needed for our two small steaks so Matt put the rest on the top of his baked potato & said it was amazing.

Blue Cheese Glaçage
(from Emeril at the Grill)

4 oz blue cheese, crumbled
1/4 c buttermilk
1/4/ c panko breadcrumbs
2 T pecans, chopped
1 T fresh thyme, chopped
1 T fresh parsley, chopped
salt & pepper

Stir blue cheese, buttermilk, panko, pecans, thyme & parsley together until well combined. Season with salt & pepper to taste.

To use on a steak: After grilling steaks on first side, flip over. Place several tablespoons of the glaçage on top of each steak & continue grilling until finished.

To use on a backed potato: Bake potato until done, about 45 minutes. Cut potato in half & fluff flesh with a fork. Spoon glaçage over the top. Place in the broiler for about 3 minutes until the cheese is melted & slightly browned.

Thursday, April 2, 2009

Recipes to Rival - Steak Diane Flambé

This month's Recipes to Rival challenge was brought to us by Temperance of High on the Hog & Shawnee of Delishes Delishes.
IMG_2383
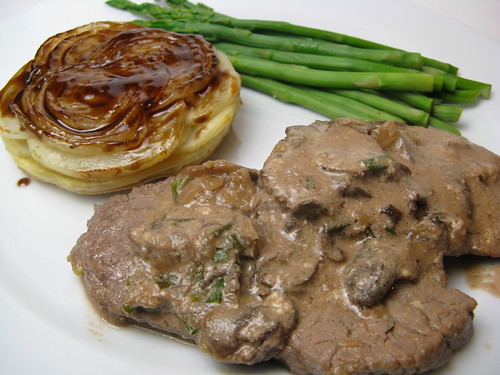
This was actually a pretty easy dish to make though we could never get ours to flambé. The best hint I can give it to have everything together & ready to add to the pan before you start cooking since it comes together quickly. We used a 10-oz beef tenderloin cut into 4 thin steaks to serve the two of us. The meat was cooked perfectly & came out very tender. The sauce was just wonderful.

Steak Diane Flambé
recipe by
Frank Bordoni from Great Food Live

Ingredients

For the steaks
4x85g beef medallions
1 tsp Dijon mustard
freshly ground salt and pepper

For the sauce
1 tsp Butter, clarified
1 tsp Worcestershire sauce
2 tbsp Shallots, finely chopped
50g button mushrooms, finely sliced
1 tbsp lemon juice
125ml double cream
1 tbsp Chives, snipped
50ml Brandy

Method
1. Rub the medallions of beef with the mustard, season with salt and pepper and set aside.
2. Heat a large frying pan over a medium heat and when hot, add the clarified butter and Worcestershire sauce.
3. Add the shallots and mushrooms, and push to the centre of the pan. Arrange the medallions around the edge. Cook for 2 minutes, stirring and tossing the mushroom mixture as you go. If you prefer your steak well done, give it an extra minute or 2.
4. Add the lemon juice and season with salt and pepper.
5. Turn the steaks over and pour in the cream and chives. Tilt the pan slightly (away from you) and pour in the brandy at the far end. Now turn up the heat to high so that the brandy ignites. Swirl the sauce around in the pan and turn off the heat.
6. Put the medallions on 4 plates, pour over the sauce and serve.

Later today I'll share the recipe for the amazing onion & potato tartes tartin we made to go with it.

If you are not reading this post in a feed reader or at http://agoodappetite.blogspot.com OR at http://agoodappetite.com then the site you are reading is illegally publishing copyrighted material. Contact me at katbaro AT yahoo DOT COM. All recipes, text and photographs in this post are the original creations & property of the author unless otherwise noted.
© 2007-2009 Kathy Lewinski

Sunday, March 1, 2009

Homemade Ricotta & Lemon Ricotta Pancakes

You might remember about a month ago we made homemade mozzarella & we were really surprised with how easy it was. Well, when I saw that this month's Recipe to Rival Challenge was to make homemade ricotta I was thrilled because I knew I could easily do it.
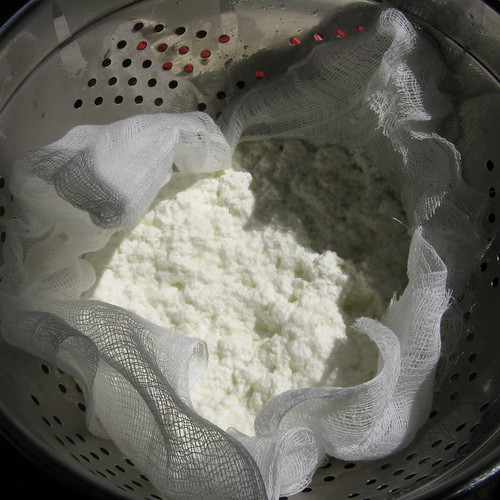
Making Ricotta
The nice thing about making homemade ricotta is that you don't need any special chemical & the only special equipment is a thermometer & a bit of patience.

Fresh Ricotta
(per Lauren at I'll Eat You, who hosted this month's event)

1 gallon milk, you can use 1 percent on up, remember that the more fat in the milk, the more cheese it will yield
1 quart buttermilk
-cheesecloth,a good, tightly woven one, not the kind you buy at the supermarket - If you don't have one of these, you can get by with a slotted spoon, but you may lose some of the cheese. ( I used supermarket cheesecloth & just doubled it. That worked just fine.)
-a thermometer
- A collander

Place buttermilk and milk in a pot, heat on med-low heat until it reaches 185 F.
Making Ricotta Making Ricotta
It will begin to separate into curds and whey. Be sure to stir occasionally to make sure no curds stick to the bottom and burn. You will see that as the temperature approaches 185, the whey becomes clearer as the curds coagulate more.
Making Ricotta
Pour the curds into a cheesecloth lined collander. Tie the ends of the chesecloth together and hang for 10-15 minutes. Remove from cheesecloth and place in an airtight container in the fridge for up to a week..
Making Ricotta
This recipe will give you about a pound of cheese. I made 1/4 of it & got 6 oz.

We then had to make something with the ricotta. I had some fabulous Lemon Ricotta Pancakes at Hell's Kitchen a few weeks ago so I decided to try them at home.
Lemon Ricotta Pancakes
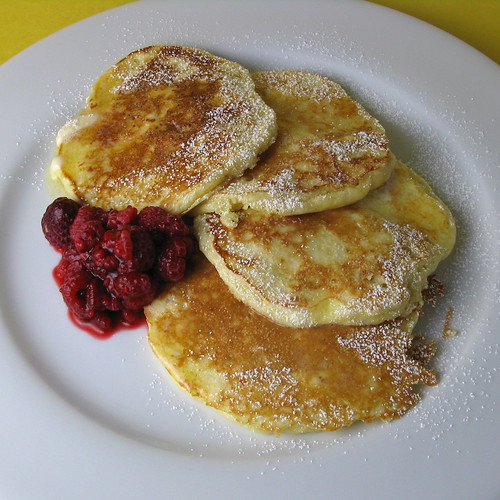
They had a wonderful light texture but Matt felt the ricotta should have been broken up finer. I added 1 T more sugar than the recipe called for because a lot of people commented it was too tart. We felt like they actually needed to either be more lemony or sweeter. We served them with thawed frozen raspberries & they wouldn't have been as good without them.

Lemon Ricotta Pancakes
(from Bobby Flay)

3/4 c all-purpose flour
1 T baking powder
1/2 t ground nutmeg
1/4 t salt
2 T sugar (we used 3)
1 c ricotta cheese (1/4 the above cheese recipe made exactly 1 cup cheese)
2 eggs
1/2 c milk
1 lemon, zested & juiced
raspberries
powdered sugar
butter for the griddle

Whisk together the cheese, eggs, milk, lemon zest & juice. Stir in the flour, baking powder, nutmeg, salt & sugar just until combined. Melt a little butter on a hot griddle. Pour 1/4 c of batter on the griddle for each pancake. Cook until brown on both sides, flipping once.

Top pancakes with raspberries & a little powdered sugar.

Makes 10 pancakes.

Saturday, January 31, 2009

Making Mozzarella At Home

For Christmas we received a Mozzarella kit from Leener's. We had heard it was quite easy to make but I have to admit I was a little skeptical. Well, I was so wrong, making mozzarella was super easy to make & the results were wonderful! You just have to have a little patience to let the milk heat slowly & in an hour you are eating your own fresh cheese!
Checking Temperature
First you ripen 1 gallon of milk with a bit of citric acid, lipase, and calcium chloride. Slowly heating over medium heat to 88 F, stirring from time to time.
Stirring
Once the milk reaches 88°F, you add rennet and continue heating to 105 F. Only stir gently every couple of minutes so you don't break up the curd too much.
Starting to coagulate
By the time it reaches 105°F, it will start to look at little chunky. At this point, turn off the heat and let it sit for 20 minutes.
Fully coagulated
After resting for 20 minutes you'll be rewarded with a big chunk of cheese curds.
Draining the curds
Remove the curds with a slotted spoon, leaving the whey in the pan.
Squeezing the curds
Lightly smash the curds with a spoon to squeeze as much whey out of them as possible, then drain. Microwave for 60 seconds and repeat, adding a bit of salt. Microwave again so it reaches 140-150°F, and start kneading the hot cheese with the spoon to help even the heat out.
Kneading with spoon
Continue kneading with a spoon until the cheese pulls together into a ball and sticks to the spoon.
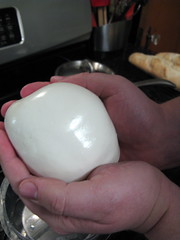
Making mozzarella
At this point you will have a soft mozzarella ball. You can stop at this point.
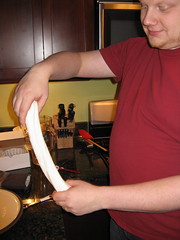
#23 - Making mozzarella
Or you can stretch & pull it like taffy until you have a cooled firmer cheese better for grating & such.
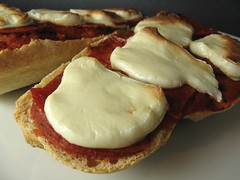
French Bread Pizza
Now you can enjoy your own homemade cheese. We made a baguette earlier in the day. Split it in half & topped it with some homemade pizza sauce, a few sliced of pepperoni & then our cheese. Perfection!
Related Posts with Thumbnails

Get Email Updates!

Enter your email address:

Delivered by FeedBurner

Measurement Abbreviations

T = Tablespoon
t = teaspoon
c = cup
lb = pound
oz - ounce

Labels

Blog Archive

Contributors

Blog Directory for Minneapolis, Minnesota