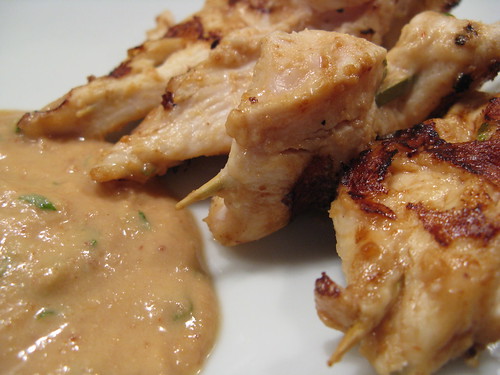
Friday, May 30, 2008

Chicken Satay with Thai Radish & Cucumber Salad

Why don't I make chicken satay more often? Every time I do I remember just how much I like it. Once again we used a recipe from Mastering the Grill: The Owner's Manual for Outdoor Cooking, have I mentioned have fabulous this book is? (I wish I had $300 to take a class from the authors in Napa this weekend) This Thai Coconut Peanut Sauce was fabulous, just spicy enough to have a bite without too bite much for wimpy me. We used Smucker's Natural Peanut Butter which is a lot less sweet than something like Jif so our sauce was not super sweet. We used about 1/2 the sauce tonight & since it will last in the fridge for a week I'll use the rest next week for peanut noodles (You could always make half the sauce if you didn't want leftovers).
Chicken Satay

Chicken Satay

3/4 c lite coconut milk
1/2 c peanut butter
1 T Thai fish sauce
1 clove garlic, minced
1t sriracha hot sauce
2 T fresh mint leaves, minced
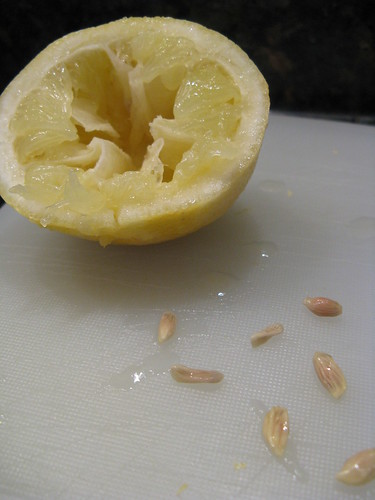
2 T lime juice
2 T rice vinegar
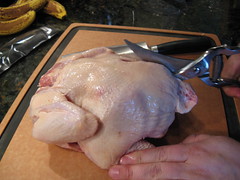
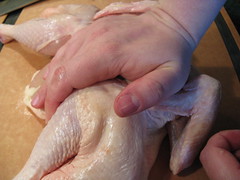
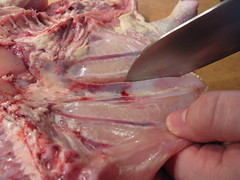
2 chicken breasts, cut into 1/4-inch strips

Combine all the ingredients except the chicken to make sauce. Pour 1/4 c of the sauce over the chicken strips & stir. Let chicken sit a few minutes. Thread the chicken strips on bamboo skewers (if cooking on a grill soak the skewers in water 1/2 before cooking). Grill the chicken on a bbq or grill pan the chicken for 2 to 3 minutes per side. Serve with more sauce for dipping.

Serves 2

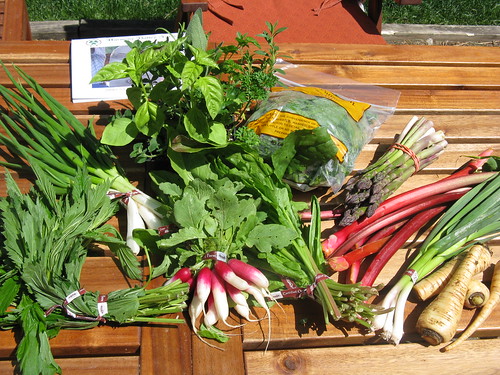
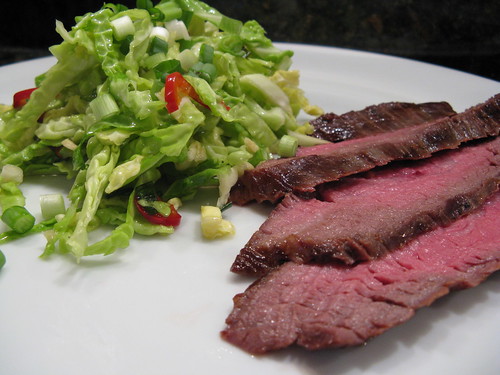
The chicken was served with a Thai Radish & Cucumber Salad from Rachel Ray. It was the perfect accompaniment just like the pickled vegetable salad you often get in Asian restaurants. And talk about colorful with all the bright red & green. The recipe called for daikon radishes but I just used the regular red radishes we got in the CSA box. I didn't even peel them since I liked how their red skin looked. I have sized this recipe way down as Rachel's would have fed 8 - 10 people instead of the 6 she says. Also the basil really didn't add much here so if you don't have any don't bother with it.
Thai Radish & Cucumber Salad

Thai Radish & Cucumber Salad

2 T rice wine vinegar
3/4 tablespoons sugar
1/2 tablespoons light oil
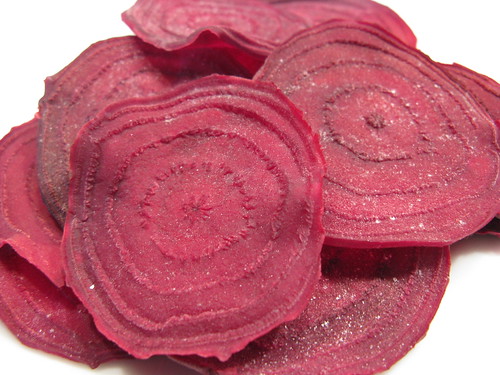
4 oz radishes, thinly sliced
1/4 of an English or seedless cucumber, thinly sliced
1/4 of a red bell pepper, seeded and very thinly sliced
1/4 teaspoon crushed red pepper flakes
5 fresh basil leaves

Combine vinegar, sugar, oil in a bowl. Add radishes, cucumber, bell pepper, pepper flakes. Toss and combine. Cover and chill until ready to serve.
When ready to serve, tear basil into pieces and add to salad. Toss salad to incorporate basil and serve.

Serves 2

Thursday, May 29, 2008

Horseradish Flank Steak with Balsamic Beurre Noir

Another foray into our newest cookbook, Mastering the Grill. We still have quite a bit of fresh horseradish left & its so good with steak that this sounded wonderful. We made the Horseradish Vodka Infusion the night before & marinaded the meat overnight so our steak was very tender & very flavorful, the smell was amazing. The recipe says you can marinade for just two hours which will probably give you a less intense flavor. We did feel it was a little too salty though & would cut back on the 2 T in the recipe, maybe to 1.
Steak marinaded in a vodka, horseradish, jalapeno infusion

Horseradish Vodka Infusion

1 lemon
3 T grated horseradish
1 c vodka
1 fresh jalapeno, chopped
2 T kosher salt (I'd use about half as much)
1 medium onion, thinly sliced


Grate the zest form the lemon. Trim the pith from the lemon & slice the fruit into thin rounds. Combine all the ingredients.

Now the Balsamic Beurre Noir on the other hand was a bit of a disaster. My butter browned beautifully.
Brown Butter
But the balsamic reduction got really gloopy & then never combined well with the butter so once we poured it on the steak it seemed more like we were pouring browned butter on & not really any balsamic. I think perhaps I reduced the balsamic too long. I'll try it again another time because the ideas sounds so tasty. Luckily the steak didn't really need it.

Balsamic Beurre Noir


1/2 c unsalted butter
3 T balsamic vinegar

Melt the butter in a small saucepan over medium heat. When it begins to foam reduce the heat to med-low & let it cook until it becomes a medium brown. Pour the butter into a small pan leaving the sediment in the saucepan (this was a bit tricky). Add the balsamic to the saucepan & raise the heat to medium. Allow it to boil down to about 1/2 volume. Remove from heat & pour the browned butter back in the pan to combine. If making ahead of time reheat gently before serving.

Horseradish Flank Steak


1 large flank steak
2 T olive oil
1 1/2 t kosher salt1/2 t black pepper
parsley & grated horseradish for serving (optional)

Put the steak & olive oil in a zippered bag with 1 c of the Horseradish Vodka Infusion. Seal the bag, pressing out any air. Massage gently & allow to marinade refrigerated for 2 hours to overnight.
Remove the steak from the Horseradish Vodka Infusion (throw the marinade away)about 30 minutes before cooking, pat it dry & sprinkle with salt & pepper. Allow to sit a room temperature. Grill the steak at medium-high for 8 to 10 minutes per side, basting with remaining marinade. Let the steak rest covered for 5 minutes & then slice thinly across the grain to serve. Serve drizzled with Balsamic Beurre Noir & sprinkled with parsley & horseradish.

We served the steak with Buttermilk Chive Mashed Parsnips & Potatoes plus fresh Spinach sautéed in a little olive oil. This was like a Sunday dinner on a Wednesday night!

Wednesday, May 28, 2008

Coconut Lime Cupcakes

When deciding on a flavor for this week's cupcake I tried to think about what I had in the house or was buying for other dishes. We are making chicken satay tomorrow & I knew there would be leftover coconut milk so a coconut cupcake sounded like a good use for it. Then I started singing "Lime in the Coconut" & this week's cupcake was born.
The coconut cupcake recipe is from Martha Stewart & really has one of the best cupcake consistencies of any I've ever made (I'll try the same recipe again with regular milk & no coconut when I want a white cake). Its very light & fluffy with a wonderful flavor. I used all-purpose flour instead of the called for cake flour & sized it down to 6 cupcakes. The glaze is a simple milk glaze with lime juice & zest for color & flavor. This cupcake is light & tangy & tastes like a vacation somewhere warm.
Coconut Lime Cupcake

Coconut Cupcakes

3/4 c all-purpose flour
1/2 t baking powder
1/4 t salt
6 T unsalted butter, room temp
1/2 c + 1 T sugar
1/8 t vanilla
1/4 c lite coconut milk
2 large egg whites
5 T shredded sweetened coconut

Preheat oven to 350 F. Prepare 6 muffin tins. Beat butter & sugar until light & fluffy. Beat in vanilla. With mixer on low, add flour, baking powder, salt & milk in three parts, alternating dry & wet, starting & ending with the flour. Beat until just combined. Set aside.
In a clean bowl beat the egg whites on high until stiff glossy peaks form. Fold 1/3 of the egg whites into the batter until combined. Gently fold in the remaining egg whites & coconut.
Fill muffin tins half full. Bake for 20 -25 minutes until golden or a tester comes clean. Allow to cool completely.

Makes 6 cupcakes

Lime Glaze

1/2 c powdered sugar
1 t lime (about 1/2 of a lime)
zest from 1/2 lime
milk
shredded coconut (optional)

Mix sugar, lime juice & zest together. Add milk 1 t at a time until desired consistency, usually between 1 & 2. Glaze cupcakes & sprinkle with shredded coconut if you wish. Let sit until glaze has set.

Makes enough glaze for 6 cupcakes

Pasta with Nettles, Sorrel & Lemon

I have to admit when we got stinging nettles in the latest CSA box I was a little intimidated, I mean do I really want to cook with something that I need to boil to get rid of the stingers & toxins?! But part of the reason I wanted to do CSA was to try new things so we looked up a few recipes online & went with this one from Hogwash.
Pasta with Nettles, Sorrel & Lemon
Really after you boil down the nettles you work with them like spinach & this recipe seemed a lot like a pasta with spinach pesto to me. What really made it for me was the lemon & the sorrel, which has such a nice lemony flavor too. Those two ingredients really gave this a fresh, bright flavor. I'd make this again but I wouldn't search out nettles & would use spinach instead.

2 oz fresh stinging nettle leaves (or spinach)
4 oz farfalle (or pasta of choice)
1/4 c olive oil
2 oz ricotta cheese
1/2 lemon zest & juice
1/2 T fresh mint, chopped
1/2 T fresh parsley, chopped
1/2 T fresh chives, chopped
salt & pepper
1 c sorrel leaves, torn into bite-sized pieces
1/4 c toasted pine nuts

Bring a pot of water to boil & add the nettles (use gloves to handle the nettles until cooked). Cook for 5 minutes. Remove the nettles to a colander with a slotted spoon (leaving any dirt at the bottom of the pot) & squeeze out as much water as you can.

Cook pasta according to directions.

While pasta is cooking, put the nettles in a food processor & puree. Drizzle in olive oil & process until smooth. Add ricotta, lemon zest, lemon juice, and herbs. Pulse to blend. Season with salt & pepper.

When the pasta is cooked set aside 1/2 c of the cooking water. Drain & return to pot. Mix the nettle mixture into the pasta. Add the sorrel & cooking water if dry.

Serve topped with pine nuts.

2 servings

Tuesday, May 27, 2008

Horseradish, Cheddar & Apple Burgers

Despite the cloudy skies yesterday we still grilled up a tasty Memorial Day bbq. I love the idea of putting the spicy horseradish with the sweet apple right into your cheeseburger. This recipe came from Mastering the Grill: The Owner's Manual for Outdoor Cooking
IMG_3804.JPG

2 lbs ground beef
3 T jarred horseradish (We used fresh grated instead & used a little less)
1/2 t kosher salt
1/4 t ground black pepper
4 oz shredded cheddar cheese
1/2 apple, peeled, cored & finely chopped
1/3 c apple juice or cider

Heat the grill to 425 - 450 F. Mix all the ingredients together & form 6 patties, no more than 1 inch thick. Cook over direct heat. We served them with some red onion & tomatoes on homemade hamburger buns.
IMG_3798.JPG
Dinner was completed with grilled asparagus & my favorite potato salad, Mixed New Potato Salad with Sweet Basil & Shallots (though we substituted green garlic for the shallots.)

Sunday, May 25, 2008

Weekly Menu 5/26 - 5/29

The grilling continues this week at Chez Good Appetite.
Grilled Chicken, Green Garlic & Radicchio
We picked up a fabulous book called Mastering the Grill: The Owner's Manual for Outdoor Cooking. Saturday night we sat outside going through it & have probably earmarked a summer's worth of recipes we want to try. You'll find many in this week's menu.

Here's our Monday Menu Plan...

Horseradish, Apple & Cheddar Burgers - from Mastering the Grill. Sounds good for a Memorial Day bbq - RESULT - A good take on the classic burger.

Pasta with Nettles, Sorrel & Lemon - From Hogwash - RESULT - A light lemony pasta that I'd make with spinach in the future.

Horseradish Flank Steak with a Balsamic Reduction - also from Mastering the Grill - RESULT - The steak was very tender & flavorful though we'll use less salt next time.

Chicken Satay with Thai Radish & Cucumber Salad - The Cicken is from Mastering the Grill & the salad is from Rachel Ray - RESULT - A really good dinner I should make more often

This week's cupcake will be Coconut Lime - RESULT - Oh so good & the flavors are like a tropical vacation.

Its a short menu week because we are heading back to San Francisco. We'll be eating sushi at Yuzu, Mission Style burritos & getting together with lots of friends.

Grilled Asian Pork

Pork tenderloin has to be one of our favorite pieces of meat. It cooks quickly, can be flavored with lots of different sauces & leftovers make a good sandwich the next day. This Asian variation is adapted from one in the Best of Cooking Light.
Grilled Asian Pork

2 T sliced green onion
2 T oyster sauce (hoisin sauce is good too)
2 T soy sauce
2 T honey
1 T hot water
2 garlic cloves minced
1 lb pork tenderloin
1/4 t salt

Mix onion, oyster sauce, soy sauce, honey,hot water & garlic together in a bowl. Pour 1/4 c of the sauce in a large zip-top bag & add the pork. Seal & refrigerate for 30 minutes, turning occasionally.
Remove the pork from the bag & sprinkle with salt. Discard marinade in bag. Cook on grill until the pork registers 160 F about 20 minutes.
Slice to serve serve with remaining sauce.

Saturday, May 24, 2008

CSA box #2

We picked up our CSA second box this week & are now trying to plan next week's menu around it. Once again there are some interesting things that are completely new to us.
This week's box from the farm #2
Stinging Nettles - A food you are supposed to wear gloves to use scares me a little but I think we'll try them in a pasta.
Green Garlic - I've already used some in a salad
Nine Herb pack for the garden - I saved a space for these & they are already planted & enjoying the sun.
Radishes - I need to find a good radish salad recipe
Spinach
Sorrel
Asparagus - That's going right on the grill
Rhubarb - Perfect for a Memorial Day picnic crisp
Egyptian Walking Onions
Parsnips - I think I'll mash them this week

Friday, May 23, 2008

Apricot Almond Cupcakes

This week was another of Matt's flavor choices for cupcakes. I have to say his ideas have been pretty darn good. This cupcake was not overly sweet, we even used a reduced sugar jam for the filling. I love the flavor of the almond liquor in the frosting & also the toasted almonds on top.
Apricot Almond Cupcakes
As I may have mentioned before I've been having a hard time with frosting. My buttercreams have been coming out really sweet & often gritty or broken. I do ok with ganache & glazes but I really wanted a more traditional frosting. I had recently read about Italian Merengue Buttercream & how it had a wonderful texture but not the overly sweet like butter mixed with tons of powdered sugar can be. People were saying it could be a little fussy & a little tricky but I found a recipe on recipezaar that someone said was perfect everytime. Well it turned out beautifully. I was so thrilled & now I have a buttercream that I can make again & again.

Apricot Almond Cupcakes
(adapted from Just Plain Good Cupcakes in Small-Batch Baking )

2 T unsalted butter, room temperature
1/2 flour
1/4 c yogurt
1/8 t baking soda
1/8 t baking powder
yolk of 1 large egg, room temperature
1/2 t vanilla
1/4 cup + 2 T sugar
4 t apricot jam
almond liquor

Preheat oven to 350 F. Place paper liners in four muffin cups. Combine yogurt, baking soda & baking powder in a small bowl & stir to mix. Gently whisk in egg & vanilla.
In a medium bowl combine flour, sugar & salt. Add the butter & half of the yogurt mixture. Beat on low speed until moistened. Increase to medium & beat until light & fluffy. Add remaining yogurt mixture & beat on medium until well blended.
Fill each muffin tin 1/3 full with batter. Spoon 1 t of jam on top of the batter in each cup and then top with remaining batter. Bake for 20 - 25 minutes until golden.
Remove from the pan & place on a rack to cool. Brush a little almond liquor on the top of each cupcake.

Makes 4 cupcakes

Almond Italian Buttercream Frosting


1 1/4 oz egg whites
1/4 c + 1 T sugar
1 T + 1 t water
1/4 lb butter, cut into pieces
2 1/2 t almond liquor

Beat the egg whites until almost a the stiff peak stage. Heat the sugar & water in a small sauce pan until it reaches 240 F. With a mixer on low slowly pour the sugar into the egg whites, then turn to high & whip until cool. Slowly add the butter & continue beating until you reach the desired consistency & smoothness. (I read that part of the trick is to have you butter at the same temperature as the egg whites, so I let the butter get to room temp) Beat in almond liquor.

Frost cooled cupcakes & top with toasted almond slivers.

Makes enough frosting for 4 cupcakes

You can refrigerate this frosting but bring it back to room temperature & beat a little before using.

Thursday, May 22, 2008

Sea Salt & Thyme Turkey Burgers with Homemade Buns

I love love love Matt's turkey burgers. Thyme is such a wonderful herb to use with poultry. The sea salt though is really the thing that makes these burgers sing. There is no recipe with set amounts for them but he mixes a good amount of chopped fresh thyme leaves into the ground turkey. Then he makes the turkey into patties. Before cooking he presses some sea salt into the top & bottom of each burger. We don't cook these on the grill as they tend to fall apart so a griddle is the way to go.
Sea Salt & Thyme Turkey Burger
Buns are always an issue though. I don't like to buy hamburger buns in packages at the store because there are always my more than I need for two of us. Even when you freeze the extra they are never as good when you thaw them. The other option is to go buy bakery buns the day we are planning on using them but they are often way too big. So, I decided since I always (ok, almost always) have some bread dough in the fridge why not make my own buns. I use the Artisan Bread in Five Minutes a Day: The Discovery That Revolutionizes Home Baking way of making bread. Basically you stir the ingredients together, let it rise & then keep it in the fridge until you want to bake it. This is perfect for buns because I can break off enough dough for as many buns as I want at a time. It took a few tries to come up with the right amount of dough for these as my first batch were huge (um yeah 7 oz is too big for a bun oops).
Fresh Baked Hamburger Buns

Hamburger Buns
(based on the Buttermilk Bread Recipe in Artisan Bread in Five Minutes a Day)

1/2 c warm water (no warmer than 110 F)
1/4 c yogurt or buttermilk
1 rounded t yeast
1 rounded t salt
1 rounded t sugar
1 1/2 c + 2 T all -purpose flour
1 well beaten egg (optional)
poppy seeds, sesame seeds, or dried minced onion (optional)

In a large container with a lid that isn't completely airtight (I use a Tupperware container & don't seal it completely) mix together the water, yogurt or buttermilk, yeast, salt & sugar. Using a spoon stir in the flour. If it gets to hard to stir use your hand to finish the mixing. You don't need to knead just get everything completely mixed. Put the lid on the container & allow to sit at room temperature for about 2 hours, the dough should rise & then start to fall again. You can form the dough into buns & do the second rise at this point or put it covered into the fridge to use over the next 7 or so days (Its a wet dough & actually a little easier to use after refrigeration).

When ready to make the buns pull off 3 - 4 oz pieces of dough (3 oz is a regular size burger, 4 oz will give you something slightly larger). Stretch the dough in your hands a little, turning it under itself to form a ball. Turn 1/4 turn & repeat this step, continue doing this a few times until you have a smooth surface on top of the ball, you will have the ends that you pull together on the bottom. Place the ball with the smooth side up on a baking pan covered with either a silicone mat or parchment paper. Press the ball flat to create a bun shape, they will rise quite a bit in cooking so I press them to about 1/2 inch. Allow to rise for 1 - 1 1/2 hours (I find the fresh dough needs less rising time than the refrigerated). Before baking we brushed each bun with a little beaten egg & then top with either a poppy or sesame seeds or minced dried onion (the onion smelled fantastic cooking). Bake for 20 - 25 minutes at 350 F. The buns should be golden brown & sound hollow when you tap on the bottom. Allow to cool on a rack before slicing.

Makes 4 - 5 buns depending on size.
These made great sandwich rolls too.

If you have a little dough leftover mix it right into the next batch, it will give it a slightly sourdough flavor.

Wednesday, May 21, 2008

What I did with my CSA box

As I mentioned in an earlier post we decided to do Community Supported Agriculture this year & became a member of Harmony Valley Farm. Two weeks ago we were excited to get our first box. Its still pretty early in the growing season here in Zone 4 so many things were overwintered like parsnips & spinach. We also got to try somethings that were new to us like ramps & sunchokes. We get box 2 tomorrow so I thought it would be a good time to review what we did with box 1.
CSA first delivery & the results
1. The Delivery 2. Farfalle with Chicken, Caramelized Onions & Tomatoes on a bed of Spinach 3. Ramp Risotto 4. Scrambled Eggs with Chives 5. Rhubarb Crisp 6. French Sorrel Tart 7. Grilled Steak & Roasted Sunchokes & Parsnips with Horseradish Cream 8. Ramp Tart 9. Spinach & Soybean Salad10. Ham & Spinach Pasty
I think this service is going to be really great for us. We get to try lots of new things & we are eating locally & a little more seasonably.

Ham & Spinach Pasty

I woke up the other morning & realized I had forgotten to make bread dough for sandwiches for lunch. So I started rummaging through the fridge to see what I could come up with. I had an uncooked pie crust leftover from the French Sorrel Tart, half a bag of spinach, a little leftover goat cheese & some deli ham so I decided a ham & spinach pasty would be just thing. I know a pasty is usually filled with meat, potatoes & onion but I really think of it as more of a technique that you can use with any filling. I used to buy two unbaked pie crusts at the store & make four of these at a time, freezing them after cooking, then I would take them to work & warm them up in the toaster oven for a really great lunch.
Ham & Spinach Pasty

1 unbaked pie crust (I use store-bought but homemade would be great)
4 c spinach
1 small onion, chopped
1 clove garlic, minced
1 T olive oil
1/4 c toasted pine nuts
1 egg
2 T goat cheese, crumbled (any cheese will work, feta is really good)
1 T grated Parmesan
2 sliced deli ham, chopped
salt & pepper
nutmeg

Preheat oven to 450 F. Heat olive oil in a large skillet over medium-high heat. Add onion & garlic & sauté until the onion is tender. Add the spinach to the skillet & cook until completely wilted. Put spinach mixture in a medium bowl & allow to cool slightly. Mix in pine nuts, egg, ham and cheeses. Season with salt, pepper & a few pinch of nutmeg.
Cut the pie crust into two half circles. Put half of the spinach filling on one side of each half circle.
Ham & Spinach Pasty
Fold the other half of the half circle over the filling. Fold the edges in & pinch them to seal shut. Poke a few hole in the top with a fork. Place the pasties on a baking sheet lined with a silicone pad or parchment paper. Bake for 15 -20 minutes or until golden brown.
Ham & Spinach Pasty

Makes 2

Tuesday, May 20, 2008

Curried Pea Fritatta with Fresh Tomato Chutney

I was not really excited about this recipe when Matt picked it out of the June Bon Appétit. A frittata with some peas in it just didn't really peek my interest. But I was so wrong & knew from the minute I smelled it cooking. Really a pretty simple dish but the flavors were just wonderful together. Do not skip the fresh tomato chutney since it adds so much fresh flavor to the dish with the sweetness of the tomatoes & the smokiness of the cumin (I can see using this chutney as a condiment on other things too for example it would be good on a burger). We added some chickpeas to the frittata because we had some leftover in the fridge & felt they really added a lot of texture to it & would definitely add them again.
Curried Pea Frittata with Tomato Chutney

Fresh Tomato Chutney

6 oz sweet cherry tomatoes
1/2 T packed brown sugar
1/2 t ground cumin
1 small garlic clove, peeled
pinch ground ginger

Place all the ingredients in a food processor. Pulse on & off until the tomatoes are coarsely chopped. Season with salt & pepper & set aside.

Curried Pea Frittata

4 large eggs
2 T freshly grated Parmesan
1 t curry powder
1/8 t salt
1 T olive oil
2 green onions, chopped
1/2 c frozen peas
1/2 c chickpeas (garbanzo beans) drained & rinsed.

Preheat broiler. In a medium bowl, whisk eggs. Add cheese, curry powder, and salt & mix well. Heat oil in a medium to small (the smaller the pan the thicker the frittata) broilerproof nonstick skillet over medium-high heat. Add green onions, peas & chickpeas. Sauté until the onions wilt. Add the egg mixture. Cook until the top is almost set & the bottom is golden, lifting the edges to let the uncooked egg flow underneath. Place the frittata in broiler until the top is set. Run a spatula around the frittata to loosen it & slide onto a plate to serve.

Serves 2

Monday, May 19, 2008

Weekly Menu - 5/18 - 5/23

The weather here has really kicked into spring, dare we say it almost summer, here which means you'll be seeing a lot more grilling recipes from us. This is our first summer in a house so we can retire the grill pan for the summer & break in that new grill we got for our birthdays.
Our new grill is a Char-Broil 4 burner gas grill with a side burner, which Consumer Reports rated a Best Buy. Its probably a little bigger than we needed for the two of us but we wanted something that would allow us to cook for lots of people if we wanted. Also the 4 burners give us plenty of cooking options, for example, with this week's ribs we are able to turn only two burners on & cook the ribs over indirect heat. My Dad tried to talk us into charcoal but we really like the convenience of gas, sorry Dad. We also bought a smoker box this weekend so we'll be able to get a good smoky flavor from gas hopefully!

Ok, now on to Menu Planning Monday. As usual come back during the week for the recipes & results for each meal.

Raspberry Lime Glazed Ribs with Tangy Almond Slaw - Our entry to this month's Royal Food Joust - RESULT - This meal turned out fabulous. I love the bbq sauce because it has the right blend of sweet, tangy & heat. (I cheated a little & we made this on Sunday but that is really our menu planning day.)

Curried Pea Frittata - From Bon Appétit - RESULT - This was so good! I'll definitely make this light dinner again.

Grilled Chicken Fajitas - We use a wonderful store bought Tequila Lime marinade on the chicken.

Asian Pork Tenderloin with Sweet Potatoes - We usually do this in the oven but this week we'll be grilling it. - RESULT - This one is always a favorite with us.

Sea Salt & Thyme Turkey Burgers - One of my favorites - RESULT - We made homemade hamburger buns, yum. I won't buy them again.

Grilled Sausage & Vegetables - We went out for dinner instead

This week's cupcakes will be Apricot & Almond - RESULT - These were so good & I finally found a buttercream frosting I like.

Friday, May 16, 2008

Ramp Tart

When we got two bunches of ramps in our CSA box I went trolling the web for recipe ideas to use them. I saw Sounding My Barbaric Gulp's Ramp Tart on Tastespotting & immediately added it to the menu. A nice light, cheesy tart on puff pastry sounded great. The recipe was certainly easy enough, roll out a sheet of puff pastry, sprinkle it with cheese (I used mozzarella & gruyere), add some whole blanched ramps, season, cook at 400 for 10 minutes & you are done. It certainly came out pretty.
Ramp Tart
And it tasted really good too. We had some problems with it though. First, the puff pastry really didn't stand up very well. Now, I don't have a ton of experience working with puff pastry so maybe I rolled it out too thin. Second, the whole blanched ramps look pretty laid out on the tart but the greens are impossible to bite into, try to take a bite & you get the whole thing at once. Next time I'd use my favorite pizza dough & cut the ramps into bite-sized pieces, then I think we'd be looking at a winner.

Thursday, May 15, 2008

Dark Chocolate Cupcakes with Caramel & Sea Salt

Kara's Cupcakes in San Francisco has a cupcake called the Fleur Del Sel which was one of my favorites. Its a chocolate cupcake with caramel filling, ganache frosting & fleur del sel. This is my tribute to that cupcake & a pretty fine one if you ask me. I went with a dark chocolate cupcake & frosting since I prefer that to milk chocolate. My one complaint about the cupcake at Kara's was I wanted more caramel in the middle. Mine seemed to have slightly more caramel but still I'd like even more. I also added the caramel swirl to the top.
Dark Chocolate Cupcakes with Caramel & Sea Salt

Dark Chocolate Cupcake with Caramel Filling

1/4 c unsalted butter
1/8 c Hershey's Special Dark Cocoa Powder
3 T water
1/2 c granulated sugar
2 T well beaten egg
1/8 c plain yogurt
1/2 T vanilla
1/2 c all-purpose flour
1/4 t baking soda
1/4 t baking powder
pinch of salt
1/4 c caramel sauce

Preheat oven to 350 F. Prepare muffin tins.
Melt butter in a large heavy saucepan over moderately low heat, then whisk in cocoa. Add water and whisk until smooth. Remove from heat. Whisk in separately sugar, egg, yogurt, and vanilla. Sift flour, baking soda, baking powder, and salt into the cocoa mixture and whisk until just combined (it will be a little bit lumpy).

Fill muffin tins to about 2/3 full for rounded cupcakes or 1/2 full for flat cupcakes. Bake for 18 - 20 minutes until a skewer or toothpick comes out clean. It's a moist cake, so don't worry if a few crumbs stick to your tester.
Allow cupcakes to cool.

Makes 4 - 6 cupcakes.

Let the cupcakes cool completely. Fill a pastry bag with the caramel sauce & fit it with a star tip. Stick the tip into the top of a cupcake, pushing it about 3/4 inch deep (I found the perfect depth was the length of the tip). Gently squeeze the pastry bag to fill the cupcake, withdrawing it slowly as you squeeze. Scrape any excess caramel from the top of the cupcake. Fill all the cupcakes. I found the caramel settles a little & had to go back to top it off. Put the cupcakes in the fridge while making the frosting to let the caramel set.
Dark Chocolate Cupcakes with Caramel & Sea Salt

Dark Chocolate Frosting

1/4 c unsalted butter
1/3 c Hershey's Special Dark cocoa powder
1 1/2 c powdered sugar
3 T milk
1/2 t vanilla extract

Melt butter. Stir in cocoa. Alternately add powdered sugar and milk, beating to spreading consistency. Add small amount additional milk, if needed. Stir in vanilla.

About 1 cups frosting.

Frost the cupcakes while the frosting is still slightly warm. Allow the frosting to cool completely in the fridge before adding the caramel swirl to the top. Sprinkle with fleur de sel right before serving if desired. These cupcakes should be stored in an airtight container in the fridge.
Dark Chocolate Cupcakes with Caramel & Sea Salt

Pasta with Soybeans, Tomatoes & Sausage

This recipe came from Bon Appétit May '08. Matt picked it because it has a lot of things we like in it especially sausage. The original recipe called for fava beans which we couldn't find fresh or frozen so we substituted frozen soybeans. We also substituted fresh fettuccine for the fresh pasta sheets the recipe used. For the sausage we used our own homemade bulk Italian sausage.
Pasta with Soybeans, Tomatoes & Sausage
This was one of those meals where we liked it, it was ok but there was nothing about it that makes us want to have it again. I felt that even though our Italian sausage is really tasty this dish was a little bland. Also the recipe kept talking about a sauce but we had really very little liquid even after adding the pasta water, maybe our tomatoes weren't a ripe as could be. I doubt we'll make this again as we already have a that we really love.
Here's the recipe as we made it.

2 T olive oil
1/2 c finely chopped onion
2 large garlic cloves, coarsely chopped
1/8 t dried crushed red pepper
1/2 lb bulk Italian sausage
1/4 c dry white wine
1 3/4 c chopped plum tomatoes
1 c shelled soybeans
9 oz fresh egg fettuccine
2 T finely grated Pecorino Romano cheese plus additional for passing

Heat oil in large saucepan over medium heat. Add next 3 ingredients. Sauté until onion is translucent, about 6 minutes. Add sausages; break up with fork. Sauté until brown, about 3 minutes. Add wine; simmer 1 minute, scraping up browned bits. Add tomatoes and soybeans. Sauté until tomatoes soften, about 5 minutes. Season sauce with salt and pepper.

Meanwhile, cook pasta in large pot of boiling salted water until tender but still firm to bite. Drain, reserving 1/2 cup pasta cooking liquid. Return pasta to same pot.

Add sauce to pasta. Toss over medium heat until sauce coats pasta, adding reserved cooking liquid as needed if dry, about 2 minutes. Mix in 2 tablespoons cheese. Transfer pasta to bowl. Serve, passing additional cheese.

Makes about 3 servings

Wednesday, May 14, 2008

Grilled Steak with Roasted Sunchokes & Parsnips with Fresh Horseradish Cream

I used two ingredients from our CSA box for this dinner that I'd never used before, sunchokes and fresh horseradish. I had read that sunchokes can be used raw to replace jicama or watercress so we tasted a little raw & it does have that same texture with very little taste. Our CSA newsletter suggested roasting them & serving them with a horseradish cream so that's the route we went.
Grilled Steak & Roasted Sunchokes & Parsnips with Fresh Horseradish Cream
Even roasted I don't feel the sunchokes had that much flavor, I feel like they may be more of a vehicle for other flavors. I won't search them out to use again. Really it was the horseradish that was the star of this meal. This cream sauce was perfect over the steak & the vegetables. It has a nice sharp flavor but it wasn't so strong that it overpowered everything.

Horseradish Cream Sauce
(from Martha Stewart)

1/2 c sour cream
1 T fresh horseradish root, peeled & grated
1 T fresh chive, snipped into small pieces
a pinch of two of kosher salt

Mix everything together & let sit for an hour of so in the fridge to blend the flavors.

We have a lot of horseradish root left & apparently we can keep it in the fridge for a coupe months so I plan on making this sauce a lot to use on grilled food over the summer.

Tuesday, May 13, 2008

French Sorrel Tart

We got a bunch of sorrel in our CSA box last week which is a vegetable I've used only once & that was for soup. With the long winter behind us we've had enough of soups for awhile & its not hot enough yet to want a cold soup (this what came up most often when looking for sorrel recipes). Luckily, Harmony Valley Farm has a chef on staff who share recipes for the vegetables they grow in their newsletters which can be found online. We searched that & found this tart.
Sorrel Tart
The tart was a wonderful light dinner, a lot like a quiche but not as heavy or rich. The sorrel adds a lemony flavor but you could substitute spinach & perhaps a little lemon juice. The original recipe called for green garlic which we didn't have but we had lots of ramps which make a good substitution, you could also substitute leeks, shallots or green onions. We used a frozen store bought pie crust just to make this dinner come together quicker.

1 9-inch single pie crust
3 T unsalted butter
1/2 c ramp bulbs & stems, thinly sliced (we sliced the greens & threw them in with the sorrel too)
1 lg. bunch sorrel, cut into bite-sized pieces
2 eggs
1 c cream
1/4 c. Gruyere, grated
salt and pepper to taste

Preheat oven to 375 degrees. Prick the pie crust all over with a fork. Line the pie crust with foil and weigh down with uncooked rice or beans. Bake until golden brown, about 15 minutes. Carefully remove foil and beans.
In a skillet, melt butter. Add the ramp bulbs & stems. Cook for about 5 minutes. Add the sorrel and continue cooking over low heat. When the sorrel is completely
wilted, remove from heat and set aside. In a medium bowl, whisk the eggs and cream. Add half the cheese and the ramp sorrel mixture. Mix together and season with salt and pepper. Layer the other half of the cheese on the crust and pour the filling on top. Bake until set, about 35 minutes.
Sorrel Tart

Monday, May 12, 2008

Ramp Risotto

When I posted asking for ideas on how to use some vegetables I had received from our CSA farm Mr. Orph sent me a link for Cook Eat Fret's Ramp Risotto. We love risotto so this seems like a good idea. I've used some ideas from that recipe & also some from a leek risotto recipe in Risottoto come up with this dish. It was really wonderful. The ramps cooked in cream had a lovely mild flavor & smelled amazing.
Ramp Risotto

1 1/2 T unsalted butter
7 ramps, sliced thin, greens & all. Keep the sliced bulbs & stems separate from the sliced greens.
1/4 c cream
salt & pepper
3 1/2 c broth (chicken or vegetable)
1/4 c white wine
1/2 T olive oil
1 shallot, minced
3/4 c arborio rice
1/4 c grated Parmesan
pinch - 1/2 t crushed red pepper flakes (to taste)

Heat 1/2 T of the butter in a small skillet over med heat. Add the sliced ramps bulbs & stems & cook until tender, about 3 minutes. Add the cream & cook for another few minutes until the cream has thickened slightly. Salt & pepper to taste. Set aside.
In a saucepan bring the broth to a simmer & keep it warm during cooking.
Heat 1 T of the butter & the olive oil in a large pot over medium heat. Add the shallot & sauté for a minute or two. Add the arborio rice & stir for 1 minute until coated. Add the wine & stir until completely absorbed. Add 1/2 c of the broth & cook until absorbed, stirring frequently to prevent sticking. Once absorbed add the next 1/2 c of broth along with the ramp greens & cook until broth is absorbed. Continuing adding the broth, 1/2 c at a time, as each addition is absorbed. When 1/4 - 1/2 c of broth is left, about 18 to 20 minutes, the rice should be creamy & tender but still have a bite. Add the final addition of broth, red pepper flakes & the cream ramp mixture. Stir to combine. Remove from the heat & stir in cheese. Serve immediately.

Makes 2 main dish servings or 4 sides.

Weekly Menu - 5/12 - 5/17/08

Busy weekend getting the gardens planted, cross your fingers we don't get a late frost. The weather has been so odd here this spring but I was dying to get those veggies in the ground. I can't wait for heirloom tomatoes fresh from the garden this summer!

On to the Menu Plan Monday... This week's menu is based a lot on what we got in our first CSA box. I know everyone can't get ramps (we were lucky enough to get two bunches) but they can easily be substituted with green garlic, leeks, shallots or scallions.
Ramp Risotto
Ramp Risotto - I took some ideas from various risotto recipes to come up with this one. - RESULT - A really wonderful mild risotto, I only wish ramps weren't so hard to get.

Sorrel Tart - A lot like a quiche but a little lighter. - RESULT - A nice light dinner with a little lemony flavor from the sorrel.

Grilled Steak with Roasted Sunchokes & Parsnips topped with Horseradish Cream Sauce - RESULT - The sunchokes were not very exciting but the horseradish cream sauce is one to make again & again.

Fresh Pasta with Soybeans and Italian Sausage - A take on a fava Bean recipe in Bon Appétit May '08 but I can't find fava beans. - RESULT - Just ok, I don't think we'll make this one again.

Ramp Pizza - A recipe from Sounding My Barbaric Gulp. - RESULT - The puff pastry didn't really work for us & the whole blanched ramps were hard to eat but with a few tweaks this would be a great Ramp Pizza.

This week's cupcake will be Dark Chocolate, Caramel & Sea Salt.

Sunday, May 11, 2008

Farfalle with Chicken, Tomatoes, Caramelized Onions & Goat Cheese

Is it just me or does Bon Appétit have the longest names on their recipes? Anyway, the June issue had a section called Pasta in a New Light & I think we bookmarked every single recipe in it to try. This one was full of so many of our favorite flavors like caramelized onion & goat cheese plus its good use for leftover chicken. We really liked how the onions tasted caramelized in the sherry vinegar. I felt the marjoram overpowered the flavor of everything else & next time I'll leave it out. This is a good dish if you are worried about eating too much pasta, each serving is only 1.5 oz of pasta & is filled out by the spinach & tomatoes.
Farfalle with chicken, caramelized onions, tomatos & goat cheese

2 T olive oil
2 large red onions, thinly sliced
1 t sugar
8 oz farfalle
1 c dry white wine
1 c chicken broth
6 tomatoes, cored & chopped (the recipe called for heirloom, we just used what we had)
2 c cooked, shredded chicken
1/2 c thinly sliced fresh basil
2 T chopped fresh marjoram (I'd leave it out)
3 c chopped fresh spinach
2 oz goat cheese crumbled

Cook pasta according to directions & drain. Meanwhile, heat oil in a large heavy skillet over med-high heat. Add onions and sprinkle with salt. Cook until beginning to brown, stirring often, about 8 minutes. Reduce to med-low & stir in vinegar ans sugar. Continue to cook until onions are browned, about 15 minutes. Transfer to a bowl & set aside. In the same skillet bring the wine to a boil & let reduce by half, about 3 minutes. Add pasta, onions, broth, tomatoes, chicken, basil & marjoram. Season with salt & pepper. Stir over medium heat until warmed through. Divide spinach among plates. Serve the pasta over the spinach & top with goat cheese.

Serves 6

Thursday, May 8, 2008

Our first box from the farm

Matt & I decided to try Community Supported Agriculture this year & bought a half share from Harmony Valley Farm in Wisconsin. So from now through late fall we'll be getting a box of fresh organic vegetables (& some fruit) every other week. We were excited to get our first box today. Its still quite early here in the Northern Midwest but we did get an interesting selection.
Our first box from the farm
Here's whats in the box; parsnips, sorrel, sunchokes, rhubarb, horseradish, spinach, chives & ramps. Also they included some pussy willow branches just to use as decoration.
Most things here I know straight away how they'll be used. The rhubarb will go into a crisp, the parsnips will be roasted and the spinach in tonight's pasta & salads. But I have never used ramps, fresh horseradish or sunchokes before. The farm does give us some recipes but anyone else out there have a great recipe using any of these items?
I can't wait for the next box because it includes herbs to plant in our garden!

Strawberry Balsamic Cupcakes

This wasn't the cupcake I had envisioned making this week. Oh, I wanted to do a strawberry cupcake with strawberry frosting but the plan was to fill it with balsamic caramel. Let's just say I may be good a making many things but caramel is not one of them. Matt just shook his head & said candy making is hard. I didn't let that stop me since really, I just wanted to make a cupcake that tasted like strawberries with balsamic, I didn't need the caramel.
Strawberry Balsamic Cupcake
The strawberry flavor is just wonderful in this cupcake & frosting plus I loved the texture of the cake. The balsamic vinegar plus the cream cheese in the frosting add a really nice tang.

Strawberry Cupcakes

1 c strawberries, fresh or frozen (I used frozen & they worked beautifully)
1/4 c sugar
1 T balsamic vinegar

2 T unsalted butter, a room temp
1/4 c sugar
2 T well beaten egg
1/4 c + 1 1/2 T all purpose flour
1/8 t baking powder
1/8 t baking soda
pinch of salt
1 T milk

If using fresh strawberries cut them in half & remove the stems. If using frozen thaw them. Mix the strawberries with 1/4 sugar & let stand for about 15 minutes. Place in a small saucepan & add balsamic. Let simmer over medium for about 15 minutes. The strawberries should cook down & create a sauce. Crush the berries our use a hand blender if you want a smoother puree. Let cool. You should have about 3 T of strawberry sauce.
Beat the butter on high for about 30 seconds. Add the sugar & beat on medium high until light & fluffy about 3 minutes. Add the egg & beat for another 30 seconds. Add baking powder, baking soda and salt plus 1/3 of the flour. Beat until combined. In a small bowl mix 2 T of the strawberry sauce with the milk. Add 1/2 of the strawberry/milk mixture to the batter and beat until combined. Add another 1/3 of the flour and combine. Add the rest of the strawberry/milk mixture and combine. Finally add the last of the flour & beat until just combined. Divide the batter evenly between four prepared muffin tins. Bake at 350 for 20 minutes or until a toothpick inserted into the center comes out clean.

Strawberry Balsamic Cream Cheese Frosting

strawberry sauce (leftover from above)
1 t balsamic vinegar
2 oz cream cheese, softened
1 T butter, softened
1 c powdered sugar (or more as needed)

Mix balsamic vinegar into leftover strawberry sauce & set aside.
Beat cream cheese & butter together at medium speed until creamy. Shift in 1/2 c of the sugar & beat until combined. Add 1 T of the strawberry sauce & balsamic mixture (you can add more is you like but you'll need to add more sugar to get a good consistency) and beat until combined. Shift in the remaining sugar & combine. Add more sugar if necessary for sweetness & consistency. Frost cooled cupcakes.

Makes 4 cupcakes
I decided to post this recipe in this small batch size because that's how I bake for the two of us. I figure other people out there might be interested in baking recipes that have been sized down.

(I based this recipe on one SpeedM posted on Flickr)

Roast Chicken Breast with Garbanzo Beans, Tomatos & Paprika

This is another recipe from Bon Appétit's Fast Easy Fresh section. Matt picked it because we love the flavors of cumin & smoked paprika. This recipe smells heavenly while its cooking. I really liked the easy of using the same seasoning mixture for the chicken, vegetables and sauce. The chicken is really good on its own but extra good with the yogurt sauce.
Roast Chicken with Garbanzo Beans, Tomatoes & Paprika
We had one problem with the recipe, the chicken was supposed to roast in 20 minutes but ours needed another 10 minutes (our chicken breast were really large & perhaps still a little frozen in the middle). That extra time was probably too much for the garbanzo beans & some got a little dark. Next time I'd cook the vegetables to one side of the baking dish so I can remove them after 20 minutes if the chicken isn't quite done.

1/4 c olive oil
4 garlic cloves, pressed
1 T smoked paprika (not sweet!)
1 t ground cumin
1/2 t dried crushed red pepper
1/2 c plain yogurt
4 bone-in chicken breast halves
1 can garbanzo beans
12 oz cherry tomatoes (we used Santa Sweets & the flavor was amazing)
1 c chopped fresh cilantro

Preheat oven to 450 F. Mix together oil, garlic, paprika, cumin & red pepper. Mix 1 teaspoon of this mixture with the yogurt & set aside until serving. Place chicken on a baking sheet with sides. Rub 2 T of the spiced oil on the chicken breasts. Mix the beans, tomatoes & 1/2 c of the cilantro with the remaining spiced oil & toss to coat. Pour beans & tomatoes around the chicken. Season everything with salt & pepper.
Roast until the chicken is cooked through, about 20 minutes (see my notes above). Sprinkle with remaining cilantro. Serve with yogurt sauce.

Serves 4

Wednesday, May 7, 2008

Gilled Asian Flank Steak with Sweet Slaw

On Tuesday afternoons, I meet with a wonderful group of women for a few hours of knitting & some good chat but it means I often don't get home until five so I don't really want to cook anything that involved a ton of prep. That's why I love the Fast Easy Recipes in Bon Appétit each month. I particularly like it when you get the side & the main dish such as in this one. Plus this was done on the grill so I didn't even have pans to clean! The meat is pretty delicately flavored with only 30 minutes marinating, though you could really taste the flavor in the edges. The slaw on the other hand is quite tangy so its a good pairing. The slaw was supposed to be made of Napa Cabbage but we had Savoy & it was a fine substitution.

Grilled Asian Flank Steak with Sweet Slaw

1/4 c soy sauce
5 T vegetable oil
5 t fresh ginger, peeled & minced
1 garlic clove, pressed
1 1/2 lb flank steak
3 T sugar
3 T seasoned rice vinegar
2 red jalapenos, thinly sliced into rounds (I remove the seeds & ribs & cut into half circles)
5 c Napa Cabbage, thinly sliced
3/4 c cropped green onions

Mix soy sauce, oil, 3 t ginger and garlic is a resealable bag. Add the steak and seal bag. Turn to coat & let stand at room temperature for 30 minutes turning occasionally.
Stir sugar & vinegar in a small saucepan over medium heat until the sugar dissolves. Remove from heat & add jalapeno and 2 t ginger. Place cabbage & 1/2 green onions in a medium bowl. Pour the vinegar mixture over and toss to coat. Season with salt & pepper & let stand while preparing steak, tossing occasionally.
Grill steak until desired doneness, about 6 minutes per side for medium-rare. Let stand on a cutting board for 10 minutes after cooking. Slice thinly against grain.
Sprinkle remaining 1/4 c green onions on slaw & serve.

Serves 4
from Bon Appétit June '08

Tuesday, May 6, 2008

Baked Beet Chips

I was watching Diary of a Foodie the other day & at the end of the episode they showed how to make baked beet chips. Well, I love beets & beet chips & thought how wonderful that these were baked instead of fried. I bought some beets this weekend & made the chips for a side dish with grilled sausage last night.
Beet Chips
They were certainly pretty & sweet but were a chip for all of about 3 minutes before going soggy. The recipe does say to cool them completely & then keep them in an airtight bag until right before serving because they will go soggy. But really, I cooled ours, served them right away & they got soggy & chewy as we ate dinner. I think the first couple were crisp. I wonder if perhaps I need to slice them even thinner next time, mine were under 1/8 of an inch? I'm also wondering if I can blanch them in water instead of a simple syrup, beets are nice & sweet on their own. Has anyone else tried making baked beets chips with any success?

2 medium beets with stems trimmed
1 cup water
1 cup sugar

Peel beets with a vegetable peeler, then slice paper-thin with slicer. Bring water and sugar to a boil in a 3-quart heavy saucepan, stirring until sugar is dissolved. Add beets, then remove pan from heat and let stand 15 minutes. Drain beets in a colander, discarding liquid, then let stand in colander 15 minutes more. Put oven rack in middle position and preheat oven to 225ºF. Line a shallow baking pan with nonstick liner, then arrange beet slices snugly in 1 layer and season with salt and pepper. Bake beets until dry, about 1 hour. Immediately transfer chips to a rack to cool (chips will crisp as they cool).

Beet chips can be made 5 days ahead and cooled completely, then kept in a sealed plastic bag at room temperature.

Monday, May 5, 2008

Weekly Menu - 5/4-5/9/08

We had a really hard time coming up with a menu this week for some reason. It seems like some weeks we know exactly what we want & others its like pulling teeth to come up with 5 meals. So, we sat down with the last two Bon Appétits & picked a few new recipes to try. Let's hope they're good!
After

Here's the Menu Planning Monday!

Grilled Pork Sausage with Beans & Beet Chips - This is the sausage we made the Foodie Joust awhile back & still have in the fridge. The beet chips are from a recipe I saw on Diary of a Foodie the other day (I love beet chips so am excited to try my own.) - RESULT - The beet chips went soggy before we even finished dinner. I need to work on this one.

Grilled Asian Flank Steak with Sweet Slaw - From Bon Appetit June '08 - Really good & really fast to make. Would be good on a warm evening.

Butter Chicken Curry - An easy dinner made from one of our favorite premade sauces.

Roast Chicken Breasts with Garbanzo Beans, Tomatoes & Paprika - From Bon Appetit May '08 - RESULT - This dish was fantastic! We love the flavors of smoked paprika & cumin.

Farfalle with Chicken, Tomatoes, Caramelized Onions and Goat Cheese - From Bon Appetit June '08 - RESULT - Really good, almost like a spinach salad with pasta.

This week's cupcake will be Strawberry with a Balsamic Caramel filling, at least that's I'm thinking.... - RESULT - ok the caramel part didn't work out but the Strawberry Balsamic Cupcake is tasty!

Friday, May 2, 2008

Lemon Raspberry Cupcakes

It's Matt's birthday today & even though we are headed out for dinner tonight I could resist baking him some cupcakes. He told me the other day he prefers vanilla or fruit cupcakes over chocolate & I know he loved the Lemon Cupcakes with Blackberry Filling. Since we had a lemon in the fridge & some raspberries in the freezer I decided to do that combination. The recipe is the same with the chopped frozen raspberries added to both the cupcake & icing. I think the raspberries look like little jewels in this light, fruity cupcake.
Happy Birthday to Matt

Lemon Raspberry Cupcakes
makes 6 cupcakes but can easily be doubled

2/3 c all-purpose flour
1/4 t baking soda
1/4 t baking powder
pinch of salt
3 T unsalted butter, softened
1/3 c sugar
1 large egg, lightly beaten
zest of one lemon
juice of one lemon (with 1 t held aside for the icing)
1/4 c plain yogurt
1/3 c frozen raspberries, chopped

Preheat oven to 350 and prepare muffin tins.
Stir flour, baking soda, baking powder and salt together. Set aside.
Beat the butter until light and fluffy. On high speed, gradually beat in the sugar until light & fluffy. Lower speed and add egg, beating until just blended. Then beat in lemon zest & lemon juice. On low speed beat in flour mixture & yogurt until just blended. Fold in the chopped raspberries. This will be a very light fluffy batter.

Divide the batter evenly between 6 muffin tins.

Bake for 18 minutes. The edges should just be turning golden brown.
Raspberry Lemon Cupcakes
Let cool on wire rack before icing

Lemon Raspberry Milk Icing

3/4 c powdered sugar, shifted
1 t lemon juice
1 T frozen raspberries, chopped & thawed while cupcakes are cooking & cooling
milk

Mix powdered sugar, lemon juice, raspberries and 1/2 t milk. Add more milk as needed by 1/2 t amounts until icing consistency. After icing allow cupcakes to sit until the icing has set, about an hour.

Makes enough to ice 6 cupcakes

Smoked Gouda Mac & Cheese

This week we did little twist on my typical Mac & Cheese which I make with Gruyere, caramelized onions & tomatoes. This time we substituted the Gruyere with Smoked Gouda then added some really good Kendleson's Smoked Ham & frozen peas. The subtle smokiness of the cheese & ham really blended well together & the sweetness of the peas was a nice compliment.
Smoked Gouda Mac & Cheese
I didn't have enough of any one pasta on hand so this was made with a mix of elbows & gemelli.

Smoked Gouda Mac & Cheese

Serves 4

3/4 lb spiral macaroni (or macaroni of your choice)
1 Tbs butter
1/8 C flour
1 C milk
1/2 C heavy cream
1 1/2 C grated cheddar cheese
3/4 C grated smoked Gouda
1 t dry mustard
salt
pepper
1 thick slice of smoked deli ham, chopped
1 c frozen peas

Cook pasta according to directions. Place frozen peas into the bottom of a colander & drain past over them. The pasta water will thaw the peas.

In a small saucepan melt butter over med-low heat. Add flour an stir constantly for 1 minute. Do not allow to brown. Slowly whisk in milk and cream. Stir until hot and smooth and slightly thickened, about 1 minute. Turn heat to low and add cheese. Whisk until melted. Add dry mustard and salt and pepper to taste.

Butter a glass casserole dish. Add pasta, peas, ham and cheese sauce. Mix well until cheese sauce covers everything.

Cook in a 350 oven for 25 minutes or until top is brown & crispy (this is the best bit).

Thursday, May 1, 2008

Beef Stroganoff

When I posted the picture of this dish on Flickr a friend wrote, "Now that reminds me of Minnesota." It made me laugh because as I was making it I said to Matt that even though it wasn't technically a hotdish is was certainly close. This is a dish I grew up with & its still as creamy & comforting as ever. Its super easy & fast to put together & then just let it simmer away for an hour. This recipe is the one my Mom always used, I'm not sure where its from but it tastes just as good as I remember.
Beef Stroganoff

1 T unsalted butter
1 lb beef round steak or flank steak, cut into thin strips
1 med yellow onion, thinly sliced
1 can golden mushroom soup
1/3 c water
1/2 c sour cream
salt & pepper

In a large skillet melt the butter over med-high heat. Add the onions & beef and cook until the beef is browned & the onions are softened. Drain fat. Stir in soup and water & bring to a boil. Cover and simmer for 1 hour. Stir in sour cream & just heat through. Salt & pepper to taste. Serve over hot egg noodles.

Serves 4

Spatchcocking

Matt & I are big fans of a good roast chicken.

Roasted Chicken & Vegetables

Its just so comforting, we make it as our nice Sunday dinner quite often. Its almost always the dish I ask for when Matt offers to make me whatever I want for dinner. We've tried a few different methods of roasting a chicken; just putting it on a roasting rack & letting it go, making a tinfoil stand & turning it on its side, etc... Then we saw Alton Brown spatchcock a chicken on Good Eats & Matt decided to try that. Wow, a juicy perfectly cooked chicken with just a little preroasting prep. Cutting the bird to lie flat allows it to cook evenly, not drying out the white meat while cooking the dark. I know some people are intimidated by boning their own chicken but follow along & you'll see how easy it is...

You'll need a cutting board, good sharp knife & poultry shears.

Spatchcocking a chicken
Using the poultry shears cut along either side of the backbone removing it completely.

Spatchcocking a chicken
Turn the chicken over & lay it out. Press into the middle to break the wishbone.

Spatchcocking a chicken
Flip the chicken over again & cut the membrane holding the meat to the keel bone.

Spatchcocking a chicken
Slide your thumbs up both sides of the keel bone to loosen the meat from it.

Spatchcocking a chicken Spatchcocking a chicken
Use your poultry shears to cut the end of the keel bone from the chicken & remove it. Save the bones you removed to make stock!

#117 - Spatchcocking a chicken
And you have a beautifully spatchcocked chicken ready to prepare how you wish. We roast it in the oven but it would be great on the grill too. Here's how we prepared this one.

Roasting the chicken
We put some chopped garlic & fresh thyme under the skin. We also salted both sides of the chicken. Rub a little olive oil on the skin side of the chicken.

Roasting the chicken
In our roasting pan we created a bed of vegetables, this time we used carrots, yukon gold potatoes & cauliflower. Lightly coat the vegetables with oil olive. Place the chicken skin side up on the vegetables.

Roasting the chicken
Roast the chicken & vegetables at 425 for about 10 minutes per pound. Check for doneness with a thermometer. Remove the chicken from the roasting pan & let it sit for about 5 minutes before carving. Serve with the wonderfully caramelized vegetables.
Related Posts with Thumbnails

Get Email Updates!

Enter your email address:

Delivered by FeedBurner

Measurement Abbreviations

T = Tablespoon
t = teaspoon
c = cup
lb = pound
oz - ounce

Labels

Blog Archive

Contributors

Blog Directory for Minneapolis, Minnesota