Showing posts with label challenges. Show all posts

Tuesday, December 7, 2010

Vote For These Ribs!

Remember these Sweet and Spicy Ribs I posted last Friday?
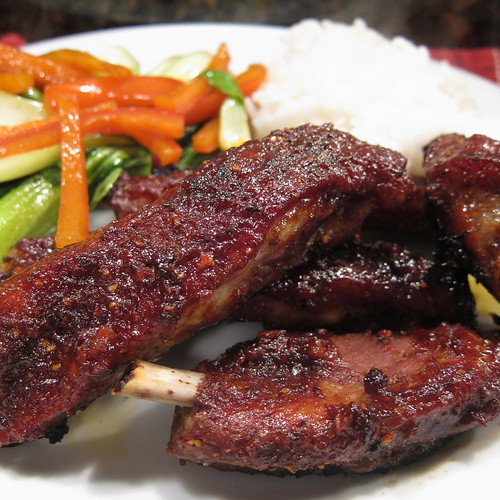
Sweet & Spicy Spare Ribs
Remember how they were our entry in the Iron Foodie 2010 competition sponsored by Marx Foods? And how they incorporated the secret ingredients of maple sugar, aji panca chili, bourbon vanilla bean and smoked sea salt?
Sweet & Spicy Spare Ribs
Well now is your chance to vote for them & make us the Iron Foodie! The prize is a gift certificate to get more gourmet ingredients so, if we win we'll have lots more inspiration to share new recipes with you, see, a win-win situation.


If you are not reading this post in a feed reader or at http://agoodappetite.blogspot.com OR at http://agoodappetite.com then the site you are reading is illegally publishing copyrighted material. Contact me at katbaro AT yahoo DOT COM. All recipes, text and photographs in this post are the original creations & property of the author unless otherwise noted. © 2007-2010 Kathy Lewinski

Thursday, December 2, 2010

Iron Foodie 2010 - Sweet and Spicy Spare Ribs

Voting is now open so, please go give these ribs your vote & make us Iron Foodie 2010!

Iron Foodie 2010 | Here's Why that will be me:
MarxFoods.com -- Fine Bulk Foods The Foodie BlogRoll
As you might remember, a few weeks back we were chosen as one of 25 finalist in this year's Iron Foodie. We received a box of 8 mystery ingredients from Marx Foods & were told to create a signature dish using at least 3 of the ingredients in the box. The mystery ingredients were Dried Aji Panca Chilies, Bourbon Vanilla Beans, Fennel Pollen, Dried Porcini Mushrooms, Tellicherry Peppercorns, Dulse Seaweed, Maple Sugar & Smoked Sea Salt. We pondered this diverse assortment of flavors for awhile then Matt said, "Ribs. Asian-style ribs." & we were off. Come on, it makes perfect sense that our signature dish would feature pork.
Sweet & Spicy Spare Ribs
These ribs are first rubbed with a combination of ground aji panca chile, maple sugar & smoked salt then roasted until almost done. Next they are coated with a glaze flavored with more maple sugar, soy sauce, garlic, ginger, aji panca chili & surprisingly, vanilla. The glaze bakes on to create a sticky, finger-licking coating with gorgeous color.

Tasty, tasty, tasty, if we do say so ourselves. The aji panca chilies give a mild heat (I was a little worried they'd be too spicy when I tasted the rub) that plays beautifully against the sweet maple sugar & molasses. Maple sugar has this mellow, natural sweetness which works so well with pork & really shines through in this dish. The vanilla gives a subtle, unexpected note to the Asian-inspired glaze. It isn't like you'd instantly say "oh, there is vanilla in this," but more like there is a pleasant vanilla flavor & scent lingering as a background note. Plus, for ribs cooked in the oven for only an hour they were more tender than expected. They almost make me not miss being able to barbecue ribs outside (ok, we could barbecue outside but it's in the teens & we're wimps).

Sweet & Spicy Spare Ribs

1 Dried Aji Panca Chile
4 T Maple Sugar
1 t Smoked Sea Salt
1 3/4 - 2 lbs spare ribs
2 T water
1/2 Bourbon Vanilla Bean
1 1/2 T soy sauce
2 T tomato paste
1 clove garlic, minced
1/2 t fresh ginger, peeled & minced
1 T rice vinegar
1 T molasses

Preheat the oven to 350 F.

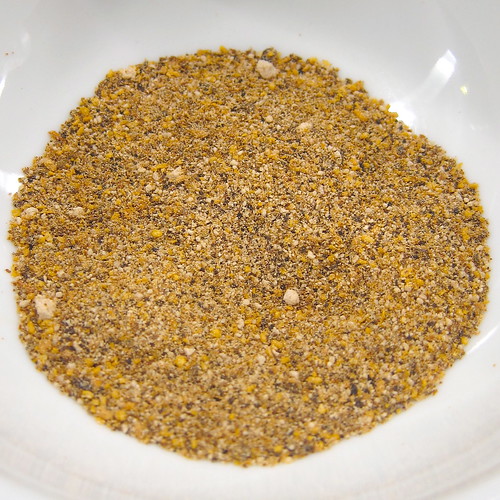
Grind the chile, seeds & all, in a coffee or spice grinder until about the texture of freshly ground black pepper. Reserve 1 teaspoon for the glaze. Mix the remaining ground chili with 1 tablespoon of the maple sugar & the smoked salt.
Dry Rub
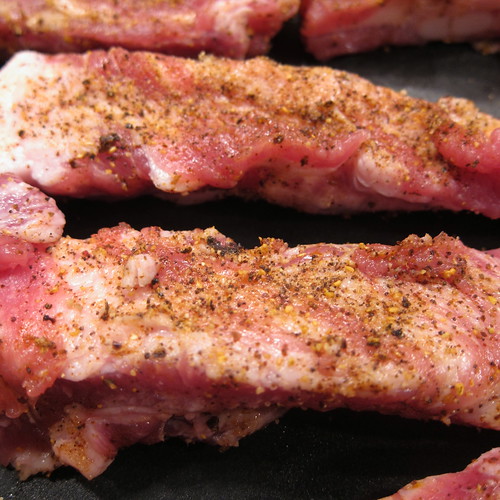
Remove the skin from the back of the ribs then cut them apart. Rub the ribs all over with the chile mixture.
Spare Ribs with Dry Rub
Put the ribs in the oven & roast for 50 minutes.

Meanwhile make the glaze. Put the remaining 3 tablespoons of maple sugar & water in a small saucepan. Split the vanilla bean in half & scrap the seeds into the pan. Add the pod as well. Bring to a boil. Stir while boiling for about a minute until the sauce smells like caramel & is slightly thickened. Remove the vanilla pod. Turn the heat down to medium. Add the soy sauce, tomato paste, garlic, ginger, vinegar, molasses & reserved teaspoon of ground chile. Heat while stirring for a minute or two to blend the flavors. Set aside.

After the ribs have roasted for 50 minutes, brush them with the glaze. Roast another 10 minutes.
Sweet & Spicy Spare Ribs
Makes 2 servings.

For a quick side dish I stir-fried a sliced red pepper & 3 heads of baby bok choy in 2 tablespoon soy sauce & 1 teaspoon maple sugar. It made for a colorful fresh dish with flavors that complimented the entrée perfectly.

Hope you all like our entry & will consider voting for us next week!

If you are not reading this post in a feed reader or at http://agoodappetite.blogspot.com OR at http://agoodappetite.com then the site you are reading is illegally publishing copyrighted material. Contact me at katbaro AT yahoo DOT COM. All recipes, text and photographs in this post are the original creations & property of the author unless otherwise noted. © 2007-2010 Kathy Lewinski

Wednesday, November 10, 2010

Iron Foodie 2010 - I'm a Challenger

The final 25 challengers for Iron Foodie 2010 were announced yesterday & I've made the cut! I'm so excited to get my box of secret ingredients from Marx Foods so, I can get in the kitchen & start creating.

Watch for all the entries on December 3rd.

Iron Foodie 2010 | Here's Why that will be me:
MarxFoods.com -- Fine Bulk Foods The Foodie BlogRoll

If you are not reading this post in a feed reader or at http://agoodappetite.blogspot.com OR at http://agoodappetite.com then the site you are reading is illegally publishing copyrighted material. Contact me at katbaro AT yahoo DOT COM. All recipes, text and photographs in this post are the original creations & property of the author unless otherwise noted. © 2007-2010 Kathy Lewinski

Wednesday, November 3, 2010

Iron Foodie 2010

The Foodie Blogroll & Marx Foods are hosting Iron Foodie 2010. 25 food bloggers will get a box of gourmet ingredients to create a dish with & one will be chosen the Iron Foodie. I thought it sounded like a really fun challenge so I'm throwing my hat in the ring.
Iron Foodie 2010 | Here's Why that will be me:
MarxFoods.com -- Fine Bulk Foods The Foodie BlogRoll
We were asked to answer a series of questions help pick the 25 challengers.

1. Why do you want to compete in this challenge?

It's so easy to fall back on the same old dishes so, I'm always looking for inspiration in the kitchen. More often than not, that inspiration comes from new ingredients whether it's some exotic vegetable at the farmers market or an interesting condiment at a gourmet market. The idea of having a box of ingredients from Marx Foods just show up at my door to create with is very exciting to me as another way to get those creative juices flowing.

2. Limitations of time/space notwithstanding, whose kitchen would you like to spend the day in & why?
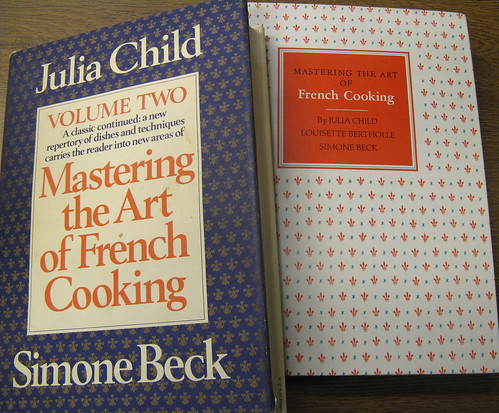
Julia Child, Thomas Keller, Ferran Adria, James Beard, Marie-Antoine Careme, or The  Swedish Chef
#310 - Score!
Definitely Julia. Even though she was a classically trained chef I still think of her as a home cook who first & foremost cooked because she loved to eat. She was a perfectionist when it came to creating recipes for her cookbooks but, I'm betting in real life she was a lot of fun in the kitchen. She just seems like some who truly embraced life.

3. What morsel are you most likely to swipe from family & friends’ plates when they aren’t looking?
Espresso Smoked Ribs
Bring on the pork, the bacon, the pork belly, the confit, the ribs... It's like candy to me.

4. Sum your childhood up in one meal.
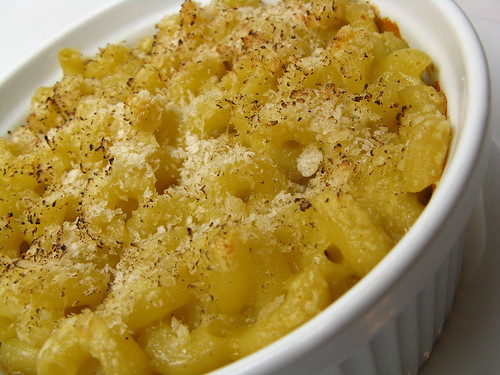
#88 - Mac & Blue Cheese
My mom is a fabulous cook who has always liked to experiment in the kitchen introducing us to things like curried shrimp as kids but, the the ultimate comfort food, homemade bake macaroni & cheese with a side of peas, will always take me back to childhood.

5. The one mainstream food you can’t stand?

This is a toughie because I'm not sure if you can call the stuff I can't stand mainstream & I find as I get older things I think I couldn't stand I now love. That said, despite my love for sushi, I can't stand Uni (Sea Urchin) I find the texture & flavor just hard to swallow. I also can't even take the smell of liver & onions but give me a good pate on the other hand....

If you are not reading this post in a feed reader or at http://agoodappetite.blogspot.com OR at http://agoodappetite.com then the site you are reading is illegally publishing copyrighted material. Contact me at katbaro AT yahoo DOT COM. All recipes, text and photographs in this post are the original creations & property of the author unless otherwise noted. © 2007-2010 Kathy Lewinski

Tuesday, March 30, 2010

Polish Pork Sausage - Oink!

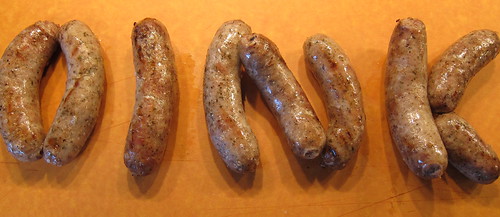
When we saw Tangled Noodle & Savor the Thyme's Eating Your Words Challenge 2010 we knew we wanted to join the fun. For some reason, we decided almost right away that we wanted to spell something with sausage. Really, I think we were just looking for an excuse to try our hand at making homemade sausage again. Since it was pork sausage, we figured there was only have one thing to say...
Oink Uncooked
Uncooked
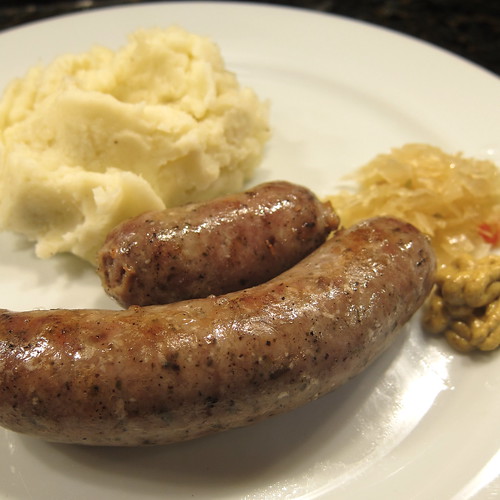
Oink Cooked
Cooked

Does this mean we have a bit of a sick sense of humor?

Just like little piggies we ate this sausage right up. It was wonderful with some spicy brown mustard & a sauerkraut relish. We were very happy by the mixture of spices especially the large amount of garlic & the caraway (Matt almost left the caraway out but it ended up being one of our favorite things about this).
Homemade Polish Sausage
The first time we made homemade sausage we weren't happy with the texture at all. This time was 100% better. First & most importantly, we made sure to buy a nice fatty cut of pork. A lot of sausage recipes even tell you to add extra fat. Secondly, we used the coarse setting on our meat grinder.

Some notes about casings: we used natural casings that we get at our local grocery store, Lund's, from the butcher. They cost about $10 a pound but you'll only need less than $2 worth. You can store any casings you don't use in your refrigerator for 1 to 2 years (though we find they stink). If your local grocer or butcher makes their own sausage they will probably have casings to sell. Any casings you don't use can be stored in your refrigerator for 1 to 2 years (though we find they start to stink). You can also buy collagen casings at stores that carry supplies for hunters like Gander Mountain. Natural casings are best for fresh sausages while collagen is good for fresh & smoked sausage.

Polish Pork Sausage
(from Stuffers)

3 lbs pork with a good amount of fat (we used a pork sholder)
1 T salt
2 t black pepper
5 cloves garlic, peeled & pressed
1 t sugar
2 t dried marjoram
1/4 t ground allspice
2 t caraway seeds
1/2 c cold water
6 feet casing (about 1 1/2 oz)

Run the pork through a meat grinder set at a coarse grind. Using your hands, mix in the seasonings & cold water.

Makes enough filling for 12 6" sausages.

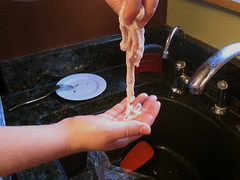
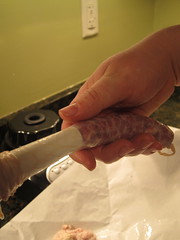
Rinse the sausage casings to remove any grit. Feed the sausage casings on to the sausage stuffer. Tie a knot at the end of the casing.
Rinsing the casingsFeeding the casing onto the stuffer
Slowly filled the casing with the ground meat, try to keep the width the same the whole way. Create one long sausage. Stop filling when you have 2 - 3 inches of casing left. Tie a knot at the end.
Stuffing the sausage casings#87 - Sausage!
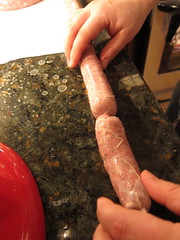
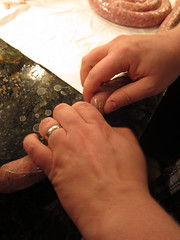
Twist into desired length sausages, twist clockwise at the first sausage end then counterclockwise at the second sausage end & so on.
Twist into linksTwist into links
Sausages can then be steamed, boiled or grilled. We steamed ours for about 15 minutes until cooked through & then finished them on the grill to get a crispy brown skin. These would probably also be fantastic smoked.

If you are not reading this post in a feed reader or at http://agoodappetite.blogspot.com OR at http://agoodappetite.com then the site you are reading is illegally publishing copyrighted material. Contact me at katbaro AT yahoo DOT COM. All recipes, text and photographs in this post are the original creations & property of the author unless otherwise noted.
© 2007-2010 Kathy Lewinski

Wednesday, December 23, 2009

Daring Baker's Gingerbread Houses

The December 2009 Daring Bakers’ challenge was brought to you by Anna of Very Small Anna and Y of Lemonpi. They chose to challenge Daring Bakers’ everywhere to bake and assemble a gingerbread house from scratch. They chose recipes from Good Housekeeping and from The Great Scandinavian Baking Book as the challenge recipes.
IMG_7447
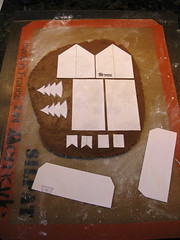
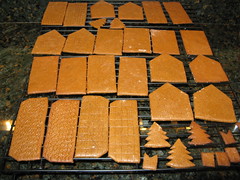
At first I thought I was way too busy to do this challenge but then I kind of got excited by it & in the end Matt & I had so much fun making our little houses that I'm really glad we did it. I decided to do a village of small houses which for some reason seemed more managable to me than one big house. Then I spread the project out over 3 days which also made it not seem so big. Day 1, I made the dough & let it refrigerate overnight. Day 2, using templates for 2" x 3" house that I found here & here.
IMG_7430IMG_7432IMG_7435
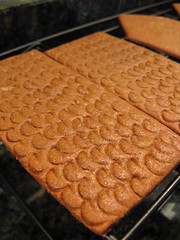
I just cut the templates out of paper & laid them on the dough then cut around them with a sharp knife. Here are some things I learned. 1. Flour your template. 2. Press the knife down to cut the dough don't drag it or your dough will pull. 3. Remove the template right away or the dough will stick to it & ruin your piece. I also cut out a few small trees to add to my village. I used different cake decorating tips to make textures on the roof pieces before baking. I didn't have much trouble with the dough shrinking while cooking though it did puff up in some places. I let the cooked gingerbread pieces sit overnight on the counter to get really dry.
Day 3, was all about decorating & assembly. I good stiff royal icing is really key to getting the houses to build easily. With thinned it out with water as needed for different types of decorating. I used meringue powder in my icing which worked really well.
IMG_7439IMG_7440
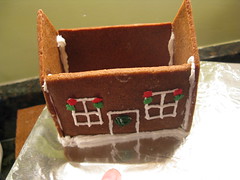
We did some of the piping work for windows & doors before putting the houses together. We figured it would be easier to do with the pieces lying flat. I made a base for the village from a piece of cardboard covered in tin foil. Then we piped a line of icing for each side of the houses to help secure them. After all four sides were up we let the icing dry before putting on the roofs. Then came the fun part of adding all the other decorations.
IMG_7449
We thinned the icing out with a little water to coat the trees & make the dripping snow on the roof. Thick icing made great smoke from the chimney.
IMG_7457IMG_7454IMG_7452IMG_7451
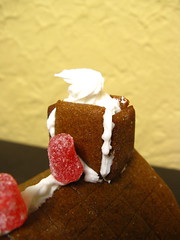
The next week I got invited to my cousin Lucas' first grade class to help make a gingerbread house as well. We went a little easier route by attaching graham crackers to milk cartons with frosting but the results were just as cute!
Gingerbread House Day
This post is dedicated to my $7 Target hand beater that met an untimely death while making royal frosting.

If you are not reading this post in a feed reader or at http://agoodappetite.blogspot.com OR at http://agoodappetite.com then the site you are reading is illegally publishing copyrighted material. Contact me at katbaro AT yahoo DOT COM. All recipes, text and photographs in this post are the original creations & property of the author unless otherwise noted.
© 2007-2009 Kathy Lewinski

Sunday, November 1, 2009

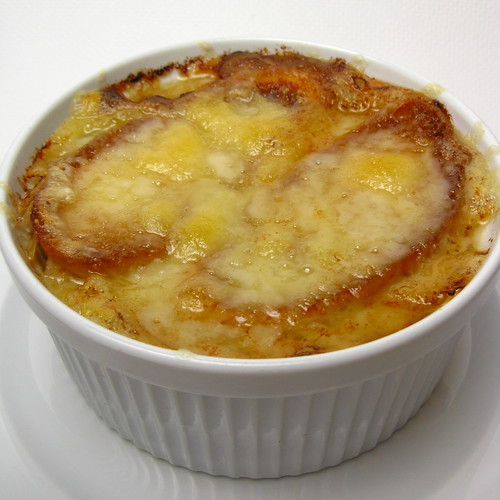
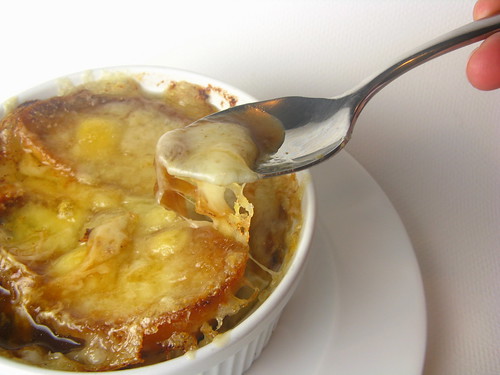
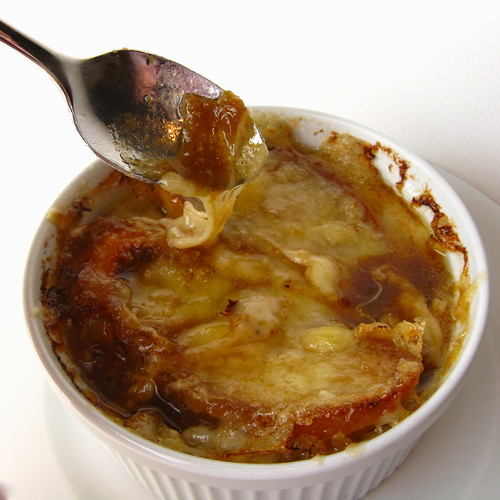
Recipes to Rival - Soupe A L'Oignon

This month for Recipes to Rival Sara of Imafoodblogdotcom chose Onion Soup from Thomas Keller's Bouchon cookbook. I would like to give this soup another name, The I Have No Life Onion Soup.
IMG_6760
I was very happy to make it because Matt really love onion soup but seriously, cook the onions for 5 hours stirring every 15 minutes! Yes, it made for wonderful, sweet, deep brown onions but its a commitment. The soup was very good, slightly sweet & extremely rich, I couldn't even finish my whole bowl.
IMG_6763
I had every intention of making Keller's beef stock as well but ended up really just winging it. My stock started with about 1 pound of short ribs. I roasted the short ribs with a little olive oil at 450 for about an hour, turning once. Then I added a chopped carrots, some leeks & some onion to the roasting pan & let them all cook for about another half hour. All of that went into a stock pot with some fresh thyme & parsley, a bay leaf, a little salt & a few peppercorns & then covered with 10 cups of water. I let that simmer for a good 6 hours adding more water as needed (I probably added at least another 6 cups of water throughout the day). Them I put the stock through a sieve to remove the solids. I refrigerated it overnight & then was able to remove any fat since it became a solid on the top of the stock. I ended up with a really beautiful beef stock, that was a lovely brown color & full of flavor. It made just enough to make 1/3 of the onion recipe which was 2 servings, perfect for us.
IMG_6766
Onion Soup - Soupe A L'Oignon
Thomas Keller - Bouchon

makes 6 servings

Sachet:
2 bay leaves
12 black peppercorns
6 large sprigs of thyme

Soup:
8 pounds (about 8 large) yellow onions
8 tablespoons (4 ounces) unsalted butter

Kosher salt
1 1/2 teaspoons all purpose flour
3 1/2 quarts Beef Stock (recipe below)
Freshly ground black pepper
Sherry wine vinegar

Croutons:
1 baguette (about 2 1/2 inches in diameter)
Extra Virgin Olive Oil
Kosher salt
6 to 12 slices (1/8 inch thick) aged Comte or Emmentaler cheese (at least 4 inches square)
1 1/2 cups grated aged Comte or Emmentaler cheeses, or a combination

FOR THE SACHET: Cut a piece of cheesecloth about 7 inches square. Place the bay leaves, peppercorns, and thyme in the center, bring up the edges, and tie with kitchen twine to form a sachet.

FOR THE SOUP: Cut off the tops and bottoms of the onions, then cut the onions lengthwise in half. Remove the peels and tough outer layers. Cut a V wedge in each one to remove the core and pull out any solid, flat pieces of onion running up from the core.

Lay an onion half cut side down on a cutting board with the root end toward you. Note that there are lines on the outside of the onion. Cutting on the lines (with the grain) rather than against them will help the onions soften. Holding the knife on an angle, almost parallel to the board, cut the onion lengthwise into 1/4 inch thick slices. Once you've cut past the center of the onion, the knife angle will become awkward: Flip the onion onto its side, toward the knife, and finish slicing it, again along the grain. Separate the slices of onion, trimming away any root sections that are still attached and holding the slices together. Repeat with the remaining onions. (You should have about 7 quarts of onions)

Melt the butter in a large heavy stockpot over medium heat. Add the onions and 1 tablespoon salt, reduce the heat to low. Cook, stirring every 15 minutes and regulating the heat to keep the mixture bubbling gently, for about 1 hour, or until the onions have wilted and released a lot of liquid. At this point, you can turn up the heat slightly to reduce the liquid, but it is important to continue to cook the onions slowly to develop maximum flavor and keep them from scorching. Continue to stir the onions every 15 minutes, being sure to scrape the bottom and get in the corners of the pot, for about 4 hours more, or until the onions are caramelized throughout and a rich deep brown. (Sara's note - like a super deep brown, like way browner than you think they need to be. Think poop. Yes I said it.) Keep a closer eye on the onions toward the end of the cooking when the liquid has evaporated. Remove from the heat. (You will need 1 1/2 cups of onions for the soup; reserve any extra for another use. The onions can be made up to 2 days ahead and refrigerated.)

Transfer the caramelized onions to a 5 quart pot (if they've been refrigerated, reheat until hot.) Sift in the flour and cook over medium-high heat, stirring, for 2 to 3 minutes. Add the beef stock and sachet, bring to a simmer, and simmer for about 1 hour, or until the liquid is reduced to 2 1/2 quarts. Season to taste with salt, pepper, and a few drops of vinegar. Remove from the heat.

FOR THE CROUTONS: Preheat the broiler. Cut twelve 3/8 inch thick slices from the baguette (reserve the remainder for another use) and place on a baking sheet. Brush the bread lightly on both sides with olive oil and sprinkle lightly with salt. Place under the broiler and toast the first side until golden brown, then turn and brown the second side. Set aside and leave the broiler on.

TO COMPLETE: Return the soup to a simmer. Place six flameproof soup tureens, with about 1 1/2 cups capacity on a baking sheet to catch any spills (the soup will bubble up and over the tureens). Add the hot soup to the tureens, filling them within 1/2 inch of the tops. Top each serving with 2 croutons: Lay them on the surface - do not push them into the soup. Lay the slices of cheese over the croutons so that the cheese overlaps the edges of the tureens by about 1/2 inch, Scatter the grated cheese over the sliced cheese, filling in any areas where the sliced cheese is thiner, or it may melt into the soup rather than forming a crust.

Place the tureens under the broiler for a few minutes, until the cheese bubbles, browns, and forms a thick crust. Eat carefully, the soup and tureens will be very hot.

Beef Stock
makes 3 1/2 quarts

We use this stock for onion soup and to add in combination with veal stock to beef stews. The bones are roasted first to give the stock a roasted flavor, then simmered with caramelized vegetables for a rich brown stock.

About 2 tablespoons canola oil
5 pounds meaty beef necks or leg bones, cut into 2-3 inch sections
2 small Spanish onions (about 8 ounces total), peeled
1/2 teaspoon Kosher salt
3 ounces (1 large) carrot, peeled and cut into 4 pieces
3 ounces (1 large) leek, roots trimmed, split lengthwise, rinsed well, and cut into 2 inch pieces, or leek tops
1 large sprig of thyme
1 large sprig of Italian parsley
3 bay leaves
1/4 teaspoons black peppercorns
1 head garlic, cut horizontally in half (reserve half for another use)

Preheat the oven to 475F. Place a large roasting pan in the oven to preheat for about 10 minutes.

Add 1 tablespoon of the oil tot he hot roasting pan and distribute the beef bones in a single layer. Roast the bones for about 45 minutes, or until richly browned, turning each piece only after it is well browned on the bottom side.

Meanwhile, cut 1 onion crosswise in half. Heat a small heavy skillet over medium-high heat for 2-3 minutes. Place 1 onion half cut side down to one side of the skillet so that it is not over direct heat and let it brown and char black, about 30 minutes. This will add color to the stock, set aside.

Remove the roasting pan of bones from the oven and reduce the oven temperature to 400F. Transfer bones to a large colander set over a baking sheet to drain.

Drain the fat from the roasting pan and discard. Add about 1 cup water to the pan, place over medium heat, and use a metal spatula to scrape the bottom of the pan and release the pan juices. Let them simmer until reduced by half. Add the resulting fond to a large deep stockpot.

Transfer the bones to the stockpot and add about 5 quarts cold water - just enough to cover the bones. Any fat present in the juices will rose to the top when the cold water is added; use a skimmer to remove and discard the fat. Add the charred onion half and the salt. Place over medium heat and bring to a simmer, skimming as impurities rise to the top of the stockpot. Reduce the heat and simmer gently, skimming often, for 5 hours. If the level of liquid falls below the bones, add additional water.

Meanwhile, cut the remaining whole onion into quarters and cut the remaining onion half in half again. Place the onions, carrots, and leeks in a roasting pan that will hold them in a single layer, toss with the remaining 1 tablespoon canola oil, and place in the oven to roast for 20 minutes.

Remove from the oven and stir, then roast for an additional 20 minutes or until the vegetables are richly caramelized. Set aside.

After the stock has simmered for 5 hours, add the caramelized vegetables, herbs, peppercorns, and garlic and simmer for 1 hour longer. Turn off the heat and allow the stock to rest for 10 minutes.

Prepare an ice bath. Place a strainer over a large bowl. Removing the bones or pouring out the liquid through the bones would cloud the stock. Instead, carefully ladle the stock out of the pot and pass it through the strainer, tilting the pot as necessary to get all the stock. Strain a second time through a chinois or fine mesh strainer lines with a dampened cheese cloth.

Measure the stock. If you have more than 3 1/2 quarts, pour it into a saucepan and reduce to 3 1/2 quarts. Strain the stock into a container and cool in the ice bath, stirring occasionally. (Store the stock in the refrigerator for up to 3 days, or freeze in several containers for longer storage.)

NOTE: If the stock will be refrigerated for longer than 3 days, bring it back to a boil after 3 days, cool it, and return it to the refrigerator.

If you are not reading this post in a feed reader or at http://agoodappetite.blogspot.com OR at http://agoodappetite.com then the site you are reading is illegally publishing copyrighted material. Contact me at katbaro AT yahoo DOT COM. All recipes, text and photographs in this post are the original creations & property of the author unless otherwise noted.
© 2007-2009 Kathy Lewinski

Tuesday, October 27, 2009

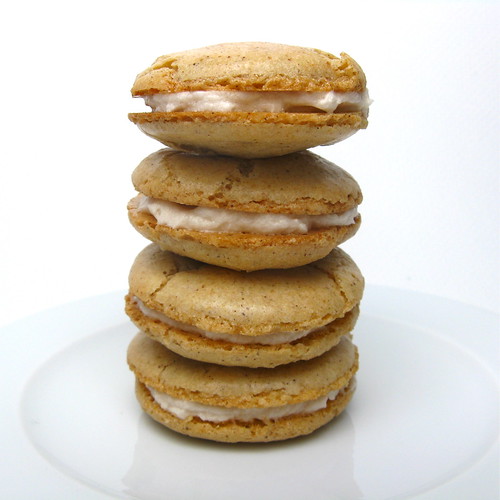
Daring Bakers - Macarons

The 2009 October Daring Bakers’ challenge was brought to us by Ami S. She chose macarons from Claudia Fleming’s The Last Course: The Desserts of Gramercy Tavern as the challenge recipe.
IMG_6529
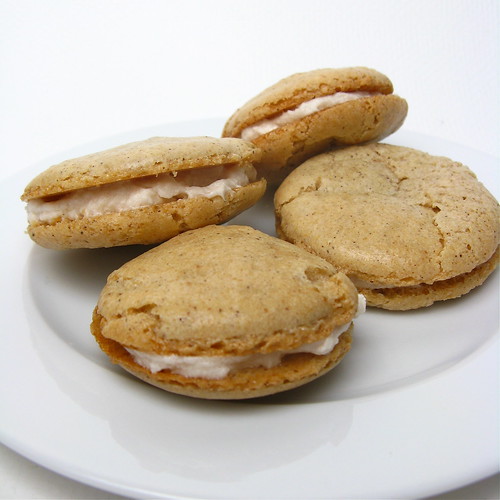
Of all the Daring Bakers' challenges I would have to say this is the first one that didn't come out as good as I hoped. Most of my macarons cracked during baking which meant the didn't have that crispy outside. They were pretty close though so I'm sure if I played with the recipe a bit I could get it right but I realized I'm just really not that big a fan of macarons.
IMG_6523
Since the recipe claimed to make 10 dozen I sized it way down & got about 10 sandwiches total (this might be part of the reason the weren't perfect.) I decided to make my own nut flour for the recipe & went with hazelnuts instead of almonds because that's what I had on hand. They were roasted so moisture wasn't a problem. I felt like they gave a nice flavor to the cookies. I also added a little ground cinnamon to the dough.

For the filling I did a very simple buttercream (butter & powdered sugar) flavored with jelly, but the jelly I chose to use was Port Wine Jelly. The flavor just wasn't as good as I had hoped. I really should have gone with my first instinct & used the Green Tomato Jam instead.

Macarons
from Claudia Fleming’s The Last Course: The Desserts of Gramercy Tavern

Actual baking time: 12 minutes total, plus a few minutes to get your oven from 200°F to 375°F.

Confectioners’ (Icing) sugar: 2 ¼ cups (225 g, 8 oz.)

Almond flour: 2 cups (190 g, 6.7 oz.)

Granulated sugar: 2 tablespoons (25 g , .88 oz.)

Egg whites: 5 (Have at room temperature)

1. Preheat the oven to 200°F (93°C). Combine the confectioners’ sugar and almond flour in a medium bowl. If grinding your own nuts, combine nuts and a cup of confectioners’ sugar in the bowl of a food processor and grind until nuts are very fine and powdery.

2. Beat the egg whites in the clean dry bowl of a stand mixer until they hold soft peaks. Slowly add the granulated sugar and beat until the mixture holds stiff peaks.

3. Sift a third of the almond flour mixture into the meringue and fold gently to combine. If you are planning on adding zest or other flavorings to the batter, now is the time. Sift in the remaining almond flour in two batches. Be gentle! Don’t overfold, but fully incorporate your ingredients.

4. Spoon the mixture into a pastry bag fitted with a plain half-inch tip (Ateco #806). You can also use a Ziploc bag with a corner cut off. It’s easiest to fill your bag if you stand it up in a tall glass and fold the top down before spooning in the batter.
5. Pipe one-inch-sized (2.5 cm) mounds of batter onto baking sheets lined with nonstick liners (or parchment paper).

6. Bake the macaroon for 5 minutes. Remove the pan from the oven and raise the temperature to 375°F (190°C). Once the oven is up to temperature, put the pans back in the oven and bake for an additional 7 to 8 minutes, or lightly colored.

7. Cool on a rack before filling.

Yield: 10 dozen. Ami's note: My yield was much smaller than this. I produced about two dozen filled macaroons.

If you are not reading this post in a feed reader or at http://agoodappetite.blogspot.com OR at http://agoodappetite.com then the site you are reading is illegally publishing copyrighted material. Contact me at katbaro AT yahoo DOT COM. All recipes, text and photographs in this post are the original creations & property of the author unless otherwise noted.
© 2007-2009 Kathy Lewinski

Monday, October 12, 2009

Hello Winter and Weekly Menu 10/11 - 10/17

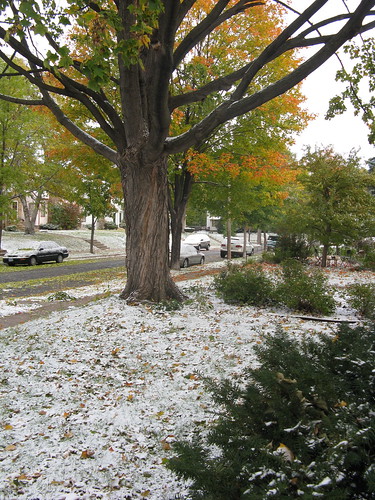
Apparently Mother Nature turned the wrong page on her calendar & thinks its late November not early October.
October 10: snow, 17 degree windchill...
Snow & a windchill of 17 degrees!
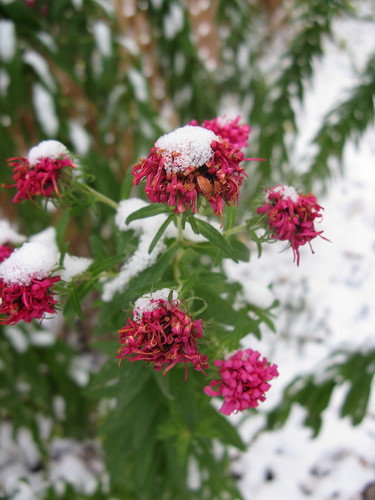
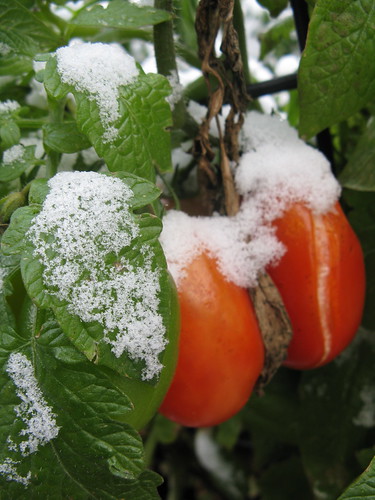
Frosted AstersFrozen Tomatoes
The garden is officially done for the year.
So, that's got us all thinking of warming soups here in Minneapolis & the Minneapolis Farmer's Market is hosting a Soup Recipe Contest. You can check out all the recipes here & if your so inclined vote for my Crock Pot White Bean & Spinach or Creamy Chicken Wild Rice Soup.

On to Menu Planning Monday...

Chai brined pork chops with squash & brussel sprouts

Arugula Salad with squash & peppers & fried goat cheese

Baby Back Ribs with a leek & potato gratin

Open-faced Meatball Sandwiches

3rd Anniversary dinner at La Belle Vie

Then we are headed up to the North Shore to enjoy the fall colors or perhaps the snow they way things are going this year.

If you are not reading this post in a feed reader or at http://agoodappetite.blogspot.com OR at http://agoodappetite.com then the site you are reading is illegally publishing copyrighted material. Contact me at katbaro AT yahoo DOT COM. All recipes, text and photographs in this post are the original creations & property of the author unless otherwise noted.
© 2007-2009 Kathy Lewinski

Sunday, September 27, 2009

Daring Bakers - Vols-au-Vent

The September 2009 Daring Bakers' challenge was hosted by Steph of A Whisk and a Spoon. She chose the French treat, Vols-au-Vent based on the Puff Pastry recipe by Michel Richard from the cookbook Baking With Julia by Dorie Greenspan. When I first saw it I groaned at the thought of making puff pastry from scratch. Then Matt reminded me I'd basically already made puff pastry for the Danish Braid challenge. Ok, I figured if I'd done it once I can do it again and here's the flaky layers to prove it.
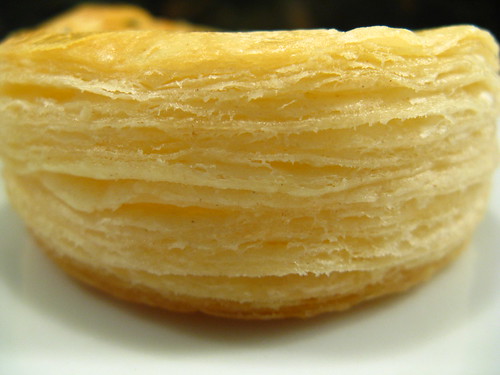
IMG_6126
I decided if I was going to take the time to make puff pastry I was going to use the best butter possible which to us means the locally produced Hope Butter. (Seriously, this is the best butter ever!) It was worth it, Matt took one bite of the finished pastry & declared it the best puff pastry he'd ever had.
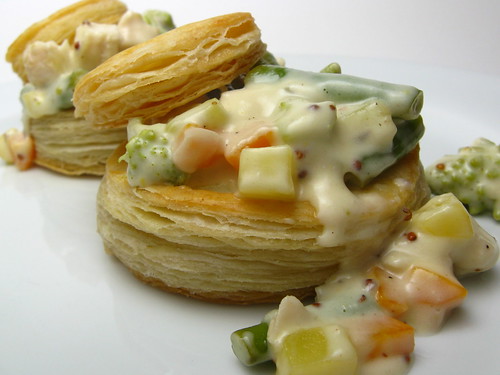
Vols-au-Vent
I did a pretty basic filling for it. Cooked chicken with mixed vegetables in a white wine & cream sauce with just a tough of whole grain mustard in it. Simple, comforting & satisfying.

Vols-au-Vent
I did 1/4th of this recipe which gave me 4 vols-au-vent & lots of scraps. My notes are in italics throughout the recipe.

Prep Times:
-about 4-5 hours to prepare the puff pastry dough (much of this time is inactive, while you wait for the dough to chill between turns…it can be stretched out over an even longer period of time if that better suits your schedule)
-about 1.5 hours to shape, chill and bake the vols-au-vent after your puff pastry dough is complete

Michel Richard’s Puff Pastry Dough
From: Baking with Julia by Dorie Greenspan

Yield: 2-1/2 pounds dough


2-1/2 cups (12.2 oz/ 354 g) unbleached all-purpose flour I used 1/2 c plus 2 T

1-1/4 cups (5.0 oz/ 142 g) cake flour
 I used 1/4 c plus 1 T
1 tbsp. salt (you can cut this by half for a less salty dough or for sweet preparations)
 I used 1/2 t
1-1/4 cups (10 fl oz/ 300 ml) ice water
 I used 1/4 c plus 1 T
1 pound (16 oz/ 454 g) very cold unsalted butter I used 1/4 lb
plus extra flour for dusting work surface

Mixing the Dough:
Put the all-purpose flour, cake flour, and salt in the work bowl of a food processor fitted with a metal blade and pulse a couple of times just to mix. Add the water all at once, pulsing until the dough forms a ball on the blade. The dough will be very moist and pliable and will hold together when squeezed between your fingers. (Actually, it will feel like Play-Doh.)
Remove the dough from the machine, form it into a ball, with a small sharp knife, slash the top in a tic-tac-toe pattern. Wrap the dough in a damp towel and refrigerate for about 5 minutes.

Meanwhile, place the butter between 2 sheets of plastic wrap and beat it with a rolling pin until it flattens into a square that's about 1" thick. Take care that the butter remains cool and firm: if it has softened or become oily, chill it before continuing. Make sure your butter isn't too cold either. Mine was a little hard & broke through the dough right away. I had to start over with fresh dough & just made sure the butter wasn't still frozen

Incorporating the Butter:
Unwrap the dough and place it on a work surface dusted with all-purpose flour (A cool piece of marble is the ideal surface for puff pastry) with your rolling pin (preferably a French rolling pin without handles), press on the dough to flatten it and then roll it into a 10" square. For 1/4 of the recipe I only made a 2.5 inch square. Keep the top and bottom of the dough well floured to prevent sticking and lift the dough and move it around frequently. Starting from the center of the square, roll out over each corner to create a thick center pad with "ears," or flaps.

Place the cold butter in the middle of the dough and fold the ears over the butter, stretching them as needed so that they overlap slightly and encase the butter completely. (If you have to stretch the dough, stretch it from all over; don't just pull the ends) you should now have a package that is 8" square. I ended up with a 2" square.

To make great puff pastry, it is important to keep the dough cold at all times. There are specified times for chilling the dough, but if your room is warm, or you work slowly, or you find that for no particular reason the butter starts to ooze out of the pastry, cover the dough with plastic wrap and refrigerate it . You can stop at any point in the process and continue at your convenience or when the dough is properly chilled.

Making the Turns:
Gently but firmly press the rolling pin against the top and bottom edges of the square (this will help keep it square). Then, keeping the work surface and the top of the dough well floured to prevent sticking, roll the dough into a rectangle that is three times as long as the square you started with, about 24" (don't worry about the width of the rectangle: if you get the 24", everything else will work itself out.) For 1/4 of the dough I made sure the longest side was 6" long. With this first roll, it is particularly important that the butter be rolled evenly along the length and width of the rectangle; check when you start rolling that the butter is moving along well, and roll a bit harder or more evenly, if necessary, to get a smooth, even dough-butter sandwich (use your arm-strength!). I found I had to pound the dough & butter to get it all spread without ripping the dough.

With a pastry brush, brush off the excess flour from the top of the dough, and fold the rectangle up from the bottom and down from the top in thirds, like a business letter, brushing off the excess flour. You have completed one turn. I found it better to chill the dough for 30 minutes at this point & then do the second turn.

Rotate the dough so that the closed fold is to your left, like the spine of a book. Repeat the rolling and folding process, rolling the dough to a length of 24", or 6" in my case, and then folding it in thirds. This is the second turn.

Chilling the Dough:
If the dough is still cool and no butter is oozing out, you can give the dough another two turns now. Once again I only did one turn & chilled it for 30 minutes between turned. The dough got easier to work with each time. If the condition of the dough is iffy, wrap it in plastic wrap and refrigerate it for at least 30 minutes. Each time you refrigerate the dough, mark the number of turns you've completed by indenting the dough with your fingertips. It is best to refrigerate the dough for 30 to 60 minutes between each set of two turns.

The total number of turns needed is six. If you prefer, you can give the dough just four turns now, chill it overnight, and do the last two turns the next day. Puff pastry is extremely flexible in this regard. However, no matter how you arrange your schedule, you should plan to chill the dough for at least an hour before cutting or shaping it.

Forming and Baking the Vols-au-Vent:
Yield: 1/3 of the puff pastry recipe below will yield about 8-10 1.5” vols-au-vent or 4 4” vols-au-vent
In addition to the equipment listed above, you will need:
-well-chilled puff pastry dough (recipe below)
-egg wash (1 egg or yolk beaten with a small amount of water)
-your filling of choice

Line a baking sheet with parchment and set aside.

Using a knife or metal bench scraper, divided your chilled puff pastry dough into three equal pieces. Work with one piece of the dough, and leave the rest wrapped and chilled. (If you are looking to make more vols-au-vent than the yield stated above, you can roll and cut the remaining two pieces of dough as well…if not, then leave refrigerated for the time being or prepare it for longer-term freezer storage.

On a lightly floured surface, roll the piece of dough into a rectangle about 1/8 to 1/4-inch (3-6 mm) thick. Transfer it to the baking sheet and refrigerate for about 10 minutes before proceeding with the cutting.

(This assumes you will be using round cutters, but if you do not have them, it is possible to cut square vols-au-vents using a sharp chef’s knife.) For smaller, hors d'oeuvre sized vols-au-vent, use a 1.5” round cutter to cut out 8-10 circles. For larger sized vols-au-vent, fit for a main course or dessert, use a 4” cutter to cut out about 4 circles. Make clean, sharp cuts and try not to twist your cutters back and forth or drag your knife through the dough. Half of these rounds will be for the bases, and the other half will be for the sides. (Save any scrap by stacking—not wadding up—the pieces…they can be re-rolled and used if you need extra dough. If you do need to re-roll scrap to get enough disks, be sure to use any rounds cut from it for the bases, not the ring-shaped sides.)

Using a ¾-inch cutter for small vols-au-vent, or a 2- to 2.5-inch round cutter for large, cut centers from half of the rounds to make rings. These rings will become the sides of the vols-au-vent, while the solid disks will be the bottoms. You can either save the center cut-outs to bake off as little “caps” for you vols-au-vent, or put them in the scrap pile.

Dock the solid bottom rounds with a fork (prick them lightly, making sure not to go all the way through the pastry) and lightly brush them with egg wash. Place the rings directly on top of the bottom rounds and very lightly press them to adhere. Brush the top rings lightly with egg wash, trying not to drip any down the sides (which may inhibit rise). I used my finger tip to egg wash the rings, this gave me better control than a brush & prevented drips. If you are using the little “caps,” dock and egg wash them as well.

Refrigerate the assembled vols-au-vent on the lined baking sheet while you pre-heat the oven to 400ºF (200ºC). (You could also cover and refrigerate them for a few hours at this point.)

Once the oven is heated, remove the sheet from the refrigerator and place a silicon baking mat (preferred because of its weight) or another sheet of parchment over top of the shells. I used a silicon baking pad to do this & it actually stuck to the top layer of my vols-au-vent making it really hard to remove. I also don't think it helped give me an even rise. This will help them rise evenly. Bake the shells until they have risen and begin to brown, about 10-15 minutes depending on their size. Reduce the oven temperature to 350ºF (180ºC), and remove the silicon mat or parchment sheet from the top of the vols-au-vent. If the centers have risen up inside the vols-au-vent, you can gently press them down. Continue baking (with no sheet on top) until the layers are golden, about 15-20 minutes more. (If you are baking the center “caps” they will likely be finished well ahead of the shells, so keep an eye on them and remove them from the oven when browned.) My caps cooked the exact same amount of time as my shells.

Remove to a rack to cool. Cool to room temperature for cold fillings or to warm for hot fillings. Fill and serve.

*Shaped, unbaked vols-au-vent can be wrapped and frozen for up to a month (bake from frozen, egg-washing them first).

If you are not reading this post in a feed reader or at http://agoodappetite.blogspot.com OR at http://agoodappetite.com then the site you are reading is illegally publishing copyrighted material. Contact me at katbaro AT yahoo DOT COM. All recipes, text and photographs in this post are the original creations & property of the author unless otherwise noted.
© 2007-2009 Kathy Lewinski
Related Posts with Thumbnails

Get Email Updates!

Enter your email address:

Delivered by FeedBurner

Measurement Abbreviations

T = Tablespoon
t = teaspoon
c = cup
lb = pound
oz - ounce

Labels

Blog Archive

Contributors

Blog Directory for Minneapolis, Minnesota