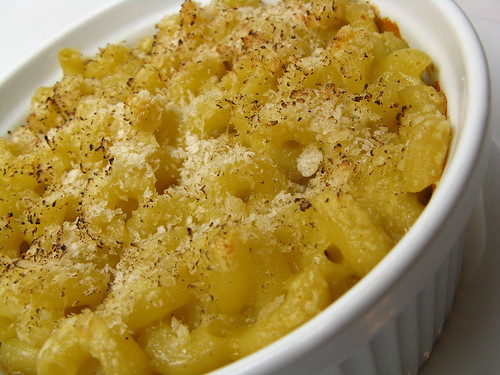
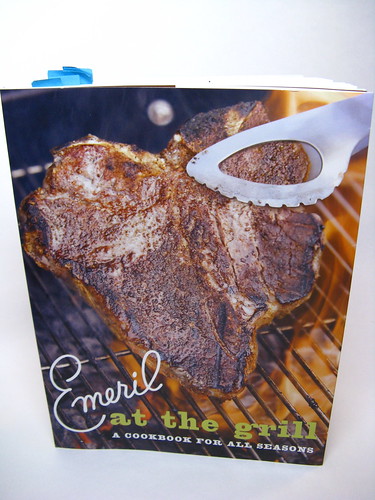
Recently, we were sent a copy of Emeril Lagasse's newest cookbook Emeril at the Grill: A Cookbook for All Seasons. So, we've decided to test & write about various recipes from it for the next week or so.
Matt started going through it immediately & marking recipes he wanted to try (as you can tell by the little blue post-its). I was drawn to the really interesting side dishes in the book as I'm always looking for new side dishes especially for summer. We were both impressed by the amount of different ethnic dishes included as well. Since it's finally starting to warm up here in MN the timing on getting this book was perfect for us as we were itching to try new things on the grill.
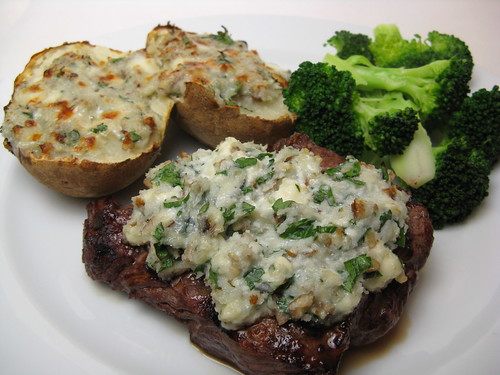
The first dish we tried was Buffalo Rib-Eyes with A Blue Cheese Glaçage. Our local store didn't have buffalo rib-eye so we went with a really nice beef rib-eye but really the star here was the glaçage. We loved how you cooked it right on top of the steak on the grill. The crunchy pecans are a great unexpected ingredient. We made a full batch which was more than needed for our two small steaks so Matt put the rest on the top of his baked potato & said it was amazing.
Blue Cheese Glaçage
(from Emeril at the Grill)
4 oz blue cheese, crumbled
1/4 c buttermilk
1/4/ c panko breadcrumbs
2 T pecans, chopped
1 T fresh thyme, chopped
1 T fresh parsley, chopped
salt & pepper
Stir blue cheese, buttermilk, panko, pecans, thyme & parsley together until well combined. Season with salt & pepper to taste.
To use on a steak: After grilling steaks on first side, flip over. Place several tablespoons of the glaçage on top of each steak & continue grilling until finished.
To use on a backed potato: Bake potato until done, about 45 minutes. Cut potato in half & fluff flesh with a fork. Spoon glaçage over the top. Place in the broiler for about 3 minutes until the cheese is melted & slightly browned.
Thursday, April 30, 2009
Monday, April 27, 2009
Weekly Menu 4/27 - 5/2/09
This is a big birthday week for us so there are few meals out planned. Thursday we'll be going out for pizza to celebrate my cousin Max's 10th birthday. Matt's birthday is Saturday & we'll be heading to Craftsman in Mpls. Sunday is my birthday (yes, we are a day apart) & the plan is to smoke a turkey breast on the grill using our new rotisserie.
On to Menu Planning Monday...
We are trying out recipes from a new grilling cookbook that we'll tell you about later in the week....
Steak with Blue Cheese Glaçage
Bánh Mi
Grilled Sausage with Bacon Potato Salad
Chicken Paillards with Grilled Sweet Potato Salad
Pasta with Bacon, Leeks & Mushrooms - by request from my dad after seeing this post.
Daring Bakers - Cheesecake
The April 2009 challenge is hosted by Jenny from Jenny Bakes. She has chosen Abbey's Infamous Cheesecake as the challenge. The challenge was to take the basic cheesecake recipe & mix it up with different flavorings, crusts, etc...
Believe it or not I don't think I've ever made a cheesecake before so this was a fun challenge for me. It was certainly not too hard but it was great to get to make something new. I asked Matt what flavor he liked & he suggested chocolate. He also suggested using the Ginger Shortbread we had received from The Ginger People for the crust.
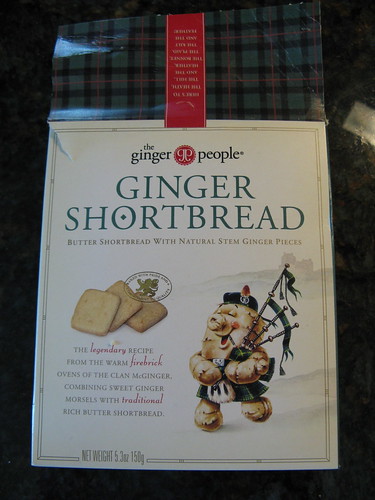
This was a great idea. The flavor combination of the chocolate & ginger was really tasty. The ginger in the shortbread really stood out. I was afraid the shortbread wouldn't work great as a crust because it already has so much butter in it but it actually came out perfectly. It seemed to bond together in baking to create an almost cookie-like crust. I used melted bittersweet chocolate to flavor the filling & just a little was enough to add a deep chocolate flavor. To knock the chocolate content up even a little more the whole thing was topped with a chocolate fudge sauce. This was one rich cheesecake!
I made half of the original recipe which was perfect to fill my two 4.5 inch springform pans. I cut the baking time down to 30 minutes.
Abbey's Infamous Cheesecake (Chocolate Ginger Version)
(this is the measurements for the full-sized cheesecake)
crust:
2 cups / 180 g ginger shortbread
1 stick / 4 oz butter, melted
2 tbsp. / 24 g sugar
1 tsp. vanilla extract
cheesecake:
3 sticks of cream cheese, 8 oz each (total of 24 oz) room temperature
1 cup / 210 g sugar
3 large eggs
1 cup / 8 oz heavy cream
1 tbsp. vanilla extract (or the innards of a vanilla bean)
3 oz bittersweet chocolate, melted
DIRECTIONS:
1. Preheat oven to 350 degrees F (Gas Mark 4 = 180C = Moderate heat). Begin to boil a large pot of water for the water bath.
2. Mix together the crust ingredients and press into your preferred pan. You can press the crust just into the bottom, or up the sides of the pan too - baker's choice. Set crust aside.
3. Combine cream cheese and sugar in the bowl of a stand-mixer (or in a large bowl if using a hand-mixer) and cream together until smooth. Add eggs, one at a time, fully incorporating each before adding the next. Make sure to scrape down the bowl in between each egg. Add heavy cream, vanilla and melted chocolate and blend until smooth and creamy.
4. Pour batter into prepared crust and tap the pan on the counter a few times to bring all air bubbles to the surface. Place pan into a larger pan and pour boiling water into the larger pan until halfway up the side of the cheesecake pan. If cheesecake pan is not airtight, cover bottom securely with foil before adding water.
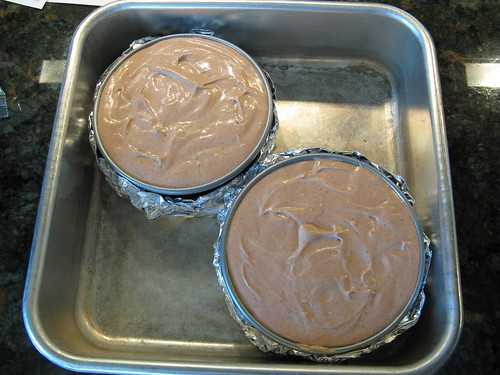
5. Bake 45 to 55 minutes, until it is almost done - this can be hard to judge, but you're looking for the cake to hold together, but still have a lot of jiggle to it in the center. You don't want it to be completely firm at this stage. (This was really hard to judge!)
Close the oven door, turn the heat off, and let rest in the cooling oven for one hour. This lets the cake finish cooking and cool down gently enough so that it won't crack on the top. After one hour, remove cheesecake from oven and lift carefully out of water bath. Let it finish cooling on the counter, and then cover and put in the fridge to chill. Once fully chilled, it is ready to serve. Top with fudge sauce if you wish.
Pan note: The creator of this recipe used to use a springform pan, but no matter how well she wrapped the thing in tin foil, water would always seep in and make the crust soggy. Now she uses one of those 1-use foil "casserole" shaped pans from the grocery store. They're 8 or 9 inches wide and really deep, and best of all, water-tight. When it comes time to serve, just cut the foil away.
Prep notes: While the actual making of this cheesecake is a minimal time commitment, it does need to bake for almost an hour, cool in the oven for an hour, and chill overnight before it is served. Please plan accordingly!
Friday, April 24, 2009
Pomegranate Barbecued Ribs
We are having an early taste of summer with 80 degree temperatures in Mpls so that calls for cooking up some of my Dad's Memphis Ribs.
I've become addicted to POM pomegranate juice since they sent me some so I decided to make a barbecue sauce for the ribs out of it. I also used the juice to steam the ribs in for 1 hour of the cooking. These ribs came out so wonderful. Sweet & tangy just like I like my barbecue. The sauce caramelized really nicely on the grill making for a perfect sticky, lick your fingers coating. The sauce tasted quite spicy to me before it had been cooked on the ribs after grilling it was very mild so adjust the amount of hot sauce to your preference.
Pomegranate Barbecue Sauce
1 c POM Pomegranate Juice
1/4 c ketchup
1/4 c honey
1 T ground ginger
1 T hot sauce (more or less to taste)
1 T balsamic vinegar
Put all ingredients in a small saucepan & bring to a boil. Boil, stirring occasionally, until thickened. Cool & store in the refrigerator until ready to use.
Makes about 3/4 c
Thursday, April 23, 2009
Moroccan Chicken with Lemon and Olives
Oh my gosh, was this one fabulous dinner. The lemon & olives brought this tang to the dish that mixed so well with the spices & really gave it a punch that pushed it over the edge to fantastic. And the smell, to die for!
To make it even better it comes together in a snap! Pretty much one hour from start to finish. It's the type of dish that would work perfectly if you were having guests over for dinner after work. Not much fuss but definitely impressive.
Moroccan Chicken with Lemon & Olives
(adapted from Bon Appetite May '09 for number of servings)
1 lemon
1/2 T olive oil
1 medium onion, cut in half & then sliced thin
salt & pepper
1 garlic clove, pressed
1/2 T paprika
1 t cumin
1/2 t cinnamon
1/2 t ground ginger
1 c chicken broth
4 chicken thighs, on the bone with skin removed
10 green olives (we couldn't find any that were pitted without a filling so we bought some stuffed with almonds & actually liked that addition)
Slice the lemon in half. Cut one half into 4 wedges. Squeeze the juice from the other half. Set juice & wedges aside.
In a skillet heat the oil over medium-high heat. Add the onions & season with salt & pepper. Sauté until golden brown. Stir in the garlic paprika, cumin, cinnamon & ginger & cook while stirring for 1 minute. Add the chicken broth & bring to a boil. Add the chicken thighs & lemon wedges. Cover & reduce heat to medium-low. Let simmer for 30 minutes, turning the chicken from time to time.
Remove the chicken to a plate. Add the lemon juice & olives to the skillet. Turn the heat to high & let boil for about 5 minutes until slightly thickened.
Serve the sauce over the chicken. We served the chicken & sauce over basmati rice.
Serves 2
Wednesday, April 22, 2009
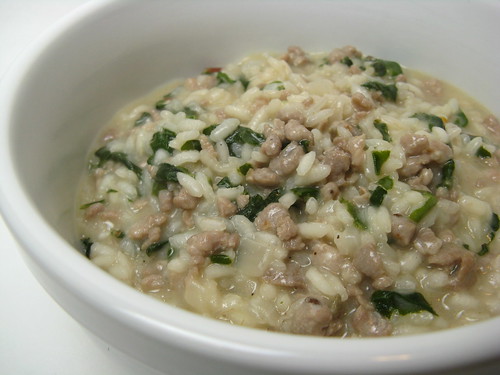
Risotto with Sausage and Greens
Matt marked this risotto recipe in the latest issue of Bon Appetite, as he said its risotto & sausage together, what's not to love. Risotto is one of those dishes I make typically without a recipe just changing the items in it based on what I have on hand. I found this recipe interesting because it didn't have you keep the stock warm as you added it to the rice. I always thought you had to keep the stock at the same temperature as rice but if this worked it would save me from dirtying another pan.
It did work. I think maybe it took slightly longer for the rice to absorb the stock but maybe just 5 minutes or so so not a big deal. So, that basically makes this dish a one pot meal & I'm all for that being the one who does the dishes. The best thing is the final result was really delicious. I do feel that the greens were really lost in the dish though, next time I'd add a little more & I would put them in a little later in the cooking process.
Risotto with Sausage & Greens
(adapted from Bon Appetite May '09)
6-oz Swiss chard, stem removed & leaves chopped to about 1-inch (I actually think this could be doubled)
1/2 T unsalted butter
1/2 T olive oil
1 small onion, chopped
1 garlic clove, minced
6-oz bulk Italian sausage
3/4 c arborio rice
1/2 c white wine
2 1/2 c chicken stock or broth
6 T grated parmesan
salt & pepper
Blanch the chard in boiling water for 1 minute. Drain & set aside.
In a large sauce pan heat 1/2 tablespoon of butter & the olive oil over medium heat. Add the onion & garlic, cook until the onion is translucent. Add the sauce & cook until browned about 3 minutes. Add the rice & stir for 1 minute. Pour in the wine & cook while stirring until absorbed. Add 1/2 cup of the stock & cook while stirring until absorbed. Add the rest of the broth 1/4 cup at a time, adding the next addition only after the previous one has been absorbed, about 25 - 30 minutes total. If you want the greens to be really soft & cooked in add them on about 10 minutes into cooking, if you prefer them to have a little more texture add them closer to the end of the cooking time. Stir in the cheese & season with salt & pepper.
2 servings
Tuesday, April 21, 2009
Smoked Sweet Potatoes
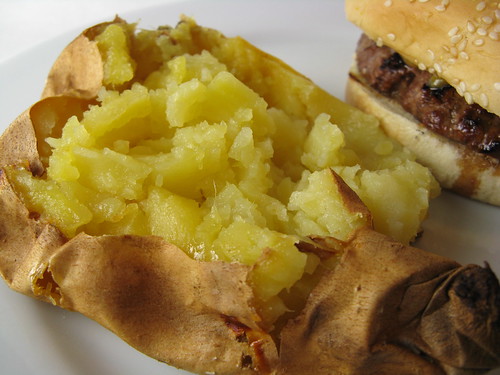
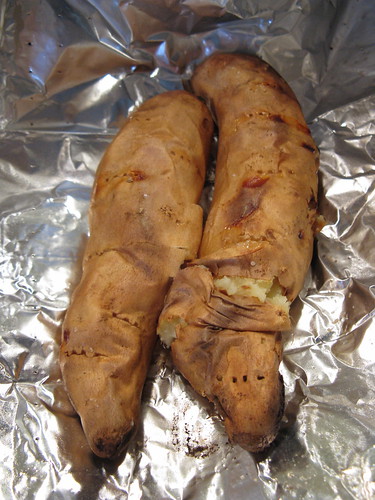
Ok, so I just had to tell you all about this side dish that Matt came up with over the weekend. There really isn't that much to it but the flavor was amazing. We decided to grill burgers on Saturday because it was so nice & I suggested sweet potatoes as a side. We usually make sweet potato fries or just bake them but Matt said why not try smoking them. I was up for trying something new so, I told him to go for it.
We washed the potatoes, pricked them a few time with a fork & coated them with a little olive oil & salt. Then we put them into a Smoker Bag. (We'd bought a bunch of smoker bags when we lived in an apartment & had no place to grill outside. They really give food a great smoky flavor & can be used in the oven or on a grill, though I found they really make your house smell like a smoker when you use them in the oven.) Then we put the bag on a grill that was about 375 - 400 F. We let the potatoes cook for about 45 minutes. The time will vary with the size of your potatoes & heat of the grill but should be the same as it would be to bake them in the oven.
The final result was perfectly done sweet potato with the skin just slightly crisp & a little caramelized in some spots with a fluffy flesh. They were sweet & creamy with a rich smokiness. They tasted so amazing we didn't even need to add any butter to them at all, which says a lot because I love butter on all potatoes. We used Jersey Sweets (light yellow flesh) for our potatoes because we prefer them over Yams (orange flesh) but I'm sure either would work. I want to try these on the grill again this summer using a smoker box instead of the bag to see if we get as intense a smoky flavor.
Monday, April 20, 2009
Weekly Menu 4/20 - 4/26/09 & a Big Pig Lunch
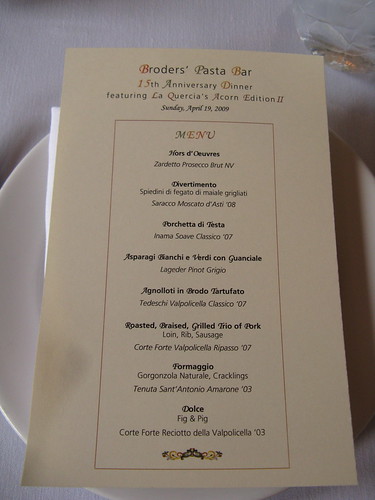
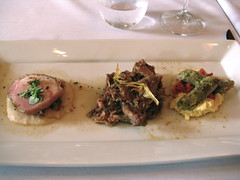
I have to tell you all a little about an amazing meal Matt & I got to experience yesterday. It was the 15th Anniversary Dinner for Broder's Pasta Bar here in Minneapolis. Each of the eight courses featured part of a La Quercia Acorn Fed Pig.
Sixty-six people, including Broder's each subscribed last year for one "pig's worth" of meat. La Quercia in Iowa organically raises the herd of Berkshire & Berkshire/Chester White Pigs feeding them only acorns for the last three months of their lives, as they do in Italy and Spain. Subscribers get the cuts of pig that are best eaten fresh first & then cured bits come on throughout the next two years. Our meal featured lots of different parts of the pig including many we had never had before.
We started with some passed appetizers featuring coppa, lardo & more
A lollypop of grilled pork liver. The sauce here was amazing.
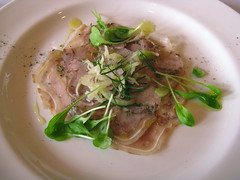
Porchetta Di Testa - pig's head that is boned out then marinated for 2 days with rosemary and garlic rolled and tied then braised for 14 hours in a sous vide bag at 200 degrees to keep it all together. Thought I'd be squeamish about this but it was really tasty with the fennel & greens.
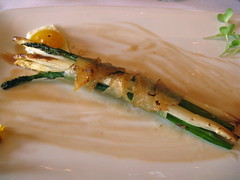
Green & white asparagus wrapped in Guanciale, an unsmoked Italian bacon prepared with pig's jowl or cheeks, served with a sunnyside up quail's egg. This was amazing & might have been my favorite course.
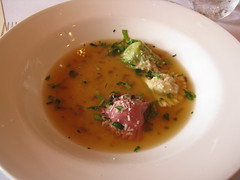
A pork & truffle broth with agnolloti filled with pork & chicken (I think there might have been a third meat too but I wasn't taking notes.)
Roasted Loin, Braised Rib & Grilled Sausage. An amazing trio for the entree here. The pork loin was so wonderful & we loved the pistachios in the sausage.
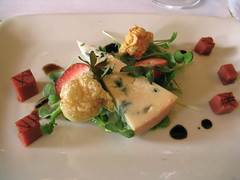
The cheese course featured a natural gorgonzola served with a strawberry gelatin & cracklings. The gelatin went so well with this cheese!
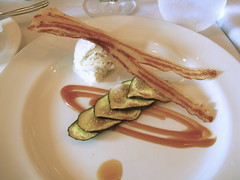
Our last course was the Fig & Pig. Oh, that crisp bacon with the vanilla bean ice creams was sooooo good!
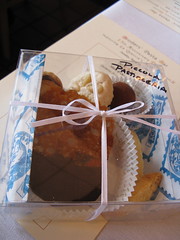
Finally, we were given a box of cookies & chocolate made by Molly Border to take home with us.
What an amazing way to spend a chilly, rainy Sunday afternoon, especially when each course was paired with a great Italian wine. Boy, is my weekly menu going to look pale in comparison.
Oh well, on to Menu Planning Monday anyway...
Risotto with Sausage & Mustard Greens - Was supposed to make this last week but it was so nice we grilled burgers.
Moroccan Chicken with Olives & Lemon
Pork Ribs with Pomegrate BBQ Sauce & Potatoes Au Gratin
Chicken & Corn Chowder
Vietnamese BBQed Pork & Noodles
Crockpot Shredded Beef
Saturday, April 18, 2009
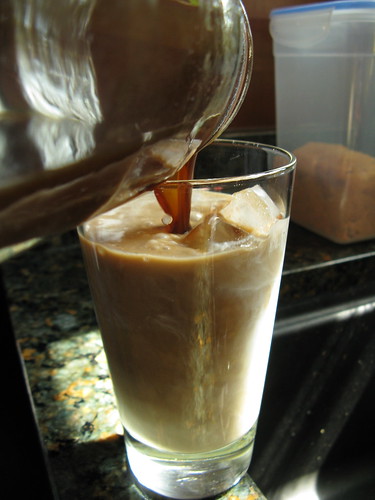
Cold Brewed Coffee
With the weather getting warmer Matt is craving iced coffee. We recently got a sample of Starbuck's new Via instant coffee in the mail to try. Matt really liked it for making iced coffee but its rather pricy & not for sale yet in Minneapolis. So, he looked for another option.
What he came up with was cold brew coffee. Sure, its not as immediate at using an instant coffee but he's able to use our favorite decaf French roast to make it. Plus cold brewing makes for a very smooth cup of iced coffee without bitterness.
This was our first experience with it & it came out really good. We started by putting 5 scoops of ground coffee in a jar (I think 4 would have been enough) & then added about 1 1/2 - 2 cups cold water. Let sit in the fridge for about 12 hours. Strain to remove the coffee grounds (Matt did this by putting a little cheese cloth over the mouth of the jar & then pouring it through). This makes a strong coffee mixture. Serve over ice & dilute with some water or milk to taste (Matt adds some hazelnut syrup too). This will make about 1 large serving.
Friday, April 17, 2009
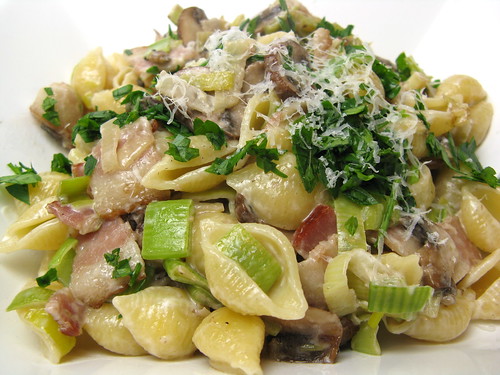
Pasta with Bacon, Leeks & Mushrooms
Lately at lunchtime we've been watching tivoed episodes of Gordon Ramsay's The "f" Word (I so prefer this to any of the other shows he does. He's much less over the top screamy.) Last week he was teaching two Olympic runners how to make quick pasta dishes. They all looked good but we were especially drawn to one featuring pancetta, leeks & mushrooms. The next morning I had this email in my inbox.
This is Matt's way of helping me remember things or give suggestions for the weekly menu. Anyway, this dish was a total winner. Super simple so perfect for a busy night & really full of flavor. Adding the creme fraiche at the end makes for a nice creamy sauce with a slight tang.
We substituted bacon for the pancetta because we had some in the fridge. I don't think it made a big difference & well you know how much we like bacon...
Pasta with Bacon, Leeks & Mushrooms
6-oz medium pasta shells
1 T olive oil
2 slices bacon, roughly chopped
2 leeks, white & light green sections sliced thin
1 1/2 c mushrooms, trimmed & sliced
salt & pepper
2 T creme fraiche
handful fresh flat leaf parsley, chopped
parmesan, grated
Put the pasta in to cook according to directions.
Meanwhile, heat the olive oil over medium-high heat in a skillet. Add the bacon & cook for about 2 - 3 minutes. Add the leeks & mushrooms and season with salt & pepper. Cook for 6 - 8 minutes, stirring occasionally.
Drain the pasta once it is cooked & add to the skillet. Stir in the creme fraiche. Divide into two bowls. Sprinkle with parsley & parmesan.
Serves 2
Thursday, April 16, 2009
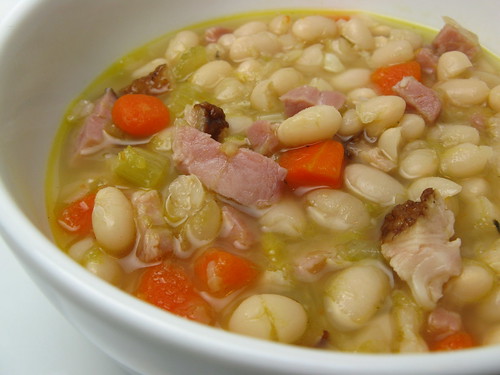
Ham & White Bean Soup
My sister sent us home with a lot of leftover Easter ham so Matt asked for ham & bean soup. He even sliced the ham up all nicely for me. Little did I know that he had sliced the ham for sandwiches & there was a bone for the soup. Oops! I guess I have the bone for another time.
Last time I made a ham & bean soup it came out too thick & I wasn't thrilled with the flavor. I was happy with how this version turned out. The broth was really flavorful with the garlic & leeks. Typically these soups have you mash some of the beans to make it thicker. I didn't do that & was much happier with the final thickness. I would even go as far as to say this soup was light for a bean soup. Things are warming up here so I hope I'm not jinxing it to say this could be the last of the cols weather soups for awhile.
Ham & White Bean Soup
1 c dry white beans (we used navy beans)
1 T olive oil
1 leek, white & light green part chopped
2 carrots, roughly chopped
2 celery ribs, chopped
2 cloves garlic, minced
2 c cooked ham, chopped
3 c chicken broth
1 bay leaf
1/2 t dried thyme
Put the beans in a pot with 3 cups water. Bring to a boil & let boil for 2 minutes. Turn off heat, cover & let sit for at least one hour. bring water to a simmer & simmer for 1/2 hour. Beans should be getting tender but not completely cooked. Drain & set aside.
In a large soup pot heat the olive oil over medium-high heat. Add the leek, carrots, celery, garlic & ham. Cook, stirring often, until the vegetables are beginning to get tender. Add the broth, bay leaf, thyme & beans. Bring to a boil. Reduce the heat, cover & simmer for 1 hour until the beans are tender.
Add more broth if needed (I needed another 1/4 c). Taste for seasoning & add salt if needed.
4 servings
Wednesday, April 15, 2009
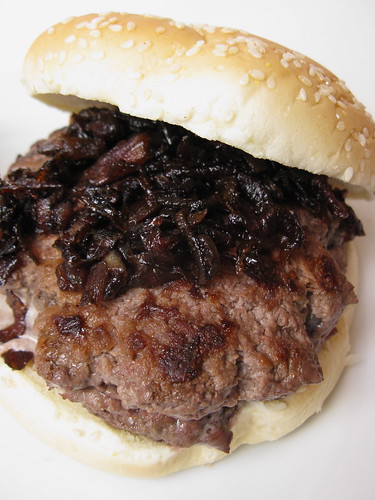
Bison Blucy with Onion Balsamic Marmalade
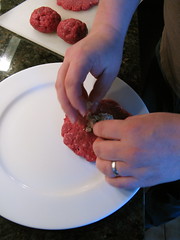
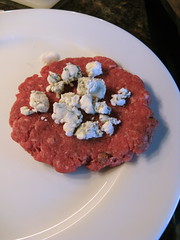
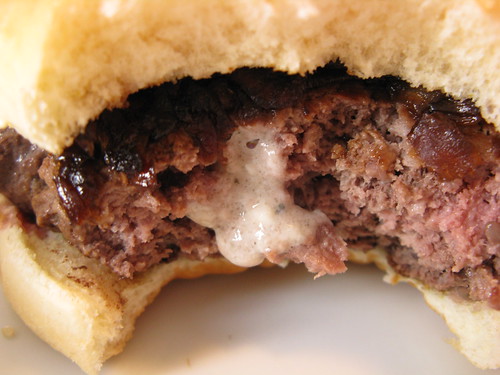
Matt saw some ground bison in the store a few weeks back & threw it in the shopping cart to try. Our first thought was to cook it very simply into burgers. Then Matt remembered the left over St. Pete's Select Blue Cheese we had & decided to make Blucys.
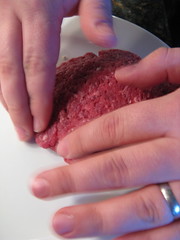
A Blucy is a thick hamburger stuffed with blue cheese. It's a take off of the Juicy Lucy, a Southwest Minneapolis specialty which features a burger stuffed with American cheese. Basically you take two patties of your ground meat & seal a layer of cheese between them. This is no small burger! But hey, bison is healthier than beef right?!
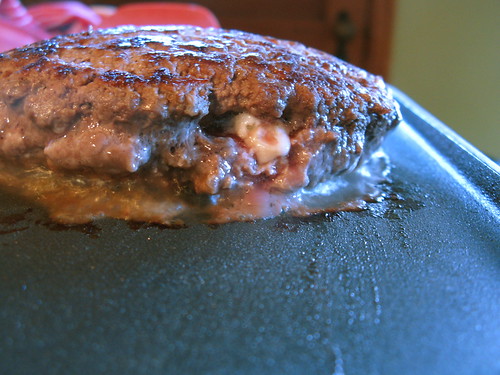
Matt seasoned our bison with onion powder, garlic powder & celery salt before making it into patties. This type of burger takes longer to cook that most so plan on about 20 minutes. Traditionally a Lucy is griddle cooked so that is what we did. I was worried the burger might be dry because bison is so lean but I was wrong, this was such a tasty juicy burger. The cheese in the middle may have helped with that.
Look at that cheese oozing from the middle!
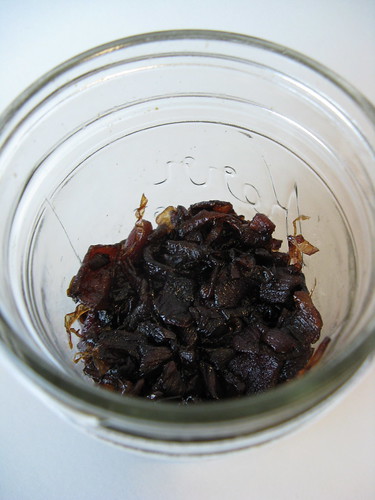
To top the burgers Matt made an Onion Balsamic Marmalade. Not exactly sure why the recipe called this a marmalade when its really just caramelized onions with balsamic added. Well, no matter what it's called it tastes fantastic. The sweetness is a perfect paring with the blue cheese & the meat. The marmalade last for awhile in the fridge so make up a batch to use on sandwiches for lunch too.
Onion Balsamic Marmalade
(adapted from 'wichcraft by Tom Colicchio)
2 c red onion, sliced thin
1 t olive oil
salt & pepper
1 T sugar
3 T balsamic vinegar
Heat the olive oil over medium heat in a skillet. Add the onion, season with salt & pepper & cook for 20 minutes stirring occasionally. Turn the heat to medium-low. Sprinkle the sugar over the onions & stir in. Cook for 10 more minutes stirring frequently. Turn the heat to low. Add the balsamic vinegar & stir. Cook for 1 hour stirring from time to time. The finished onions should be very caramelized & dry.
Can be stored in the fridge for several weeks.
Makes 1/2 - 2/3 cups.
Tuesday, April 14, 2009
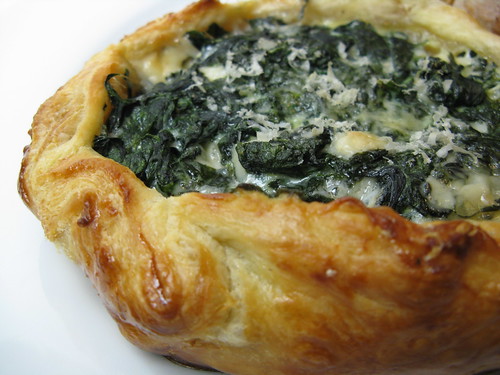
Blue & Green Tart
This tart was another way for me to use up all the blue cheese we currently have in the fridge leftover from the beer tasting we did a while back. I also had one bag of greens left in the freezer that I had blanched & frozen at the end of last summer that I wanted to use before the fresh spring greens begin arriving.
This little individual-sized tart made a great side dish. I served it with the Pork Chops with Pomegranate Balsamic Sauce but I think with the blue cheese flavor it would really shine with a nice steak. Choose a good blue cheese when you are making this because it is the flavor that really comes through here, we used St. Pete's Select from Fairbault, MN.
Blue & Green Tart
1 sheet puff pastry
1/2 c frozen greens or spinach
2 - 3 T blue cheese, crumbled
1 egg, well beaten
salt & pepper
pinch of nutmeg
parmesan
Preheat oven to 425 F.
Roll the dough out a little to just about 1/8 inch. Cut out two 6-inch circles.
Thaw the greens & squeeze out as much water as possible. Chop a little if it isn't already. Mix the blue cheese and 2 tablespoons of the egg with the greens. Season with the salt, pepper & nutmeg.
Spoon half of the greens mixture into the middle of each pastry circle leaving a 1-inch edge all around. Fold the edge up over the filling, pleating as you go. Brush the dough with the remaining beaten egg. Grated a little parmesan over the top of each tart.
Bake for 20 minutes until puffed & golden brown.
2 servings
Monday, April 13, 2009
Weekly Menu 4/13 - 4/19/09
I find this such a hard time to cook here in Minnesota. We're done with the root vegetables of fall and winter & have eaten through most of the vegetables that were frozen or canned last year. Spring vegetables are just a glimmer in our eyes at this point.
Here's our brussels sprouts, broccoli & jalapenos growing away under the grow light in the basement, far from ready to eat I'm afraid. This week we'll plant the lettuces & peas outside & the tomatoes will get started indoors. We'll start receiving our box from Harmony Valley Farm in early May so not too long before I have lovely seasonal vegetables to inspire my menus again. The excitement this week is that we'll have three days in the 60's so it's time to break out the grill.
On to Menu Planning Monday...
Ham & Bean Soup - Gotta use up that Easter ham my sister sent us home with.
Bison Blucys - Matt wants to try making burgers with the ground bison that our grocery store carries.
Bacon, Leek & Mushroom Pasta - Inspired by an episode of the "F" Word we saw last week.
Grilled Flank Steak with Garlic Beans
The secret Recipe to Rival dish
Sausage Risotto with Spring Greens - From Bon Appetite March '09
Saturday, April 11, 2009
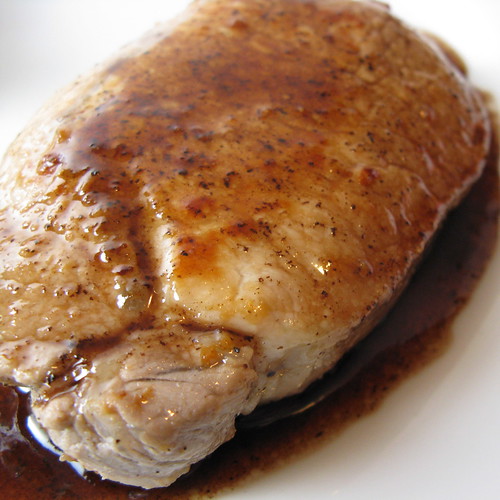
Pork Chops with Pomegranate Balsamic Sauce
We had some pork chops in the freezer that needed to be used but I wasn't sure what to do with them. Then I saw the last bottle of POM pomegranate juice in the fridge & thought it would make a great sauce for pork.
(No matter what I tried I couldn't get a good photo of this pork chop.)
The brining of the chops takes a little time but otherwise this dish is really quick to put together. The sauce had a great sweet & tart flavor that complimented the pork really well. The brine doesn't add a ton of flavor but it certainly keeps the pork chops juicy, something that has been problem for us in the past.
Pork Chops with Pomegranate Balsamic Sauce
2 T brown sugar
2 T kosher salt
1/4 c sherry vinegar
1 1/2 c cold water
pepper
2 boneless pork chops, about 3/4-inch thick
2 1/2 T unsalted butter
1 T sugar
2 T balsamic vinegar
1/4 c pomegranate juice
In the morning you are planning to cook the pork chop put the brown sugar, salt, sherry vinegar, water & a good grind of fresh pepper in a resealable plastic bag. Massage a bit to dissolve the sugar & salt. Add the pork chops & seal the bag getting out as much air as possible. Place in a bowl incase of leaks & put in the refrigerator for about 8 hours turning from time to time.
Remove the pork chops from the brine, rinse with cold water & pat dry. Pepper both sides (Do not add more salt as the brine will have added plenty.) Melt 2 tablespoons of butter in a skillet over medium heat. Add the pork chops & cook for about 6 minutes per side, basting with the butter occasionally.
When the pork is done remove it to a plate & tent with foil to keep it warm. Add the sugar, balsamic vinegar & pomegranate juice to the hot skillet. Stir & bring to a boil. Keep stirring until thick. Whisk in the last 1/2 tablespoon of butter.
Serve the sauce over the chops.
2 servings
Have a fantastic holiday weekend everyone!
Friday, April 10, 2009
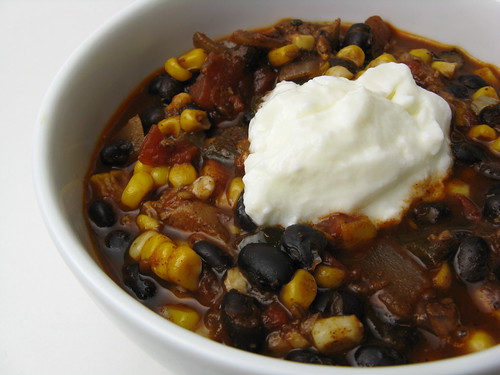
Chicken, Black Bean & Corn Chili
This might be my favorite of all the chilies we've ever made. That's saying a lot because we make chili quite often in the winter & Matt really has a way with it.
This chili just has lots of flavor without being hot (of course Matt added hot sauce to his bowl). I've never used poblano chiles before but I really loved its mild taste. For the corn we used MN sweet corn that I had frozen when it was in season last year. Really, it had the most incredible sweetness & crispness that played well with the other more savory seasonings.
You can serve this chili with any of your favorite toppings. Matt liked it with some mild grated cheese, like Monterey Jack. I liked it with a scoop of plain yogurt (my substitute for sour cream) because it added just a touch of tartness.
Chicken, Black Bean & Corn Chili
1 c dried black beans
2 T olive oil
1 T cumin seeds
2 T chili powder
1 large onion, chopped
2 cloves garlic, minced
1 poblano chile, seeded & chopped
2 T tomato paste
20-oz canned fired roasted diced tomatoes (not really exact we used about a can & a half because we had some leftovers. You could just use one can & add more chicken broth if the chili seems dry)
2 c cooked chicken, chopped
2 c chicken broth
1 c fresh or frozen corn
Put the beans & 3 cups water in a saucepan & bring to a boil. Boil for 2 minutes. Remove from heat, cover & let sit for 1 hour. Bring back to a boil, cover, reduce heat & simmer for 1 hour or until beans are almost tender. Add more water if needed during simmering. Drain & set aside.
In a large soup pot or Dutch oven heat the olive oil over medium-high heat. Add the cumin seeds & chili powder. Cook while stirring for about a minute. Add the onion, garlic & poblano & cook until the onion is translucent. Add the tomato paste & stir for about a minute. Add the beans, tomatoes, chicken & chicken broth. Bring to a boil. Turn the heat down to simmer & allow to cook for 30 minutes.
Stir in the corn & cooked until the corn is hot. Serve with your favorite chili toppings.
5 - 6 servings
Thursday, April 9, 2009
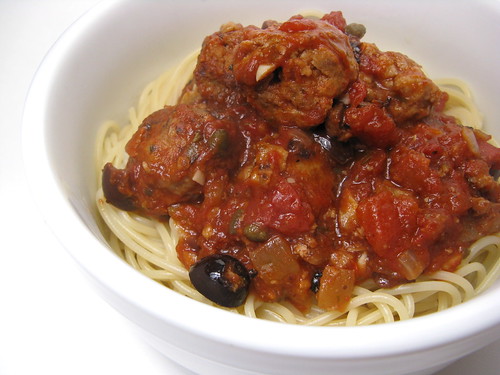
Spaghetti with Tomato & Olive Sauce
We need a quick meal on Wednesday nights because Matt has a Twin Cities Makers meeting in the evening. This week we decided to use some of the meatballs we had frozen for spaghetti & meatballs.
Matt suggested he make a sauce rather than just buy something in a jar. He wanted to add a little extra flavor to the sauce so he picked up some Kalamata olives at the deli. I suggested we add some of the capers we've had sitting unopen in the pantry to up that briney flavor. I wish we could have used fresh tomatoes but it way too early here in MN so we used the best canned ones we know, Muir Glen fire roasted. This sauce had a really wonderful flavor & was a nice switch from a plain tomato sauce.
We used meatballs in this dish because we had them on hand. We browned them & then let them cook in the sauce as it was simmering. The sauce does not need the meatballs at all though.
Tomato & Olive Sauce
1 T olive oil
12 Kalamata olives, pitted & rough chopped
1 small onion, chopped
2 cloves garlic, chopped
1 t dried oregano
1 T red wine vinegar
1 14-oz can crushed fire roasted tomatoes
1 T capers
1 t sugar
Heat olive oil over medium-high heat. Add the olives, onions & garlic. Sauté until the onion is translucent. Stir in red wine vinegar & oregano. Add the tomatoes, capers & sugar. Stir. Cover & simmer for 30 minutes.
2 servings
Wednesday, April 8, 2009
Indian Pizza
This is not a new dish for us but I thought it was worth reposting, plus we've made a few changes to it.
Matt started with our favorite pizza dough recipe from Wisebread. This time he replaced 1/3 of the all-purpose flour with whole wheat flour. He added a large pinch of garam masala & another of garlic powder to flavor the crust. This created a nice crisp crust though we felt it could use a bit more salt.
For the sauce he used this Indian BBQ Sauce from Bon Appétit. Then he added some grated Monterey Jack, I would have preferred Fontina but the grocery store only had a very expensive one on hand. On top of the cheese, Matt piled some juilienned carrots, sliced zucchini, chopped scallions & some leftover chicken cut into chunks. Such a tasty, different take on pizza.
Tuesday, April 7, 2009
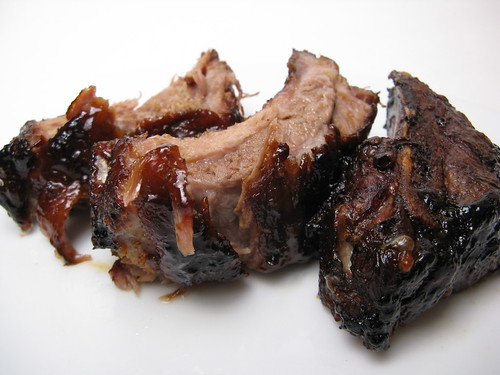
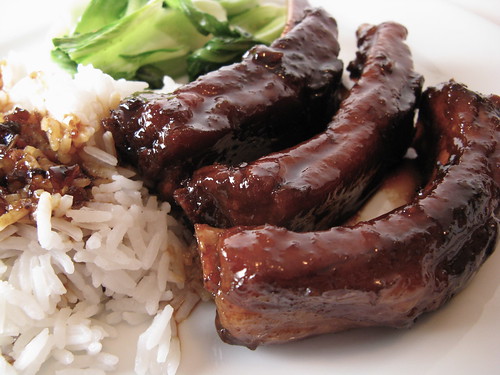
Chinese Braised Pork Ribs
Last week Allen at Eating Out Loud posted some amazing looking Chinese Braised Spare Ribs & I knew we had to try them. Well, it just so happened I had half a rack of pork ribs in the freezer that needed to be used so they went on this week's menu.
These ribs were amazing! The braising made them fall off the bone tender. The sauce was the perfect balance of sweet & salty & wonderfully lick your fingers sticky. Allen said he felt his ribs turned out good but not great. He mentioned that maybe the sauce needed some hoisin so I added it to my version. We thought it was so good we spooned it over our rice too. Allen used Chinese-style ribs to make his & we just used some baby backs, which worked perfectly. I think the baby back ribs were less fatty as Allen said he skimmed 1/2 c of fat off his sauce at the end & we didn't skim any off of ours.
Chinese Braised Pork Ribs
(adapted slightly from Eating Out Loud)
1 rack baby back ribs, about 2 - 2 1/2 lbs
2 T canola oil
1/2 c soy sauce
1 c sweetened rice wine (we find this in the Asian section of the grocery store)
1/4 c hoisin sauce
1/4 t red pepper flakes
2 cloves garlic, minced
1 T fresh ginger, peeled & minced
2 T honey
Cut the rack of ribs into separate ribs. Heat the oil over medium-high heat in a dutch oven. Add the ribs & brown on all sides, about 5 minutes.
Add the remaining ingredients & bring to a boil. Cover, reduce heat & simmer for 45 minutes, stirring from time to time.
Remove lid & let boil gently until the sauce is thickened & coating the ribs, 15 - 20 minutes.
Serves 3 -4 (depending on how many ribs you serve per person.)
We served our ribs with rice & a side of baby bok choy sautéed in a little sesame oil.
Monday, April 6, 2009
Weekly Menu 4/6 - 4/10/09
A lot of people commented they were interested in the Ham, Gruyere & Fig Panini I had on last week's menu. It's actually super simple, a few slices of prosciutto (though any sliced ham will work), top that with a few thin sliced of gruyere & then the thing that makes the whole thing for me, fig spread. Put that all on a good roll, brush with some olive oil & you are ready to cook it on your panini grill of choice.
I adore this fig spread. It's great on cheese & crackers & also on my sandwich for lunch. We can't easily get fresh figs here in MN so this is the next best thing.
On to Menu Planning Monday....
We roasted a chicken on Sunday for dinner so we'll get two more dinner out of it this week plus some chicken salad for lunch, what a deal.
Chinese Braised Ribs - Gonna play a bit with this recipe on Eating Out Loud
Indian Pizza - Using this sauce & some leftover chicken
Pork Chops with Individual Blue Cheese & Greens Tarts
Chicken, Black Bean & Corn Chili - Using more of the leftover roast chicken
Spaghetti & Meatballs with a Tomato Olive Sauce
I'm tried of waiting for spring so this weekend we planted a window sill herb garden for our kitchen.
We needed small planter & couldn't find anything small enough at the garden store. A quick trip to the kitchen section of IKEA provided us with lots of options though. We ended up going with these black ceramic cups, since they don't have drainage holes with added a good inch of small stones to the bottom of each. Right now I have thyme, rosemary & opal basil growing. I'll add some chive but we are currently starting it from seeds in our little greenhouse set up.
Saturday, April 4, 2009
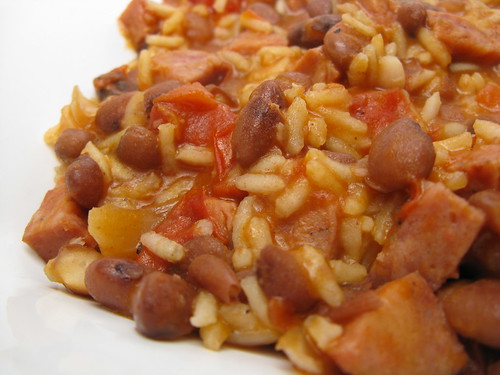
Sausage, Rice & Beans for One
This is another dinner inspired by a leftover. We had some wonderful Polish & Ukrainian sausage from an amazing Eastern European deli in Northeast Minneapolis, Kramarczuk's, at our beer tasting this weekend. There were a few sliced left so Matt suggested I use them to make beans & rice for myself this week.
I typically would have let the beans cook with the rice in a recipe like this but it seems so often my dried beans are not getting tender enough in time & I end up overcooking the rest of the food. This time I cooked the beans to tender & then just added them in at the end so they had the perfect texture. You could stop cooking the beans a little earlier than I did & add them in with the rice to finish them off. If you do that I would add a little more broth.
Sausage, Rice & Beans
Put the dried beans in a pan with 3/4 c water & bring to a boil. Let boil for two minutes. Remove from heat & cover. Let sit for 1 hour. Bring to a simmer & simmer gently for 60 - 90 minutes until tender, adding more water if needed. Drain & set aside.
I typically would have let the beans cook with the rice in a recipe like this but it seems so often my dried beans are not getting tender enough in time & I end up overcooking the rest of the food. This time I cooked the beans to tender & then just added them in at the end so they had the perfect texture. You could stop cooking the beans a little earlier than I did & add them in with the rice to finish them off. If you do that I would add a little more broth.
Sausage, Rice & Beans
1/4 c dried red beans
1/2 T olive oil
1/4 c red onion, diced
1 clove garlic, minced
2 T chopped red onion
1/2 c link sausage, diced (I used a good garlicy Polish)
1/2 T tomato paste
pinch of smoked paprika
pinch of chipotle powder
1/2 c of diced fire roasted tomatoes
1/4 c basmati rice
1/2 c chicken stock
salt & pepper
In a medium saucepan heat the olive oil over medium-high heat. Add the onion, garlic & sausage and cook until the onion begins to get translucent. Stir in the tomato paste, paprika & chipotle powder, cook for about a minute. Add the tomatoes, rice & chicken stock & bring to a boil. Reduce heat & cover. Allow to simmer for about 20 minutes or until rice is tender. Add the beans & heat through, adding more broth if its a little dry.
1 serving
If you are not reading this post in a feed reader or at http://agoodappetite.blogspot.com OR at http://agoodappetite.com then the site you are reading is illegally publishing copyrighted material. Contact me at katbaro AT yahoo DOT COM. All recipes, text and photographs in this post are the original creations & property of the author unless otherwise noted.
© 2007-2009 Kathy Lewinski
Friday, April 3, 2009
Mac & Blue Cheese for One
I had a bunch of wonderful blue cheese, St. Pete's Select from Fairbault, MN, leftover from last weekend's beer tasting so I decided to make myself some Mac & Blue Cheese with it. Blue Cheese really dresses up a basic mac & cheese by adding a sharp, tangy flavor. I would have liked to have put some caramelized onions in this but I didn't have any onions in the house so, I tried caramelizing some shallots. They just didn't get that same sweet flavor onions get from slow cooking so I left them out.
This is not really much different than my Grown Up Macaroni & Cheese recipe I've shared in the past but I thought it thought it was worth sharing the directions for making a single serving. I don't know about you but the times I'm eating alone are often the times I crave some good comfort food.
Mac & Blue Cheese for One
3 oz. elbow macaroni, cooked & drained
1 t unsalted butter
2 t all-purpose flour
1/4 c milk
2 T half & half
1.5 oz. cheddar cheese, grated
1 oz blue cheese, grated or crumbled
pinch of dry mustard
salt & pepper
panko
Preheat oven to 350 F.
In a small saucepan melt the butter over medium-low heat. Add the flour & stir while cooking for 1 minute, do not let it brown. Slowly whisk in the milk & half & half. Stir until smooth & slightly thickened, about a minute. Turn the heat to low & add the cheese. Stir until melted. Season with the dry mustard, salt & pepper.
Mix the cheese sauce with the cooked macaroni. Spoon into a two cup ramekin. Sprinkle the top with panko. Bake for 20 - 25 minutes until the cheese is bubbly & the top is golden brown.
1 serving
If you are not reading this post in a feed reader or at http://agoodappetite.blogspot.com OR at http://agoodappetite.com then the site you are reading is illegally publishing copyrighted material. Contact me at katbaro AT yahoo DOT COM. All recipes, text and photographs in this post are the original creations & property of the author unless otherwise noted.
© 2007-2009 Kathy Lewinski
Thursday, April 2, 2009
Onion & Potato Tartes Tartin
Now, I've had dessert tartes tartin but had never even heard of a savory version until Matt pointed this one out to me in Martha Stewart's Baking Handbook. It looked amazing in the book & since we were having Steak Diane Flambé for dinner I figured it would be a perfect side dish. I even had all the ingredients on hand.
This dish is a real stunner & would be great to serve at a dinner party plus it tastes absolutely wonderful. To top it off it's actually really simple to make.
Onion & Potato Tartes Tartin
from Martha Stewart's Baking Handbook
sheet of puff pastry dough
2 T cold unsalted butter plus extra for greasing the pans
1 small onion, sliced thin
1 russet potato, sliced very thin, scant 1/4-inch
salt & pepper
2 T balsamic vinegar
pinch of sugar
Preheat oven to 425 F. Butter two 4-inch mini cake pans & set aside.
Roll the puff pastry out to a scant 1/4-inch (our's was already that thin so it didn't need any rolling). Cut out two circle of the dough big enough to fit inside the widest part of the cake pan. Prick the dough with a fork. Chill the dough circles for 30 minutes.
Layer 3 or 4 slices of onion on the bottom of each pan. Top with a layer of concentric circles of potato & season with salt & pepper. Add another layer of potatoes & salt & pepper. Top each with a puff pastry circle. Place on a baking sheet then bake for 20 minutes until the pastry is puffed & golden brown. Immediately invert the tartes onto a serving platter.
Add the balsamic vinegar & sugar to a small sauce pan. Bring to a simmer & stir until thickened into a syrup. Cut the 2 tablespoons of butter into small pieces. Whisk the pieces in a little at a time until all of it in incorporated. Brush this glaze on the top of the tartes.
Serves 2
If you are not reading this post in a feed reader or at http://agoodappetite.blogspot.com OR at http://agoodappetite.com then the site you are reading is illegally publishing copyrighted material. Contact me at katbaro AT yahoo DOT COM. All recipes, text and photographs in this post are the original creations & property of the author unless otherwise noted.
© 2007-2009 Kathy Lewinski
This dish is a real stunner & would be great to serve at a dinner party plus it tastes absolutely wonderful. To top it off it's actually really simple to make.
Onion & Potato Tartes Tartin
from Martha Stewart's Baking Handbook
sheet of puff pastry dough
2 T cold unsalted butter plus extra for greasing the pans
1 small onion, sliced thin
1 russet potato, sliced very thin, scant 1/4-inch
salt & pepper
2 T balsamic vinegar
pinch of sugar
Preheat oven to 425 F. Butter two 4-inch mini cake pans & set aside.
Roll the puff pastry out to a scant 1/4-inch (our's was already that thin so it didn't need any rolling). Cut out two circle of the dough big enough to fit inside the widest part of the cake pan. Prick the dough with a fork. Chill the dough circles for 30 minutes.
Layer 3 or 4 slices of onion on the bottom of each pan. Top with a layer of concentric circles of potato & season with salt & pepper. Add another layer of potatoes & salt & pepper. Top each with a puff pastry circle. Place on a baking sheet then bake for 20 minutes until the pastry is puffed & golden brown. Immediately invert the tartes onto a serving platter.
Add the balsamic vinegar & sugar to a small sauce pan. Bring to a simmer & stir until thickened into a syrup. Cut the 2 tablespoons of butter into small pieces. Whisk the pieces in a little at a time until all of it in incorporated. Brush this glaze on the top of the tartes.
Serves 2
© 2007-2009 Kathy Lewinski