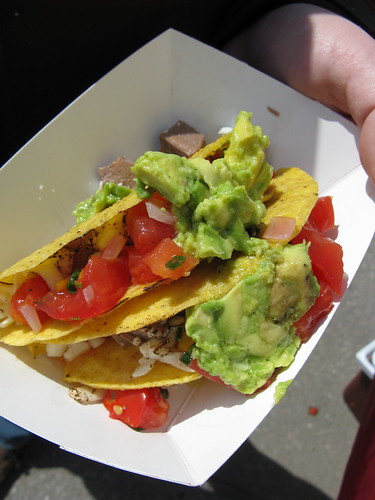
Sunday, May 31, 2009

Back from Vacation and Weekly Menu 5/31 - 6/7

We are back from a lovely week in Michigan. We went to see Matt's sister graduate but we also got to do some great foodie things as well. We picked up two big boxes of dried Michigan cherries, we'd finished our Christmas box a long time ago & needed to restock. At American Spoon we got cherry mustard, pumpkin roasting sauce & an apple & onion relish. The highlight of the trip though had to be a visit to Zingerman's Deli in Ann Arbor.
#145 - Zingerman's
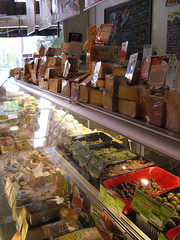
It was much smaller than I expected but every corner was full of interesting food stuffs.
Zingerman'sZingerman's
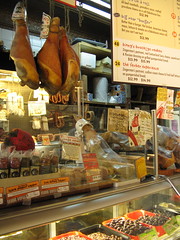
Though the real gem of this deli was the knowledgeable employees offering tastes of almost everything on the shelves. We did a balsamic vinegar tasting comparing 8, 10 & 20 year old vinegar (finally deciding to buy the 10 year). We were thrilled to see they had the cured & dried meats from an Acorn Edition II pig (the same pigs we'd enjoyed for lunch at Broder's). We couldn't resist picking up some lardo to take back & share with Matt's parents (it was perfect on some toasted Zingerman's baguette).
Zingerman'sZingerman's
They were even nice enough to provide us with an ice pack to keep it chilled on the way home. If you find yourself in Ann Arbor make sure to stop by Zigerman's, you won't be disappointed.

On to Monday Menu Planning....

Turkey Yakitori Burgers - From Real Food Magazine

Steak with Green Goddess Salad - Alice Water's dressing

Herbed Balsamic Chicken with Blue Cheese - From Bon Appetit

Grilled Fish & Asparagus - I'll see what fish is fresh in the store that day

Stir Fry - With the fresh items from that days CSA box

Smoked Cherry Stuffed Pork Lion with Cherry Mustard Sauce - Matt has been dreaming this one up with the dried cherries we got in Michigan

Spinach & Caramelized Onion Tacos

I'm also planning on finally making the Rhubarb Sorbet from Two Peas & Their Pod.

If you are not reading this post in a feed reader or at http://agoodappetite.blogspot.com OR at http://agoodappetite.com then the site you are reading is illegally publishing copyrighted material. Contact me at katbaro AT yahoo DOT COM. All recipes, text and photographs in this post are the original creations & property of the author unless otherwise noted.
© 2007-2009 Kathy Lewinski

Friday, May 29, 2009

Spicy Sunchoke Dip

On the Harmony Valley Farm CSA Yahoo Group lately people have been praising this dip from Sunset made from sunchokes. Usually I just roast my sunchokes so I was happy to find a new use.
Spicy Sunchoke Dip
I didn't have the jalapenos the recipe called for so I decided to add Siriracha instead replacing both the garlic & jalapenos. I had half a red onion in the fridge so in it went. I thought the dip was a little too spicy & needed a touch of tartness so I added some plain yogurt. The end result a spicy creamy dip that is slightly similar to hummus but with a kick.

Spicy Sunchoke Dip

12 - 16 oz sunchokes, peeled, larger ones cubes
1 1/2 T lemon juice
1 1/2 T olive oil
1/2 to 1 T Siriracha
1/2 red onion, coarsely chopped
3 heaping T plain yogurt
salt

Bring a large pot of water to a boil. Add the sunchokes & cook for 12 minutes until soft. Drain.

Add everything but the salt to a food processor. Process until smooth. Salt to taste.

Serve with tortilla chips.

about 1 1/2 cups

If you are not reading this post in a feed reader or at http://agoodappetite.blogspot.com OR at http://agoodappetite.com then the site you are reading is illegally publishing copyrighted material. Contact me at katbaro AT yahoo DOT COM. All recipes, text and photographs in this post are the original creations & property of the author unless otherwise noted.
© 2007-2009 Kathy Lewinski

Thursday, May 28, 2009

Making Farmhouse Cheddar

This is a long one folks...

After we made our own Mozzarella & Ricotta, Matt decided it was time to step our cheese making up a bit & try some firmer cheeses. First thing he did was purchase Home Cheese Making: Recipes for 75 Delicious Cheeses by Ricki Carroll. He'd done a lot of research & thought this one would suit our purposes best. Then he decided we'd start with a relatively easy cheese, Farmhouse Cheddar. If you are interested in trying this yourself I recommend getting the book but here's a little photo journal of our experience.
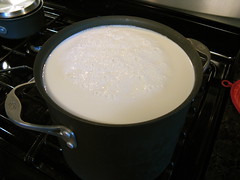
Heating the milk to 90 F
First we start with 2 gallons of whole milk which is slowly heated to 90 F. Then a starter is added. The milk is held at 90 F & sits for 45 minutes. Then rennet is stirred into the milk & it sits covered for another 45 minutes. At this point the milk will have turned to curd.
Cutting the Curd
The curd then needs to be cut. We used a long sharp knife. The curd gets cut straight in to directions & the diagonally to the bottom of the pot twice.
Bring Curd Up to 100 F in a Water Bath
Then over 30 minutes the curd is brought up to 100 F in a water bath very slowly. Then drain the water & let it sit 5 minutes.
CurdDraining the Curd
Then the curd is drained from the whey in a cheesecloth covered colander.
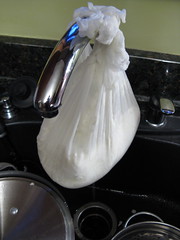
Hanging the curd to dry
The cheesecloth is tied up & hung so that the curd can drain.
Drained CurdCrumbling Curd & Adding Salt
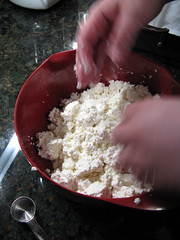
The curd is then put into a bowl & crumbled into walnut size pieces & tossed with flake salt. At this point it tastes like salty cottage cheese.
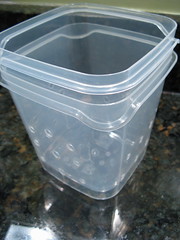
Homemade Cheese Mold
Then you need a cheese mold. Matt made ours by using two identical size plastic containers from IKEA. One container gets holes drilled into it to drain more whey.
Adding curd to the moldPressing Curd
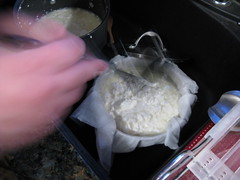
The container with the holes drilled in it is draped with cheese cloth & then filled with curds. The cheesecloth is wrapped over the top of the curds. The other container goes on top to press down on the curds.
First Curd Press about 10 lbs
Now you start pressing. Put the cheese mold into a pan to catch the draining whey. The first pressing should be about 10 lbs & last 10 minutes.
Cheese after first pressing
Remove the cheese from the mold, unwrap it from the cheesecloth. Tune it over, rewrap it & return it to the mold.
Second Press about 20 lbs
Then it gets pressed for another 10 minutes with 20 lbs. The cheese is turned over again & then pressed with 50 lbs for 12 hours at room temperature/
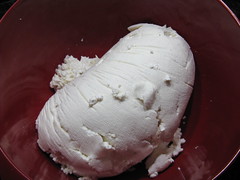
Cheese after 3rd press
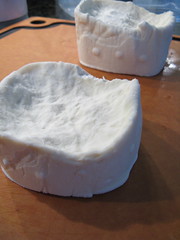
After 12 hours the cheese is removed from the mold & unwrapped. It is much firmer now & tastes a bit sour.
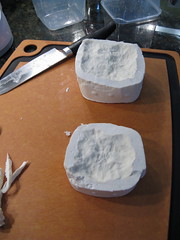
Cheese Trimmed & Ready to Ripen for 2 days
Because our plastic containers had a rounded bottom we trimmed them up a bit for a flatter surface. The cheese now sits uncovered at room temperature for 2 to 4 days to ripen & form a rind. We flipped it a couple times a day.
Cheese after sitting for 2 days
After two days the cheese has a nice rind & is ready to be waxed. We chilled it in the fridge a bit first. Now it is starting to smell like cheddar & not sour milk.
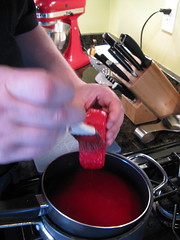
Waxing the cheeseWaxing the cheeseWaxing the cheese
We bought cheese wax & then melted it in a double boiler. Using a natural bristle paint brush the cheese is coated with two thin coats of wax. We double check for any air holes as that causes mold. Now the cheese rests for 4 weeks at a temp between 46 & 68 F before it is ready to be tasted. Stay tune...

We got our cheesemaking supplies from the New England Cheesemaking Supply Co & Leener's online.
If you are not reading this post in a feed reader or at http://agoodappetite.blogspot.com OR at http://agoodappetite.com then the site you are reading is illegally publishing copyrighted material. Contact me at katbaro AT yahoo DOT COM. All recipes, text and photographs in this post are the original creations & property of the author unless otherwise noted.
© 2007-2009 Kathy Lewinski

Wednesday, May 27, 2009

Daring Bakers - Apple Rhubarb Strudel

The May Daring Bakers’ challenge was hosted by Linda of make life sweeter! and Courtney of Coco Cooks. They chose Apple Strudel from the recipe book Kaffeehaus: Exquisite Desserts from the Classic Cafés of Vienna, Budapest and Prague by Rick Rodgers.
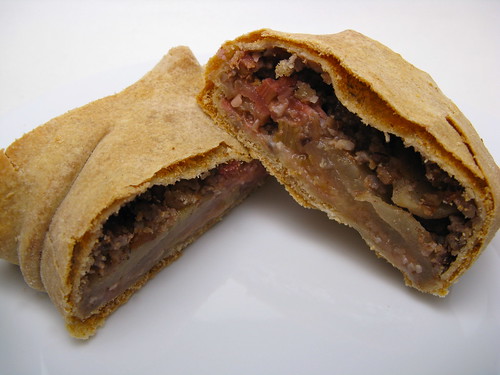
IMG_3573
We were allowed to choose any type of filling savory or sweet for our strudel. I decided to stick pretty close to the original filling but added rhubarb since its in season, I had it on hand & its a great pairing with apples.
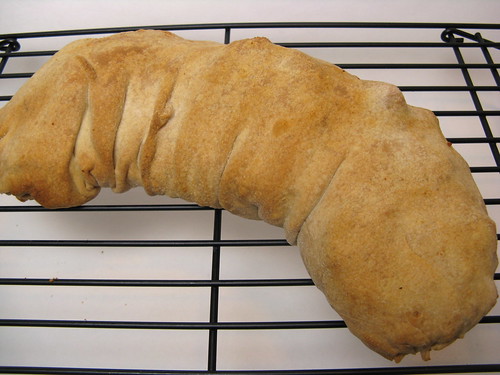
IMG_3571
This was one of those recipes where at first glance I thought, "Oh no, this is going to be a hard one," then once I started making it it turned out to be pretty easy. I started the dough around 8:00 in the morning & we had finished strudel around 11:30. It seemed that the hardest part was going to be stretching the dough out until it was paper thin. Since I only did half a batch mine only need to be about 12" x 18", a size that seemed much friendlier to working on the kitchen counter. I have a large cutting board that I covered with a cotton barware cloth & that was the perfect rolling surface as I could turn it on the counter to work from different sizes. The only time I really had any issues was when it came to rolling & getting it to the baking sheet. I lost some of my filling out an end (perhaps I had too much) & one of my apples broke through the dough (I should have been more careful about laying them out) but in the end that didn't make a difference.

I really liked the finished product here though I'm glad I halved the recipe for just two of us. I was afraid the rhubarb & apple wouldn't cook enough in 1/2 hour but they were perfect. The tart flavor, soft fruit & crunch pecans were so good together. Next time though I would maybe sprinkle a little sugar on top for some caramelization & sweetness but before that I think I may do a savory version.

Here's the recipe as I made it...


Preparation time
Total: 2 hours 15 minutes – 3 hours 30 minutes

15-20 min to make dough
30-90 min to let dough rest/to prepare the filling
20-30 min to roll out and stretch dough
10 min to fill and roll dough
30 min to bake
30 min to cool

Apple strudel
Adapted from “Kaffeehaus – Exquisite Desserts from the Classic Cafés of Vienna, Budapest and Prague” by Rick Rodgers

1/4 t ground cinnamon
3 T sugar
4 T unsalted butter, melted, divided
1/2 c toasted bread crumbs
strudel dough (recipe below)
1/4 c pecan chips
1 large Granny Smith apple, peeled, cored and cut into ¼ inch-thick slices
6 oz rhubarb, cut into 1/4-inch slices
1/2 T rum
1/2 T lemon juice

Mix the apples, rhubarb, rum, lemon juice, cinnamon & sugar & let sit while you roll out the dough.

Put the rack in the upper third of the oven and preheat the oven to 400°F (200°C). Line a large baking sheet with baking paper (parchment paper) or a silicon pad. Make the strudel dough as described below. Spread about 3 tablespoons of the remaining melted butter over the dough using your hands (a bristle brush could tear the dough, you could use a special feather pastry brush instead of your hands). Sprinkle the buttered dough with the bread crumbs. Spread the pecans about 3 inches (8 cm) from the short edge of the dough in a 3-inch-wide strip. Spread the apple/rhubarb mixture over the walnuts.
IMG_3565IMG_3566
Fold the short end of the dough onto the filling. Lift the tablecloth at the short end of the dough so that the strudel rolls onto itself. Transfer the strudel to the prepared baking sheet by lifting it. Curve it into a horseshoe to fit. Tuck the ends under the strudel. Brush the top with the remaining melted butter.
IMG_3567
Bake the strudel for about 30 minutes or until it is deep golden brown. Cool for at least 30 minutes before slicing. Use a serrated knife and serve either warm or at room temperature. It is best on the day it is baked.

Strudel dough
from “Kaffeehaus – Exquisite Desserts from the Classic Cafés of Vienna, Budapest and Prague” by Rick Rodgers
(adapted for size & hand kneading)

1/2 c + 3 T cups unbleached flour
pinch salt
3 1/2 T water, plus more if needed
1 T vegetable oil, plus additional for coating the dough
1/4 t cider vinegar

Combine the flour and salt in a small bowl. Mix the water, oil and vinegar in a measuring cup. Add the water/oil mixture to the flour & stir with a spoon. You will get a soft dough. Make sure it is not too dry, add a little more water if necessary.
Take the dough out of the bowl. Knead until you get a soft dough ball with a somewhat rough surface.

Continue kneading by hand on an unfloured work surface. Knead for about 2 minutes. Pick up the dough and throw it down hard onto your working surface occasionally. Shape the dough into a ball and transfer it to a plate. Oil the top of the dough ball lightly. Cover the ball tightly with plastic wrap. Allow to stand for 30-90 minutes (longer is better I let mine sit 2 hours & it was easy to work).
IMG_3554
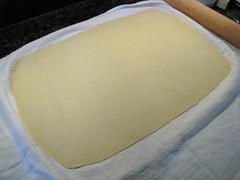
3. It would be best if you have a work area that you can walk around on all sides like a 36 inch round table or a work surface of 13 x 20 inches. Cover your working area with table cloth, dust it with flour and rub it into the fabric. Put your dough ball in the middle and roll it out as much as you can. Pick the dough up by holding it by an edge. This way the weight of the dough and gravity can help stretching it as it hangs. Using the back of your hands to gently stretch and pull the dough. You can use your forearms to support it.
IMG_3562
4. The dough will become too large to hold. Put it on your work surface. Leave the thicker edge of the dough to hang over the edge of the table. Place your hands underneath the dough and stretch and pull the dough thinner using the backs of your hands. Stretch and pull the dough until it's about 1 feet wide and 1 1/2 feet long, it will be tissue-thin by this time. Cut away the thick dough around the edges with scissors (My edges were thin so I skipped this). The dough is now ready to be filled.

4 - 6 servings

If you are not reading this post in a feed reader or at http://agoodappetite.blogspot.com OR at http://agoodappetite.com then the site you are reading is illegally publishing copyrighted material. Contact me at katbaro AT yahoo DOT COM. All recipes, text and photographs in this post are the original creations & property of the author unless otherwise noted.
© 2007-2009 Kathy Lewinski

Tuesday, May 26, 2009

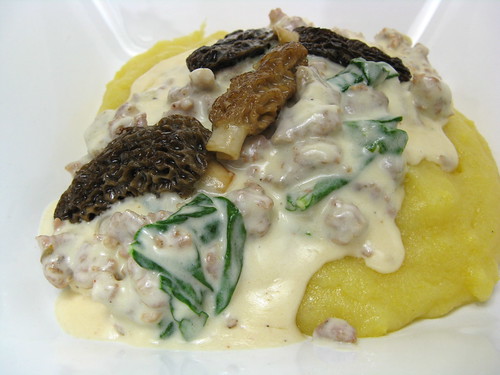
Creamy Sausage, Spinach and Morels Over Polenta

I still had half of the morels left from our farmers market trip last weekend & wanted to create a dish to show them off. I read that they are very suited to a cream sauce so my original idea was to make a cream sauce with spinach & the morels & serve that over polenta. Matt thought that sounded good but he wanted to add some of our homemade Italian sausage.
Creamy Sausage, Spinach & Morels Over Polenta
The mushroom flavor really was great in this dish, I only wish I had had more of them to add to it. This dish is super creamy & rich but I figure adding spinach to it makes it healthy, right? I thought the cream sauce was a little bland at first but the addition of the sherry took care of that.

Creamy Sausage, Spinach & Morels Over Polenta

1 T olive oil
2 shallots, peeled & chopped
8 oz bulk Italian sausage
2 T all-purpose flour
1 c cream (plus more if needed)
1 T sherry
salt & pepper
1 -2 c spinach
1/2 T butter
8 morels, halved (if you don't have fresh morels use another mushroom of your choice)
6 T instant polenta

In a large skillet heat the olive oil over medium-high heat. Add the shallots & sausage. Sauté until the sausage is cooked through. Turn heat down to medium-low. Sprinkle the flour over the sausage and cook while stirring for 1 minute. Stir in the cream & sherry. Bring to a simmer while stirring & cook until slightly thickened. If it gets too thick add a little more cream or milk. Season with salt & pepper. Stir in the spinach & let wilt. Keep warm over low heat while cooking the rest of the meal.

Melt the butter in a small skillet over medium heat. Add the morels. Sauté until tender & starting to brown. Set aside.

Bring 1 1/2 cups of water to a boil. Turn the heat down & stir in the polenta. Stir until the polenta is thick & creamy 3 -5 minutes. Season with salt.

Divide the polenta between two shallow bowls. Top with the sausage & spinach sauce. Lay mushrooms on top.

Serves 2

If you are not reading this post in a feed reader or at http://agoodappetite.blogspot.com OR at http://agoodappetite.com then the site you are reading is illegally publishing copyrighted material. Contact me at katbaro AT yahoo DOT COM. All recipes, text and photographs in this post are the original creations & property of the author unless otherwise noted.
© 2007-2009 Kathy Lewinski

Saturday, May 23, 2009

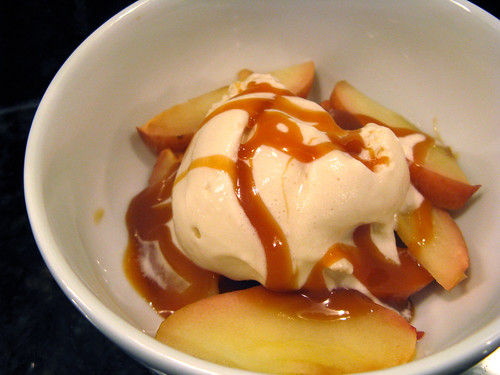
Smoked Apples

Back in early May we smoked a turkey breast for dinner & Matt decided he was going to try smoking apples for dessert. It ended up being a tasty quick dessert for a barbecue so I thought I'd share it with you for this long summer kick-off weekend.
Smoked Apples
The flavor & texture were a lot liked a baked apple but there wasn't much smoky flavor. I think once we have a real smoker we'll try this again to see if that increases. Still, it was a great dessert & perfect for a hot day when you don't want to turn on the dinner.

Smoked Apples
(These directions are for a gas grill. I'm sure you could get a similar result with a charcoal grill or smoker.)

2 apples, cored
butter
cinnamon

Put a few dabs of butter & some cinnamon in the hole of each apple left by coring.

Heat half of your grill & place a smoker box with wet wood chips over the flame. You want the grill to be at low heat, about 300 F. Once the wood chips have started to smoke place the apple in the grill on the side with no flame, indirect heat. Close the cover & let smoke for about 30 minutes or until soft.

Serves 2 - 3

Thursday, May 21, 2009

What we did with CSA box #1 and what's in #2

This has been a pretty fun box to work with. Along with the items below we had a few spinach salads & had ramps in a tasty omelette. We tried making the burdock chips but I accidently burned them to a crisp.
What We Did With CSA Box #1
And box #2
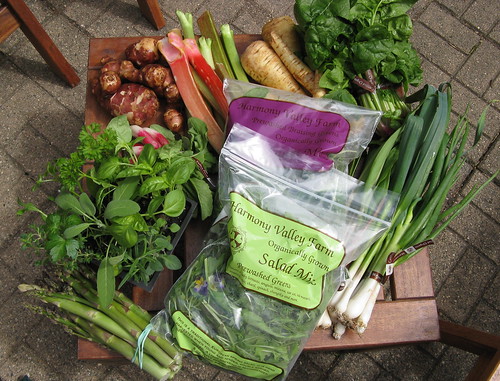
What's in CSA box #2
We are heading our of town to Matt's parents this weekend so we'll take a lot of this box with us & I'm not sure what the plans to use them will be yet.

Sunchokes - Someone posted this link to a great sounding dip on the HVF Yahoo Group that I'll try tomorrow. I'm also thinking these would make great chips.

Rhubarb - More desserts on the way

Parsnips - I still have a few of these left from the last box too. Time to research some new parsnip recipes.

Spinach - This spinach looks wonderful & perfect for salads.

Ramps - Matt's parents have never been able to find ramps where they live so we'll be bringing these to share.

Green Garlic - These would be good in the Ramp & Buttermilk Biscuits I made last week. 

Egyptian Walking Onions - I think I want these just grilled like we do with knob or spring onions.

Salad Mix

Sauté Greens - Sautéd with a little garlic or green garlic this is a favorite side in our house. They also work well in savory tarts.

Asparagus - We are making Grilled Asparagus Paninis tomorrow

Herb pack - Already planted in the garden for a whole summer's use.

Spring Radishes - I may pickle these, they are such the perfect little size.

If you are not reading this post in a feed reader or at http://agoodappetite.blogspot.com OR at http://agoodappetite.com then the site you are reading is illegally publishing copyrighted material. Contact me at katbaro AT yahoo DOT COM. All recipes, text and photographs in this post are the original creations & property of the author unless otherwise noted.
© 2007-2009 Kathy Lewinski

Trout with Rosemary Cherry Tomato Sauce

Look at me sticking to my eat more fish resolution two weeks in a row!
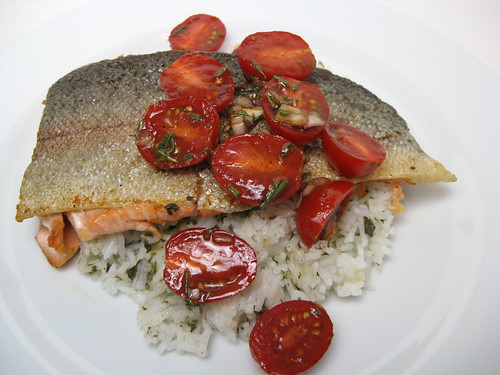
Trout with Rosemary & Cherry Tomato Sauce
This recipe was in the June '09 issue of Bon Appetit under 15 minute meals & it really did come together that quickly (well except for the rice I served it over.) I don't think I got the exact right kind of trout. I probably should have gotten the smaller, whole Canadian trout & put rosemary sprigs in the center of each fish. But we thought this steelhead looked so good we decided to adapted the recipe for it.

This was really, really good. The fish was incredibly flaky & tender. The whole dish has a very fresh taste. We really liked the way it tasted with the rosemary cherry sauce & next time we make this we'll actually double the amount of the sauce in the recipe.

Trout with Rosemary Cherry Tomato Sauce
(adapted from a recipe by Jill Silverman Hough in Bon Appetit June '09)

1/2 pint cherry tomato, about 12, halved
1 shallot, chopped
1/2 T balsamic vinegar
1 T fresh rosemary, chopped
2 1/2 T olive oil
kosher salt
pepper
1 lb steelhead trout, cut into two pieces

In a small bowl mix the tomatoes, shallots, vinegar, 1 teaspoon rosemary & 1 tablespoon olive oil. Season with salt & pepper. Set aside

Heat the remaining 1 1/2 tablespoons olive oil in a large non-stick skillet over medium high heat. Season the flesh side of the fish with salt, pepper & remaining rosemary. Put the fish in the hot oil & cook for 4 minutes or so per side.

Serve over rice, we flavored our rice with chopped parsley & sorrel.

Serves 2

If you are not reading this post in a feed reader or at http://agoodappetite.blogspot.com OR at http://agoodappetite.com then the site you are reading is illegally publishing copyrighted material. Contact me at katbaro AT yahoo DOT COM. All recipes, text and photographs in this post are the original creations & property of the author unless otherwise noted.
© 2007-2009 Kathy Lewinski

Wednesday, May 20, 2009

Linguine with Morels, Ramps, Sunchokes and Spinach

We splurged at the farmers market this weekend & bought some fresh morels. There was a recipe I remembered seeing on line with morels & cornbread I wanted to try but then couldn't find anywhere. While looking for that I ran across this recipe on Herboivoracious that called for morels, sunchokes & goat cheese all things I had on hand. 
Fettuccine with Morels, Sunchokes, Ramps & Spinach
From there I really changed the recipe quite a bit, substituting ramps for leeks, fresh spinach for spinach pasta plus  really sizing down the amount of pasta & cheese used. I also simplified the cooking technique quite a bit by not cooking each of the vegetables one at a time & then returning them to the pot.

The final result was really tasty, Matt said he never expected to like it as much as he did. My only complaint was the morels really got lost in all the other flavors which seems like a waste. Next time, I'll just use some crimini mushrooms instead. Really the star of this dish in the sunchokes. I never thought of adding them to pasta before but why not, you'd add artichokes & they have a really similar flavor.

Since a lot of the items in this dish are really seasonal I've added some substitution suggestions.

Linguine with Morels, Ramps, Sunchokes and Spinach

3 cloves garlic, minced
1/2 c half & half
3 oz goat cheese
1 T olive oil
4 sunchokes (about 6 oz), peeled & sliced 1/4-inch (or canned artichoke hearts, not marinated)
6 ramps bulbs, stems & leaves, slice & separate leaves from the rest (or one leek, white only)
4 fresh morels, quartered (or 4 - 5 crimini mushrooms)
red pepper flakes
salt & pepper
1 1/2 c spinach leaves
4 - 6 oz linguine
Parmesan

Put the garlic & half & half into a small pan & bring to a simmer. Let simmer until reduced slightly. Whisk in goat cheese until melted. Season with salt & pepper & set aside.

Start pasta cooking according to directions.

Heat the olive oil in a large skillet with high sides over medium-high heat. Add the sunchokes & cook until just starting to brown. Then add the ramp bulbs & stems & mushrooms. Cook until the mushrooms are tender. Season with salt, pepper & red pepper flakes. Stir in the ramp leaves & cook for about a minute. Add the spinach leaves.

When the pasta is cooked save about 1/3 cup of the pasta water & then drain pasta. Pour the hot pasta into the skillet over the spinach & toss until the spinach is slightly wilted. Add the goat cheese sauce & toss to coat adding the pasta cooking water if needed (We needed quite a bit).

Serve with grated Parmesan.

2 servings

If you are not reading this post in a feed reader or at http://agoodappetite.blogspot.com OR at http://agoodappetite.com then the site you are reading is illegally publishing copyrighted material. Contact me at katbaro AT yahoo DOT COM. All recipes, text and photographs in this post are the original creations & property of the author unless otherwise noted.
© 2007-2009 Kathy Lewinski


Tuesday, May 19, 2009

Ramp and Buttermilk Biscuits

The April issue of Bon Appetit had a lot of recipes for ramps in their At The Market section. Matt marked a whole bunch he wanted to try & then we just had to wait until ramps came into season. Well, that time is finally here. We were grilling some pork chops that other night & decided these biscuits would be a great side.
Ramp & Buttermilk Biscuits
I've never felt that my homemade biscuits rise as much as I think they should & these were no exception. Then I looked at the picture in Bon Appetite & theirs looked just as flat so this time I'm blaming it on the recipe. Even though they weren't as tall as I would have liked they were really light & flaky which totally made up for it. The ramps are really flavorful in these adding so much flavor.

Ramp and Buttermilk Biscuits
(from Bon Appetit April '09. Adapted for servings)

1/4 c buttermilk
1/4 c ramps, bulbs, stems & leaves, thinly sliced
1/2 c all-purpose flour
2/3 t baking powder
1/4 t salt
pinch pepper
2 T unsalted butter, chilled & cut into small pieces
1 beaten egg

Preheat oven to 425 F.

Mix the buttermilk & ramps together & set aside.

Put the flour, baking powder, salt & pepper into a food processor & pulse to blend. Add the butter & pulse until a fine meal is formed. Stir in the buttermilk/ramp mixture forming a soft dough. Turn out onto a lightly floured surface & press out to a 1/2-inch thick disc. Cut out 2" circles. Press scrapes together to form another disc & cut out more biscuits. Place on a baking sheet. Brush the tops with the beaten egg. Bake for about 20 minutes until golden brown.

Makes 4 - 5 biscuits

If you are not reading this post in a feed reader or at http://agoodappetite.blogspot.com OR at http://agoodappetite.com then the site you are reading is illegally publishing copyrighted material. Contact me at katbaro AT yahoo DOT COM. All recipes, text and photographs in this post are the original creations & property of the author unless otherwise noted.
© 2007-2009 Kathy Lewinski

Monday, May 18, 2009

Weekly Menu 5/17 - 5/22 and Mill City Farmers Market

When we lived in San Francisco we went to the farmers market quite often, especially since our neighborhoods had markets that were within walking distance. In Minneapolis we haven't gone as often, mainly because our CSA box is fulfilling most of our vegetable needs. This year though was are going to try to go more often on the weeks we don't get a box. The downtown Minneapolis Farmers Market is one of the biggest in the Midwest & open 7 days a week but we find it a little crazy on the weekends & prefer to go to the smaller Mill City Farmers Market.
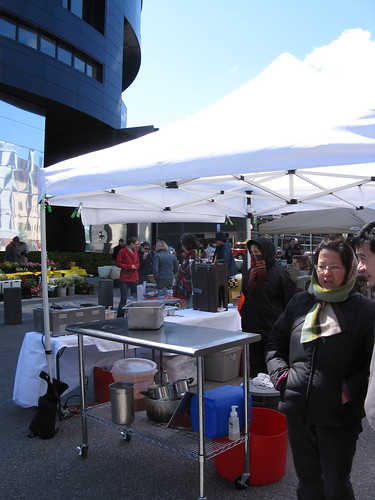
Cold market morning
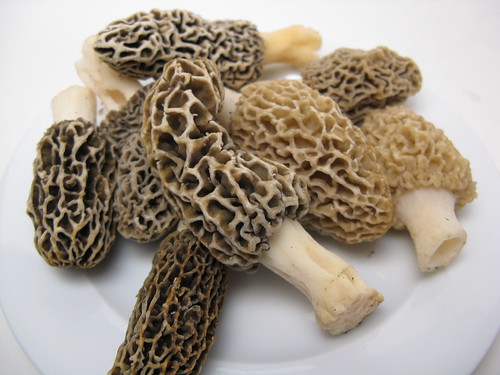
Its pretty early in the season here in Minneapolis (& cold! Check out the scarves & parkas in that picture. Yes, this is May!) but the ramps, asparagus & morels are looking great. Plus its a great time to get vegetables, herbs & plants for the garden. We picked up some beautiful perennials for our new shade garden that we'd never seen. We also splurged & went for some fresh morels even though they cost $40 a pound!
Fresh Morels
One of the great things about the Mill City Market is the Chef Shack. This is not your ordinary fast food trailer.
Chef Shack
Matt had their famous Beef Tongue Taco.
Beef Tongue Tacos
This was the first time having beef tongue for either of us & we were really surprised by how tender it was. I ordered the special which was a softshell crab sandwich with ramp tartar sauce & grilled fiddlehead ferns.
Soft Shell Crab Sandwich
We also tasted some Momos which are steamed Tibetian dumplings which is something else new for us. They were super tasty with a curry-like filling & a sesame tomato chutney for dipping.
Momos - Tibetian Steamed Dumplings
Then of course you need a sweet & we couldn't resist the Rhubarb Æbelskiver with raspberry pepper jam.
Making Rhubarb Aebleskiver
Rhubarb Aebleskiver
Despite the cold it was a great al fresco meal with an amazing Mississippi view.
Lunch with a view
The market also features musical entertainment, local meat vendors (yak anyone?), fresh cheese & some wonderful crafts people (we bought a gorgeous bowl made of reclaimed wood). All & all a fine day out & I'm looking forward to visiting the market all summer.

On to Menu Planning Monday...

Trout with Rosemary & Cherry Tomato Sauce - From Bon Appetit June '09

Grilled Duck Breast with Bacon Wild Rice Cakes & a Grilled Tomato Sauce - My Royal Foodie Joust entry

Polenta with Spinach & Morels

Recipes to Rival May Challenge - shh its a secret

Grilled Sausage with Burdock Chips

Grilled Asparagus Paninis with Tagellio & Prosciutto

If you are not reading this post in a feed reader or at http://agoodappetite.blogspot.com OR at http://agoodappetite.com then the site you are reading is illegally publishing copyrighted material. Contact me at katbaro AT yahoo DOT COM. All recipes, text and photographs in this post are the original creations & property of the author unless otherwise noted.
© 2007-2009 Kathy Lewinski

Related Posts with Thumbnails

Get Email Updates!

Enter your email address:

Delivered by FeedBurner

Measurement Abbreviations

T = Tablespoon
t = teaspoon
c = cup
lb = pound
oz - ounce

Labels

Blog Archive

Contributors

Blog Directory for Minneapolis, Minnesota