
This is a long one folks...
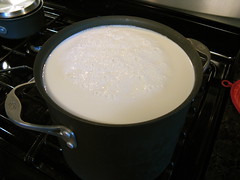
First we start with 2 gallons of whole milk which is slowly heated to 90 F. Then a starter is added. The milk is held at 90 F & sits for 45 minutes. Then rennet is stirred into the milk & it sits covered for another 45 minutes. At this point the milk will have turned to curd.
The curd then needs to be cut. We used a long sharp knife. The curd gets cut straight in to directions & the diagonally to the bottom of the pot twice.

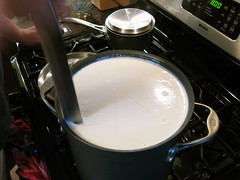
Then over 30 minutes the curd is brought up to 100 F in a water bath very slowly. Then drain the water & let it sit 5 minutes.
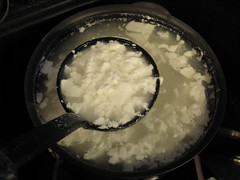
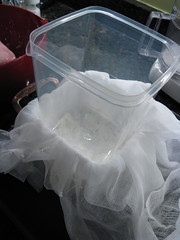
Then the curd is drained from the whey in a cheesecloth covered colander.
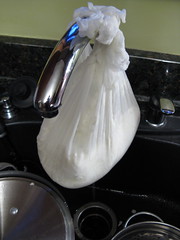
The cheesecloth is tied up & hung so that the curd can drain.
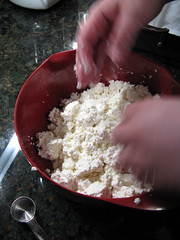
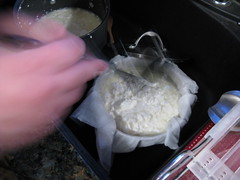
The curd is then put into a bowl & crumbled into walnut size pieces & tossed with flake salt. At this point it tastes like salty cottage cheese.
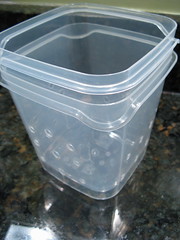
Then you need a cheese mold. Matt made ours by using two identical size plastic containers from IKEA. One container gets holes drilled into it to drain more whey.

The container with the holes drilled in it is draped with cheese cloth & then filled with curds. The cheesecloth is wrapped over the top of the curds. The other container goes on top to press down on the curds.
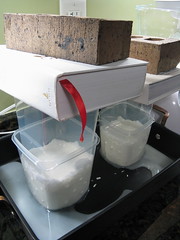
Now you start pressing. Put the cheese mold into a pan to catch the draining whey. The first pressing should be about 10 lbs & last 10 minutes.

Remove the cheese from the mold, unwrap it from the cheesecloth. Tune it over, rewrap it & return it to the mold.
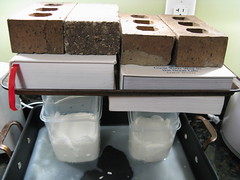
Then it gets pressed for another 10 minutes with 20 lbs. The cheese is turned over again & then pressed with 50 lbs for 12 hours at room temperature/
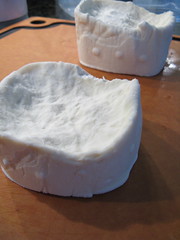
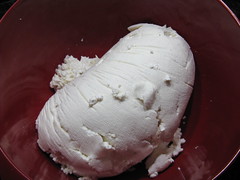
After 12 hours the cheese is removed from the mold & unwrapped. It is much firmer now & tastes a bit sour.
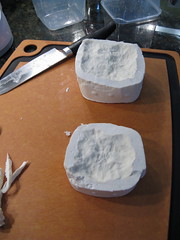
Because our plastic containers had a rounded bottom we trimmed them up a bit for a flatter surface. The cheese now sits uncovered at room temperature for 2 to 4 days to ripen & form a rind. We flipped it a couple times a day.

After two days the cheese has a nice rind & is ready to be waxed. We chilled it in the fridge a bit first. Now it is starting to smell like cheddar & not sour milk.

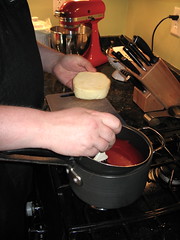
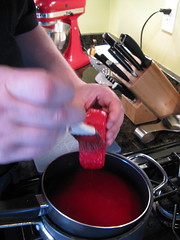
We bought cheese wax & then melted it in a double boiler. Using a natural bristle paint brush the cheese is coated with two thin coats of wax. We double check for any air holes as that causes mold. Now the cheese rests for 4 weeks at a temp between 46 & 68 F before it is ready to be tasted. Stay tune...
We got our cheesemaking supplies from the New England Cheesemaking Supply Co & Leener's online.
If you are not reading this post in a feed reader or at http://agoodappetite.blogspot.com OR at http://agoodappetite.com then the site you are reading is illegally publishing copyrighted material. Contact me at katbaro AT yahoo DOT COM. All recipes, text and photographs in this post are the original creations & property of the author unless otherwise noted.
© 2007-2009 Kathy Lewinski
© 2007-2009 Kathy Lewinski


21 comments:
I am so impressed. You reminded me that I want to order some stuff to make cheese.
Wow. Inspiring. Taking my first crack at Mozzarella this weekend up north. Hopefully I'll be on to the cheddar soon.
WOW, I am really impressed! I can't wait to hear how it turns out!
i am THOROUGHLY impressed! Wow. Can't wait to see the final product!
going to keep with the all-caps comment theme. this is SO cool you are doing this :) can't wait to hear the results!
Looks like everyone is saying it but-- wow... your dedication to the cheese is very impressive-- not sure I would have that much patience for it but I can't wait to hear how yours comes out.
Kat, I wowed and impressed...mozzarella's easy but this takes some craft...bravo!
I am excited by this! I bought some stuff from Leeners after your mozzarella experiment, but I haven't used it yet.
I am looking forward to begin my cheesemaking forays once we move to the new place! I have the same book (I think...it has already been packed).
What kind of milk did you use? I know when I read the book is says using pasteurized milk for the firmer cheeses would not work.
This is great Kat. You are amazing! I need to try this. I have already bookmarked the link for the cheese making supplies.
Great perseverance in the cheese department. Can't wait to see the final product.
Where does the orange colour in cheddar come from?
patience is not a virtue i possess, so i admire your endeavor here. four weeks is a long time to wait for pay-off. ;)
Wow great pictorial! I've been wanting to try my hand a cheeskmaking (we already make wine, beer, and canned goods). It looks fairly simple, just takes time and a few special ingredients/tools.
My husband says if I come home with a butter churn, he's going to have an intervention!
So impressive! Wow.
I want to see the picture of the 50lb. pressing. What did you do? Sit on it?
Barbara Kingsolver goes into cheese making by the end of Animal Veg. Miracle... You guys are THERE!
I love your cheese making posts! This is great! As soon as I have all the right tools (not in my kitchen in Brazil) I'm giving cheese making a try. You've definitely inspired me!
Wow, I'm so impressed!! You guys do the coolest stuff.
I love what you did. I just couldn't wait 3-4 weeks. I want to eat it now. What is the starter? Rennet?
Jenn - Everything we have read has said you can used Pasteurized milk but not Ultra Pasteurized so we are able to just use the milk from the grocery store.
Shopgirl - For 50lbs we used quite a few books, some bricks, & my flour container.
BJ - Used in cheese making mesophilic starter is a Lactic acid-producing starter bacteria which is used to produce cheeses when the cooking temperature is 39°C or lower.
Rennet is an extract from the fourth stomach of young ruminants, such as cows, goats, and sheep. This extract contains a number of enzymes which are designed to help these animals digest their mother's milk, and when added to milk, rennet will cause the milk to coagulate, forming the curds and whey which are so essential in the cheesemaking process.
I love it! You're totally inspiring me to make cheese. Did you guys try it, yet? I am really curious on a follow up entry.
Looks good, waiting to hear back on how it tasted!
Thank you for this post.
Post a Comment