Friday, July 31, 2009

What we did with CSA box #6 and what's in #7


What we did with CSA box #6
1. Broccoli & Bacon Salad 2. Zucchini Pickles (recipe to come) 3. Paella 4. Grated Zucchini for freezing 5. Summer Harvest Pizza on Honey Wheat Crust (recipe to come) 6. Classic Coleslaw 7. Grilled Zucchini with Chipotle Bacon Sauce 8. Creamy Sausage & Zucchini Pasta 9. Roasted Vegetable & Quinoa Salad

And on to box 7...
What's in CSA box #7
Cauliflower - We are going to roast this & have it with the leftover chipotle bacon sauce
Zucchini - Look for an upcoming post with lots of zucchini ideas
Sweet Spanish Onions - One has already been used in a Onion & Tomato Tart
Garlic
Peppers - Fajitas next week
Tomatoes - The first of the season. Mostly used in the tart mention above but the rest are going in bruchetta
Potatoes - We'll be taking Garlic Scape Potato Salad to a picnic tomorrow
Yellow & Green Beans - I'm going to blanch & freeze a bulk of these
Cucumbers - We're making pickles this weekend
Dill - Good for the pickles
Red Mizuna - Not sure how to use this mustardy green yet
Sauté Greens - Just a quick wilt with some garlic & these are a perfect side. This batch has such wonderful flavor.
Carrots - I think Matt is wanting some Morning Glory Muffins
Arugula

Find more ideas on using your CSA box at Cooking Away My CSA

If you are not reading this post in a feed reader or at http://agoodappetite.blogspot.com OR at http://agoodappetite.com then the site you are reading is illegally publishing copyrighted material. Contact me at katbaro AT yahoo DOT COM. All recipes, text and photographs in this post are the original creations & property of the author unless otherwise noted.
© 2007-2009 Kathy Lewinski

Thursday, July 30, 2009

Lime Chipotle Pulled Pork with Chipotle Mustard Potatoes

Recently, I was contacted by Saucy Mama about entering a recipe in a cooking contest they are hosting. Other than the Foodie Joust & Iron Cupcake, I've never entered a recipe in a cooking contest so I thought why not plus there were some great prizes including a Kindle. They sent me a lovely assortment of their marinades, dressings & sauces to play with. I have to say we were impressed to see the ingredients in all of there products, it was all things we recognized instead of a bunch of chemicals. We were most drawn to the Lime Chipotle Marinade & it made me think of the Caribbean & then I thought of pork...pulled pork.
#207 - Chipotle Lime Pulled Pork
Saucy Mama was looking for recipes that were quick & easy for a family to prepare. Well, you can't get much easier than cooking in a crock pot. Throw everything in, walk away & hours later dinner is done. As for quick the hands on time on this recipe is no more than 10 minutes.
Chipotle Lime Pulled Pork
This made for such a tasty sandwich! Just a hint of spice (the perfect amount for a wimp like me) & a freshness from the lime. The meat was super juicy. I liked mine just plain on a roll while Matt topped his with some coleslaw & a slather of Saucy Mama's Chipotle Mustard for an extra kick. For a quick side dish we roasted some potatoes with the Chipotle Mustard. They got crispy & had a gorgeous color. Everything was served up with some steamed beans for a really easy statisfying meal.

Want to try making this dish yourself? Well I have four bottles of Saucy Mama's Lime Chipotle Marinade to give away. Leave a comment on this post & I'll pick four random winners on Thursday, August 13th. Please leave your email address in your comment so I can contact you. if you win! Sorry, I can only ship to the US and Canada.

Chipotle Lime Pulled Pork

hands on time: 10 minutes
cook time: 4 - 8 hours

1 1/2 lb pork shoulder
6 T Saucy Mama Chipotle Lime Marinade
3/4 c beer (We like the flavor beer adds but if you don't want to use it add chicken stock instead.)
1 t lime juice
4 soft rolls

Rub the pork shoulder all over with 4 tablespoons of the Chipotle Lime Marinade. Place in crock pot. Add the beer. Cover & turn the crock pot to high. Let cook on high for about 4 hours or low for 8 hours until the meat is fall apart tender. (If the meat is done before you are ready to serve just turn the crock pot to warm.)

With a slotted spoon take the meat from the crock pot & put into a bowl. Use a fork to shred the pork. Stir in 2 tablespoons of the Lime Chipotle Marinade and the lime juice.

Serve on rolls.

4 servings

Chipotle Mustard Roasted Potatoes

Hands on time: 5 minutes
Cook time: 30 minutes

16 small waxy potatoes, washed & cut into 1-inch pieces
2 T olive oil
2 heaping t Saucy Mama Chipotle Mustard

Preheat oven to 400 F.

Mix everything together in a roasting pan. Place in oven and let roast to 30 minutes until browning.

4 servings

If you are not reading this post in a feed reader or at http://agoodappetite.blogspot.com OR at http://agoodappetite.com then the site you are reading is illegally publishing copyrighted material. Contact me at katbaro AT yahoo DOT COM. All recipes, text and photographs in this post are the original creations & property of the author unless otherwise noted.
© 2007-2009 Kathy Lewinski

Wednesday, July 29, 2009

Daring Bakers' - Dark Chocolate Rum Milan Cookies

The July Daring Bakers' challenge was hosted by Nicole at Sweet Tooth. She chose Chocolate Covered Marshmallow Cookies and Milan Cookies from pastry chef Gale Gand of the Food Network.

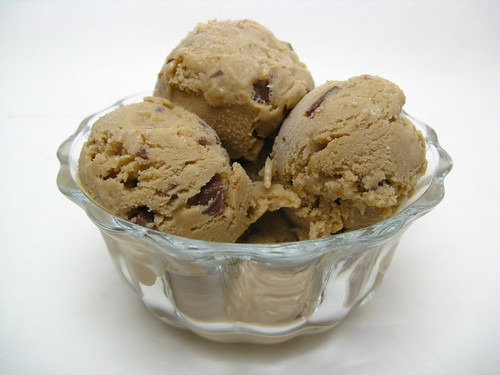
Ok, two days late but here is my version of the milans.
Dark Chocolate Rum Milans
I didn't want to add citrus flavor so I added some rum flavoring I had sitting around to the cookies. I thought the cookies were quite sweet so I went with bittersweet chocolate for the filling. These cookies were really rather easy. The hardest part was making pairs the same size to get a pretty cookie. The few that I made just circular rather than oval actually came out nicer & I'll do that next time. The original recipe said it made 3 dozen so I cut that to 1/3 which still yielded 2 dozen (the recipe never states how big your piped cookies should be so perhaps mine were smaller). Below is the recipe adapted to the smaller size with my notes in italics.

Milan Cookies

Recipe courtesy Gale Gand, from Food Network website
(adapted to be 1/3 the original quantity)

4 tablespoons unsalted butter, softened

2/3 cups + 2 T + 2 t powdered sugar

2 egg whites
2 t vanilla extract

1/2 t rum flavoring
1/2 cups all purpose flour

Cookie filling, recipe follows

Cookie filling:


2T + 2 t cup heavy cream
2 1/4 ounces semisweet chocolate, chopped
 I used bittersweet. Chop it very fine to get that small amount of cream to melt it.

1. In a mixer with paddle attachment cream the butter and the sugar. I just used the regular beaters & it seemed fine.
2. Add the egg whites gradually and then mix in the vanilla and rum flavoring.

3. Add the flour and mix until just well mixed.

4. With a small (1/4-inch) plain tip, pipe 1-inch sections of batter onto a parchment-lined sheet pan, spacing them 2 inches apart as they spread.
 I used the tip that the other tips attach to which was about 1/2-inch & piped the cookies to be about 1 1/2-inch long. I used a silpad instead of parchment paper.
5. Bake in a preheated 350 degree oven for 10 minutes or until light golden brown around the edges. Let cool on the pan.
 My cookies took between 13 & 15 minutes to get brown edges.
6. While waiting for the cookies to cool, in a small saucepan over medium flame, scald cream.
 If my microwave was working I would have just heated the cream & chocolate in there since the amount of cream was so small.
7. Pour hot cream over chocolate in a bowl, whisk to melt chocolate, add zest and blend well.

8. Set aside to cool (the mixture will thicken as it cools).

9. Spread a thin amount of the filling onto the flat side of a cookie while the filling is still soft and press the flat side of a second cookie on top.
 I did a thin amount & ended up with a lot of extra chocolate. Next time I'll do a thicker layer.
10. Repeat with the remainder of the cookies.

Makes about 2 dozen 1 1/2-inch long sandwich cookies

If you are not reading this post in a feed reader or at http://agoodappetite.blogspot.com OR at http://agoodappetite.com then the site you are reading is illegally publishing copyrighted material. Contact me at katbaro AT yahoo DOT COM. All recipes, text and photographs in this post are the original creations & property of the author unless otherwise noted.
© 2007-2009 Kathy Lewinski

Tuesday, July 28, 2009

A Midsummer MN Feast with Bacon Chipotle Sauce

Now here's a meal that just screams summer in Minnesota to me.
Midsummer MN Feast
The first MN sweet corn of the season dripping with heavenly Hope, MN butter. Grilled grass-fed New York strip steak from Thousand Hills Cattle Company in Cannon Falls, MN. (I had the pleasure of sitting with the Churchill's, the founders of Thousand Hills, at FRESH and Tasty and they make you feel great about eating locally raised beef.) Thick grilled zucchini slices picked fresh from our garden topped with a Bacon Chipotle Slather Sauce. All eaten in the backyard on a warm summer's evening.
Bacon Chipotle Slather Sauce
Ok, I'll admit Bacon Chipotle Sauce isn't very Minnesotan but it certainly makes everything else taste great & the bacon is Nueskes from WI. The sauce has an wonderful smokey flavor from the bacon and the chipolte plus a touch of sweetness from brown sugar and molasses. We used Muir Glen fire-roasted tomatoes which also upped the smoky flavor.
Grilling Zucchini
We put the sauce on the zucchini while it was grilling which gave the zucchini, a vegetable that can be bland, amazing flavor. I also liked it as a dipping sauce from the beef. I can only imagine it would be fabulous on a hamburger or hotdog.

Bacon Chipotle Slather Sauce
(by Tara Mataraza Desmond via Serious Eats)

2 slices thick-sliced bacon, cut into 1/2-inch pieces
4 large shallots, chopped
4 garlic cloves, chopped
2 T light brown sugar
1 T tomato paste
1/4 c malt vinegar
1/4 c water
2 T molasses
1 T Dijon mustard
1 T Worcestershire sauce
28-oz crushed tomatoes (we used diced & they worked just fine)
1 rehydrated, dried chipotle or chipotle in adobe (we took out the seeds for a mild sauce, leave them in for spicy)
salt & pepper

Heat a large pan over medium heat. Add the bacon & cook until its crisp. Add the shallots and garlic & cook them in the bacon fat for about 5 minutes until tender. Stir in the brown sugar & tomato paste. Then add the vinegar, water, molasses, mustard, Worcestershire, tomatoes & chipotle. Reduce the heat to medium-low and simmer for 30 minutes. Season to taste with salt & pepper.

Transfer to a blender & process until smooth. (Careful its hot!)

Store in the refrigerator or freeze to use later.

Makes 4 cups.

If you are not reading this post in a feed reader or at http://agoodappetite.blogspot.com OR at http://agoodappetite.com then the site you are reading is illegally publishing copyrighted material. Contact me at katbaro AT yahoo DOT COM. All recipes, text and photographs in this post are the original creations & property of the author unless otherwise noted.
© 2007-2009 Kathy Lewinski

Monday, July 27, 2009

Giant Vegetables and Weekly Menu 7/27 - 7/31

Despite the fact we've had a rather cool summer in Minnesota & are in the midst of a drought our little raised vegetable garden seems to be going crazy. Our tomato plants are so heavy with fruit they can barely stand despite the fact they are in cages.
One giant kohlrabi...
#195 - Matt & the Giant Kohlrabi
The hugest zucchini I've ever seen. Yeah, you'll be seeing zucchini on our menu.
Matt's Giant Zucchini
Lotsa broccoli
IMG_4690
Now these aren't big by any means but I'm happy to see our cherry tomatoes finally start to ripen.
Shades of Ripening

On to Menu Planning Monday...

Cilantro Lime Pulled Pork Sandwiches

Chicken Peanut Noodles

Pizza with Zucchini, Fontina & Onions

Paella with Chorizo & Shrimp

Grilled Steak & Zucchini with Slather Sauce

If you are not reading this post in a feed reader or at http://agoodappetite.blogspot.com OR at http://agoodappetite.com then the site you are reading is illegally publishing copyrighted material. Contact me at katbaro AT yahoo DOT COM. All recipes, text and photographs in this post are the original creations & property of the author unless otherwise noted.
© 2007-2009 Kathy Lewinski

Sunday, July 26, 2009

Fig Jam

Our jam adventure continues, this time with fig jam made with fresh figs from a tree behind my parents house in Memphis. I love the fig spread that I get at the grocery store but it is pretty expensive. Well, I think this homemade version is even better. I really like fig jam on a turkey or chicken sandwich.
Fig Jam
I had a really hard time finding a fig jam recipe that didn't require 3+ hours of cooking. I finally found basic guideline here & used them as well as the directions on the of pectin. I thought of a couple different options for added flavor, citrus, honey, ginger but finally decided on cinnamon. The flavor of the cinnamon is recognizable in this jam but not in the least bit overpowering. The jam set up beautifully & has a gorgeous color. This maybe my favorite flavor we've made so far.
Fig

Fig Jam

5 c figs, stemmed & cut in half, firmly packed
1/2 c water
1/4 c lemon juice
1/2 t cinnamon
1 box powdered pectin
7 c sugar

Prepare the jars & lids for canning. Jars should be boiled in water for 20 minutes & lids for 5 minutes.

In a large enamel or stainless steel saucepan combine the figs, water, lemon juice and cinnamon. Whisk in the pectin until completely dissolved. Turn heat to high & bring to a boil (it should not stop boiling when stirred). Stir in the sugar all at once. Return to a boil. Boil hard while stirring for 1 more minute. Remove from heat & skim of foam.

Ladle into eight hot sterilized half-pint jars leaving about 1/4-inch headroom. Clean off the tops of the jars & cover with a lid. Close with a neckband & finger-tighten. Process in boiling water for 10 minutes. Turn off heat & let sit for 5 minutes. Remove jars from the water to a heat-proof surface & let cool for 12 - 24 hours (do not dry jars). Check to make sure the top of the jar has been drawn downwards, creating a seal. If it hasn't either reprocess that jar or store it in the fridge to be eaten within 3 weeks. Remove the neckbands & store jam in a cool dark place.

Makes 8 cups

If you are not reading this post in a feed reader or at http://agoodappetite.blogspot.com OR at http://agoodappetite.com then the site you are reading is illegally publishing copyrighted material. Contact me at katbaro AT yahoo DOT COM. All recipes, text and photographs in this post are the original creations & property of the author unless otherwise noted.
© 2007-2009 Kathy Lewinski

Friday, July 24, 2009

Fig and Blueberry Crisp

Fresh figs are not something we can easily get in Minnesota, they aren't very resistant to frost let alone subzero temperatures. So, when my dad told me they had a fig tree behind their house in Memphis that was just filled with figs & asked if I wanted any, my answer was, "Yes, lots please!"
Figs
I used about half to make jam but I wanted to do a dessert with some of the rest. Since my favorite fruit dessert is a crisp (and they are just a cinch to make) I decided on fig crisp.
Fig & Blueberry Crisp
My dad was afraid the flavor of the figs was too delicate for a crisp so I added some blueberries as well to bump up the flavor. This was the right move as the crisp may have been a little bland without them. The blueberries don't overpower the figs, they really compliment them, plus add some great color. I think you could also substitute other berries like raspberries or even strawberries & get a great combination.

Fig and Blueberry Crisp

6 T brown sugar, packed
3 T cornstarch
2 1/2 lbs very ripe figs, stemmed & halved
1 c blueberries
3/4 c all-purpose flour
3/4 c sugar
1/2 t salt
1/2 t cinnamon
1/4 t nutmeg
8 T unsalted butter, cold & cut into chunks

Preheat oven to 375 F.

Mix the brown sugar & cornstarch together. Toss the figs & blueberries in to coat. Spread in the bottom of a shallow 2 quart baking dish.

Mix the flour sugar, salt, cinnamon & nutmeg together. Add the butter & cut in to make a course meal. Sprinkle over the top of the fruit.

Bake for 45 - 50 minutes until the fruit is bubbly & the topping is browned. Let cool 15 minutes before serving.

Serves 6 - 8

If you are not reading this post in a feed reader or at http://agoodappetite.blogspot.com OR at http://agoodappetite.com then the site you are reading is illegally publishing copyrighted material. Contact me at katbaro AT yahoo DOT COM. All recipes, text and photographs in this post are the original creations & property of the author unless otherwise noted.
© 2007-2009 Kathy Lewinski

Thursday, July 23, 2009

Creamy Sausage and Zucchini Pasta

It been all about simple meals this week at chez Good Appetite. I think between coming back from a weekend up North & getting ready for a visit from my parents later in the week, cooking became less of a priority. We had a bit of a cool, rainy day the other day so this quick pasta full of fresh summer zucchini & our own ground sausage really hit the spot.
IMG_4685
I usually don't make this sort of dish with a cream sauce but I was really craving it. I think the best part was it only took 1/4 cup of half & half to make it creamy and comforting without being super bad for you.

Creamy Sausage and Zucchini Pasta

3 oz pasta shape of choice
1/2 T olive oil
1/2 lb bulk Italian sausage
1 large zucchini, cut into 1-inch pieces (about 2 cups)
1 t garlic, minced
pinch red pepper flakes
14-oz can petit diced tomatoes
2 T all-purpose flour
2 T vodka (optional)
1/4 c half & half
pepper
grated Romano cheese

Cook pasta according to directions.

Meanwhile heat the olive oil in a large skillet over medium-high heat. Add the sausage & cooked until browned. Add the zucchini, garlic & red pepper flakes. Sauté until the zucchini is just starting to get soft but you still want it to have a bite to it. Stir in the tomatoes & bring to a bubble. Turn the heat down to medium-low. Sprinkle the flour over everything & cook while stirring for 1 minutes. Stir in the vodka and half & half and cook until thickened. Season with a generous amount of pepper.

Serve over the cooked pasta with grated cheese on top.

serves 2 - 3

If you are not reading this post in a feed reader or at http://agoodappetite.blogspot.com OR at http://agoodappetite.com then the site you are reading is illegally publishing copyrighted material. Contact me at katbaro AT yahoo DOT COM. All recipes, text and photographs in this post are the original creations & property of the author unless otherwise noted.
© 2007-2009 Kathy Lewinski

Wednesday, July 22, 2009

Quinoa and Roasted Vegetable Salad

I originally wanted wheat berries to make this salad but the grocery store didn't have any so I decided to to try using quinoa instead. I'd been reading about how good quinoa is on a few other blogs recently & that peaked my interest to try it.
Quinoa & Roasted Vegetable Salad
The quinoa worked really well in this warm salad. It really has a wonderful texture which stands up nicely to the soft roasted vegetables & cheese. This is one of those dished that you could really do with almost any vegetables that are in season. You could also serve it either warm like we did or at room temperature. The beets were especially good in it & pair well flavor-wise with the feta, lemon & mint.

Quinoa and Roasted Vegetable Salad

1/2 c quinoa
5 small beets, peeled & quartered
3 large cipollini onions, peeled & quartered
1 large summer squash, cut into large pieces
olive oil
kosher salt
1 t lemon juice
1 t red wine vinegar
3 T olive oil
salt & pepper to taste (go light on the salt if you have a salty feta)
2 oz feta
1 T fresh mint, chopped

Cook your quinoa according to the directions & set aside. (We used our rice cooker & it came out beautiful.)

Preheat oven to 400 F.

Put the beets, onion and squash into a small roasting pan. Coat with a little olive oil & sprinkle with salt. Roast in the oven until soft, about 30 minutes.

Whisk the lemon juice, vinegar, olive oil, salt & pepper together.

Mix the roasted vegetables with the quinoa. Toss with dressing. Plate and sprinkle with feta and mint.

Serves 2 as a light meal or side dish

If you are not reading this post in a feed reader or at http://agoodappetite.blogspot.com OR at http://agoodappetite.com then the site you are reading is illegally publishing copyrighted material. Contact me at katbaro AT yahoo DOT COM. All recipes, text and photographs in this post are the original creations & property of the author unless otherwise noted.
© 2007-2009 Kathy Lewinski

Tuesday, July 21, 2009

Greek-Style Lamb Kebabs

I was struggling to come up with some new dishes to try last week so Matt went to his post-it notes. He's been working his way through our copies of Bon Appétits and cookbooks and placing post-it notes on the pages of all the recipes he thinks sound good. This week he went to Emeril at the Grill& chose this recipe.
Grilled Lamb with Feta Spread
This was quite a tasty dinner. The lamb only needs to marinate for 2 to 4 hours so you don't have to plan super early in the day. It also cooks up really quickly. But really the best thing about this dish is the feta spread. It was really flavorful & a great option to tzatziki. (I'm finding with this Emeril book what we like best are the sides & sauces.) We served this dish with some store bought flat bread (pita pockets would have been better) & steamed green beans seasoned with a little fresh lemon.

Greek-Style Lamb Kebabs
(adapted from Emeril at the Grillfor serving size)

3/4 c onion, finely chopped
1/2 T grated lemon zest
2 T lemon juice
2 T fresh parsley, chopped
2 T fresh cilantro, chopped
1 1/2 T fresh mint, chopped
1 t salt
1/2 t ground cumin
1/2 t sweet paprika
1/2 r ground black pepper
2 T olive oil
3/4 lb boneless lamb leg (we had out butcher cut a small piece for us), cut into 1-inch cubes

In a bowl combine the onion, lemon zest, lemon juice, parsley, cilantro, mint, salt, cumin, paprika, pepper & olive oil. Stir in the lamb. Cover & refrigerate for 2 to 4 hours.

Thread the lamb onto skewers (if using wooden ones soak them in water first).

Preheat grill to high & coat with olive oil. Cook turning frequently until cooked through, 12 - 14 minutes.

3 - 4 servings

Feta Spread
(from Emeril at the Grill)

2 oz feta cheese, crumbled
2 oz cream cheese, at room temperature
1/4 c plain yogurt (the recipe called for Greek yogurt I used require & it was just fine)
1 T green onion tops, minced (I skipped this because I didn't have them)
1/2 T fresh mint, chopped
1 t lemon juice
3/4 t garlic, minced
1/2 t olive oil
1/2 t grated lemon zest
salt to taste
pinch of cayenne pepper

Combine every thing well & allow to chill for at least one hour.

About 1 cup

If you are not reading this post in a feed reader or at http://agoodappetite.blogspot.com OR at http://agoodappetite.com then the site you are reading is illegally publishing copyrighted material. Contact me at katbaro AT yahoo DOT COM. All recipes, text and photographs in this post are the original creations & property of the author unless otherwise noted.
© 2007-2009 Kathy Lewinski

Monday, July 20, 2009

Weekly Menu 7/20 - 7/24

We are just back from a classic Minnesota summer weekend "up at the lake." Unfortunately there was no walleye fish fry this time but still plenty of fun & s'mores.
Watching for WalleyeIMG_4619Sunset over Leech Lake

On to Monday Menu Planning...

Quinoa Salad with Roast Beets & Feta

Pasta with Zucchini & Sausage

Banh Mi - My mom loved the pickled carrots & radish I made to top these when she was last here so I thought I'd actually make her the whole Banh Mi this time.


Some sort of bbq for a crowd probably burgers, perhaps a Juicy Lucy of some sort.

If you are not reading this post in a feed reader or at http://agoodappetite.blogspot.com OR at http://agoodappetite.com then the site you are reading is illegally publishing copyrighted material. Contact me at katbaro AT yahoo DOT COM. All recipes, text and photographs in this post are the original creations & property of the author unless otherwise noted.
© 2007-2009 Kathy Lewinski

Friday, July 17, 2009

What we did with CSA box #5 and what's in #6


What we did with CSA box #5
1. Pea Risotto 2. Flank Steak Stir-fry 3. Grilled Trout & Fennel with Lemon Cream Sauce & Sautéed Beets 4. Roasted Beet & Fennel Salad 5. Strawberry Shortcake 6. Grilled Zucchini (with a flatbread sandwich) 7. Baja Fish Tacos 8. Beet Green & Amaranth Quesadillas 9. Dutch Baby with Fresh Strawberry Sauce

A few notes on the items without links. The pea risotto was a really basic risotto recipe that we added some shelled peas & some sugar snaps that had been sautéed in a little butter. The beef stir-fry was super simple & tasty with peas, sweetheart cabbage, bok choy & scallions all in a store bought teriyaki sauce. The grilled zucchini was just coated with a little olive oil & balsamic vinegar & cooked in a grill basket.

And on to box #6
What's in CSA box #6
Cauliflower - Think we'll roast this as a side dish. Its really good with Indian BBQ Sauce
Broccoli - This will just get steamed or used in a stir-fry
Savoy Cabbage - Probably headed for a coleslaw
Spinach - We are responsible for bringing a salad to camp this weekend & I'm thinking a spinach salad with eggs & bacon would be good
Arugula - Love this on pizza
Beans - Steamed
Golden Beets - I'm tempted to try my hand at beet ice cream
Carrots - Stir-fry, salads, carrot cake
Fresh Garlic - We've been letting the fresh garlic cure to use later
Cipollini Onions - I bet these would be fabulous grilled
Cucumber - Should go in a salad but I'm thinking Pimm's Cup
Squash - Matt loves it grilled
Chard - Sautéed with some bacon or sausage & some nuts, yum

Find more ideas on using your CSA box at Cooking Away My CSA.

If you are not reading this post in a feed reader or at http://agoodappetite.blogspot.com OR at http://agoodappetite.com then the site you are reading is illegally publishing copyrighted material. Contact me at katbaro AT yahoo DOT COM. All recipes, text and photographs in this post are the original creations & property of the author unless otherwise noted.
© 2007-2009 Kathy Lewinski

Thursday, July 16, 2009

Oatmeal Stout and Heath Bar Ice Cream

I'll start out right away by admitting this ice cream flavor was not my idea. Two people who are in Matt's TC Maker group were talking about it on Twitter & one thought perhaps I would take up the challenge of trying to make it. Well I'm always up for a little cooking challenge...
Oatmeal Stout Heath Bar Ice Cream
This was a total success, if I do say so myself. The ice cream base has a slight bitter flavor but also a bit of a toffee flavor from the stout. The sweetness of the Heath bar is a good foil to that bitterness while the toffee in it helps bring out more of that toffee flavor. The texture of the ice cream is beautifully creamy making a good base for the crunch of the Heath Bar. This is a flavor I'll definitely make again!

Oatmeal Stout and Heath Bar Ice Cream

16 oz oatmeal stout
3 egg yolks
1/2 c sugar
1 c cream
1 c half & half
2 Heath bars, chopped

In a saucepan bring the stout to a boil. Allow to reduce to about 1 cup.

In a large bowl whisk the egg yolks & sugar together until light yellow & thick. Set aside.

Reduce the heat under the stout to low & add the cream & milk. Bring to a simmer. Slowly stir into the egg mixture. Its important to add the milk slowly & stir so you don't end up with scrambled eggs. Return to the saucepan & cook while stirring until the mixture is slightly thickened. Strain into a clean storage container. Refrigerate until completely cold.

Process according to your ice cream maker's directions. Add the chopped Heath bar pieces during the last 5 minutes of mixing. Let freeze for a few hours before serving.

Makes about 1 quart.

This is my entry into The Ice Cream Social Challenge being hosted by Scotty Snacks, Savor The Thyme and Tangled. Noodle. Click on any of their links to see how you can join in too. Entries are due July, 31!

If you are not reading this post in a feed reader or at http://agoodappetite.blogspot.com OR at http://agoodappetite.com then the site you are reading is illegally publishing copyrighted material. Contact me at katbaro AT yahoo DOT COM. All recipes, text and photographs in this post are the original creations & property of the author unless otherwise noted.
© 2007-2009 Kathy Lewinski

Wednesday, July 15, 2009

Grilled Trout and Fennel with Lemon Cream Sauce

Our friend Lucas did some fishing in Lake Michigan over the July Fourth weekend. Since he doesn't like to eat his catch we were the lucky recipients of some fresh lake trout.
Lucas brings us his catch
We decided to grill it. Matt has been wanting to grill fennel bulbs & we thought we'd do that with the fish. I wanted to do a sauce for them both & thought a lemon cream sauce would be a good flavor with both. Matt told me later he was doubtful of the sauce but couldn't believe how good it was. Grilling mellows the flavor of the fennel so don't worry about it overpowering the dish.
Grilled Trout & Fennel with Lemon Cream Sauce

Grilled Trout & Fennel with Lemon Cream Sauce

2 T butter
2 T all-purpose flour
1/4 c white wine
3/4 c cream
2 T lemon juice
salt & pepper
2 lake trout fillets
2 fennel bulbs
1 scallion, chopped (optional)

In a small saucepan melt the butter over medium heat. Stir in the flour. Cook while stirring for 1 minute. Stir in the white wine. Stir in the cream and lemon juice. Cook until thickened. Salt & pepper to taste. If the sauce is too thick add either more wine or cream or a little milk.

Slice the fennel bulbs in half. Grill until slightly charred. Grill fish until cooked through.

Serve both with warm sauce & sprinkle with scallions.

Serves 2

Sautéed Radishes
If you are wondering what the other side dish is on the plate, its sautéed radishes. The other night we went to Corner Table for dinner & the amuse bouche was thinly sliced radishes with a pat of Hope butter & chives. Hope butter is a locally made butter that is just a little bit of yellow heaven. After having it in this dish we went out & bought a pound for home. Anyway, we sliced up some radishes & sautéed them until just turning brown in a little Hope butter. It makes for a dish that is quite a surprise, mellow, sweet & a little crunchy.

If you are not reading this post in a feed reader or at http://agoodappetite.blogspot.com OR at http://agoodappetite.com then the site you are reading is illegally publishing copyrighted material. Contact me at katbaro AT yahoo DOT COM. All recipes, text and photographs in this post are the original creations & property of the author unless otherwise noted.
© 2007-2009 Kathy Lewinski

Tuesday, July 14, 2009

Steak and Cheese Sandwich

When Matt told me he wanted to make a steak & cheese sandwich for dinner what I saw in my mind was bright orange cheese sauce over some chunks of mystery steak. Luckily that was not at all what he had in mind.
Steak & Cheese Sandwich
His steak & cheese was made from incredibly tender pieces of flank steak (slicing against the grain makes all the difference), mushrooms, onions & a very flavorful raclette cheese. You are not really serving each person a ton of meat & cheese here so the mushrooms really beef it up, so to speak, with flavor & texture. I could even see doing this sandwich as a mushroom & cheese sandwich if you were avoiding eating red meat.

Steak & Cheese Sandwiches

1 T olive oil
5 oz flank steak, sliced very thin against the grain
salt & pepper
4 baby bella mushrooms, sliced thin
1/4 medium onion, sliced thin
3 - 4 oz raclette cheese, grated
2 petit baguettes, sliced length-wise & toasted if you wish

Heat the olive oil in a skillet over medium-high heat. Salt & pepper the steak. Add everything to the pan except the cheese. Cook until the steak is done & mushrooms & onions are tender, stirring frequently, about 4 minutes. Add the cheese & stir until it's melted & everything is coated. Divided between the baguettes & serve.

Serves 2

If you are not reading this post in a feed reader or at http://agoodappetite.blogspot.com OR at http://agoodappetite.com then the site you are reading is illegally publishing copyrighted material. Contact me at katbaro AT yahoo DOT COM. All recipes, text and photographs in this post are the original creations & property of the author unless otherwise noted.
© 2007-2009 Kathy Lewinski

Monday, July 13, 2009

Weekly Menu 7/13 - 7/17

Some bits & bobs from the last week....
Grilled Flatbread Sandwich
We made a Grilled Flatbread Sandwich filled with leftover smoked turkey, brie & our homemade port wine jelly. The jelly was fabulous on a sandwich & I plan on using the rest of the jar on sandwiches this week.
Our vegetable garden continues to grow like crazy. This week our broccoli heads began to form.
Beginning of Broccoli
And we are starting to see the beginning of lots of little cucumbers.
Start of a Cuke
We used what is probably the last of this year's local strawberries for a fabulous strawberry shortcake the other night.
Strawberry Shortcake
For the shortcake I used the Vanilla Shortcake recipe from Small Batch Baking & realized its pretty darn close the the perfect cream scone I've been looking for.

Menu Planning Monday...

Grilled Trout & Fennel with Lemon Cream Sauce

Stir-fry - Always a good way to use up those CSA veggies

Grilled Lamb Kebabs with Feta Sauce

Quinoa Salad with Beets & Summer Squash

Sweet Pea Risotto

If you are not reading this post in a feed reader or at http://agoodappetite.blogspot.com OR at http://agoodappetite.com then the site you are reading is illegally publishing copyrighted material. Contact me at katbaro AT yahoo DOT COM. All recipes, text and photographs in this post are the original creations & property of the author unless otherwise noted.
© 2007-2009 Kathy Lewinski

Sunday, July 12, 2009

Roasted Beet and Fennel Salad

As its the time of year the fennel & beets are starting to show up in peoples CSA boxes I'm starting to read about how much people dislike these two vegetables. I guess I'm just lucky since both Matt & I really like them. I was planning to do a roasted beet salad this week & Matt suggested roasting the fennel with the beets. According to the The Flavor Bible these are two items that go together well so I did just that.
Roasted Beet & Fennel Salad
I wanted a light dressing for this salad with a little citrus tang so I did an easy Lemon Vinaigrette. (I just remembered I had originally planned on doing orange, oops!). Actually the whole salad ended up being a very light & fresh side dish perfect for this time of year. Roasting really sweetens the beets & mellows the flavor of the fennel. The strongest fennel flavor comes from the fronds that are sprinkled on top so add as much or as little as you like.

Roasted Beet & Fennel Salad

1 fennel bulb, sliced
1 1/2 c beets, cut into small pieces (you can do more this is just what I had on hand)
olive oil
kosher salt
salad greens
fennel fronds, chopped

Preheat oven to 400 F. Place the fennel bulb & beets in a small roasting pan. just coat with olive oil & sprinkle with salt. Roast for about 30 minutes or until tender. (If its too hot to roast the beets & fennel inside, cook them on your grill in a grill basket)

Place on a bed of salad greens. Dress with Lemon Vinaigrette. Sprinkle fennel fronds over the top.

Lemon Vinaigrette

2 T olive oil
1 T lemon Juice
1 T white wine vinegar
1 small clove garlic, minced
salt & pepper to taste

Serves 2

If you are not reading this post in a feed reader or at http://agoodappetite.blogspot.com OR at http://agoodappetite.com then the site you are reading is illegally publishing copyrighted material. Contact me at katbaro AT yahoo DOT COM. All recipes, text and photographs in this post are the original creations & property of the author unless otherwise noted.
© 2007-2009 Kathy Lewinski

Friday, July 10, 2009

Cherry Jams

Cherries are in season right now & on sale at all the stores in town. I know they aren't local but being a good Michigander Matt loves his cherries. I thought I'd only have enough cherries for one batch of jam but it ended up I had 8 cups of pitted cherries which was enough for two. I did one traditional batch. The cinnamon & cloves in it are optional but they are flavors we like so I added them. The flavor of the cloves really comes through here so if you don't like cloves skip it.
Cherry Jam

Traditional Cherry Jam
(from Ball Complete Book of Home Preserving)

4 c sweet cherries, pitted & chopped (about 2 lbs)
1/4 c lemon juice
1/2 t cinnamon
1/2 t ground cloves
1 package (1.75 oz) powdered pectin
5 c sugar

Prepare the jars & lids for canning. Jars should be boiled in water for 20 minutes & lids for 5 minutes.

In a large enamel or stainless steel saucepan combine the cherries, lemon juice, cinnamon & cloves. Whisk in the pectin until completely dissolved. Turn heat to high & bring to a boil. Stir in the sugar all at once. Return to a boil. Boil hard while stirring for 1 more minute. Remove from heat & skim of foam.

Ladle into eight hot sterilized half-pint jars leaving about 1/4-inch headroom. Clean off the tops of the jars & cover with a lid. Close with a neckband & finger-tighten. Process in boiling water for 10 minutes. Turn off heat & let sit for 5 minutes. Remove jars from the water to a heat-proof surface & let cool for 12 - 24 hours (do not dry jars). Check to make sure the top of the jar has been drawn downwards, creating a seal. If it hasn't either reprocess that jar or store it in the fridge to be eaten within 3 weeks. Remove the neckbands & store jam in a cool dark place.

Makes 6 - 8 cups (the recipe said it would make 8 we only got 6)

Black Forest Preserves
I decided to make something a little different for the second batch & remembered seeing Black Forest Preserves on Today's Menu. Chocolate with cherries I figure it had to be good. I added a cup more cherries than the recipe called for because I had them & because the basic cherry jam recipe with liquid pectin called for 4 cups so I figured it would work. I used Hershey's Special Dark (my favorite) for the cocoa which gives an intense chocolate flavor & a really dark color to the jam. Now I probably wouldn't put this jam on my toast in the morning but I can imagine it on a croissant or french toast, spread between layers of a cake or as the filling for turnovers. It'll probably even be good warmed up a little over ice cream.

Black Forest Preserves
(adapted from Ball Complete Book of Home Preserving)

6 1/2 c sugar
1/3 c unsweetened cocoa (I used Hershey's Special Dark)
3 - 4 c sweet cherries, pitted & chopped (the recipe calls for black cherries, i used red)
1/2 c lemon juice
2 pouches (6 oz) liquid pectin
1/2 t almond extract (or 1/4 c amaretto)

Prepare the jars & lids for canning. Jars should be boiled in water for 20 minutes & lids for 5 minutes.

Mix the sugar & cocoa together & set it aside.

In a large enamel or stainless steel pot combine the cherries and lemon juice. Stir in the sugar & cocoa. Bring to a full rolling boil over high heat while stirring. The boil should not stop when stirred. Stir in the pectin. Boil hard for 1 minute while stirring. Remove from heat. Stir in the almond extract. Skim off foam.

Ladle into eight hot sterilized half-pint jars leaving about 1/4-inch headroom. Clean off the tops of the jars & cover with a lid. Close with a neckband & finger-tighten. Process in boiling water for 10 minutes. Turn off heat & let sit for 5 minutes. Remove jars from the water to a heat-proof surface & let cool for 12 - 24 hours (do not dry jars). Check to make sure the top of the jar has been drawn downwards, creating a seal. If it hasn't either reprocess that jar or store it in the fridge to be eaten within 3 weeks. Remove the neckbands & store jam in a cool dark place.

Makes 8 cups

If you are not reading this post in a feed reader or at http://agoodappetite.blogspot.com OR at http://agoodappetite.com then the site you are reading is illegally publishing copyrighted material. Contact me at katbaro AT yahoo DOT COM. All recipes, text and photographs in this post are the original creations & property of the author unless otherwise noted.
© 2007-2009 Kathy Lewinski

Thursday, July 9, 2009

Matt's Creamy Pesto Potato Salad

I have never met anyone who loves potato salad as much as Matt. He considers it a huge treat when I get him some from the deli to have with his lunch. His favorite maybe the classic potato salad with hard boiled egg but give him a good German potato salad or even a oil & vinegar version & he's just as happy. So, when I made a big batch of garlic scape pesto he, of course, decided it would be a great flavoring for a potato salad.
Matt's Creamy Pesto Potato Salad
He kept the flavors pretty simple in this salad, a little tang from the sour cream & a little garlic from the pesto. The flavors were reminiscent of a baked potato probably due to the sour cream. The salad was a big hit at our Fourth of July bbq & I think it'll become one of our summer staples, especially with all the pesto in the freezer.
Matt's Creamy Pesto Potato Salad

Matt's Creamy Pesto Potato Salad

2 lbs waxy potatoes (we used 1lb each red potatoes & yukon gold), washed & cut into 1/2-inch cubes
2 - 3 T Garlic Scape Pesto
1/2 c sour cream
1/2 c mayonnaise
salt & pepper to taste

Boil the potatoes in salted water until fork tender about 7 - 10 minutes. Drain.

Mix the pesto, sour cream & mayonnaise together. Season with salt & a generous amount of pepper. Mix in with warm potatoes.

Serve warm or chilled

Makes 2 lbs (6 servings)

If you are not reading this post in a feed reader or at http://agoodappetite.blogspot.com OR at http://agoodappetite.com then the site you are reading is illegally publishing copyrighted material. Contact me at katbaro AT yahoo DOT COM. All recipes, text and photographs in this post are the original creations & property of the author unless otherwise noted.
© 2007-2009 Kathy Lewinski

Wednesday, July 8, 2009

Baja Fish Tacos

Matt loves a good fish taco. While I on the other hand am almost embarrassed to say I'd never tried one, mainly because of the mistaken notion that I wouldn't like them. It's not that strange a notion really. Let's face it, I am a child of the 80's in the Midwest. To me a taco was a hard shell containing ground beef, lettuce, cheese, tomato & sour cream, preferably from Taco Bell. Fancy Mexican food was Chi Chi's.
Baja Fish Taco
Well, moving to San Francisco really opened my eyes to what Mexican food is plus Matt loves to make it at home. So, I discovered the joys of burritos, tamales, fajitas and soft tacos but I still hadn't given in to the fish taco. Until this week that is. We had some tortillas left over from making quesadillas & some nice cabbage from our CSA box so Matt sent me to the store for some firm white fish.

Ok I'm sold, this is delicious. The sauce was amazing, a little tart, a little sweet & a little spicy.

Baja Fish Tacos

1/4 c mayonnaise
1/4 c plain yogurt
1 1/2 T lime juice
1/4 t cumin
1/4 t dried dill
1/4 t dried oregano
1/8 t cayenne (or more to taste)
3/4 c firm white fish filets
1/2 c flour
6-oz beer
1/2 t salt
vegetable oil (We used peanut. You want something that can handle a high heat so olive oil won't work)
2 c cabbage, sliced
flour tortillas (we used large tortillas & needed 4, if you use taco size you'll probably need 6)

Whisk together the mayonnaise, yogurt, lime juice, cumin, dill, oregano & cayenne. Set aside.

Whisk the flour, beer & salt together. Cut the fish into your desired size.

In a pot with tall sides heat enough oil to cover your pieces of fish until very hot. Dip the fish in the batter & then carefully place into the pot. Do not crowd your pot, you'll have to do your fish in batches most likely. When the fish is crispy & golden brown use a slotted spoon to remove it from the oil & place it on a paper towel covered plate to drain. Repeat to cook all the fish.

Place some cabbage in the middle of each tortilla. Top with the sauce & fish. Roll up & eat.

Serves 2

If you are not reading this post in a feed reader or at http://agoodappetite.blogspot.com OR at http://agoodappetite.com then the site you are reading is illegally publishing copyrighted material. Contact me at katbaro AT yahoo DOT COM. All recipes, text and photographs in this post are the original creations & property of the author unless otherwise noted.
© 2007-2009 Kathy Lewinski

Tuesday, July 7, 2009

Beet Green & Amaranth Quesadilla

Neither of us were feeling really well the end of last week with a touch of the flu. We knew we wanted to make something for dinner using the items that would go bad the quickest such as the beet greens. At the same time it had to be something we could make quickly with minimal effort. The Harmony Valley newsletter mentioned a veggie quesadilla using the amaranth so we thought why not make one with a mixture of greens.
Beet Green & Amaranth Quesadilla
The bright red amaranth & beet stems gave the filling of this quesadilla an amazing color plus we felt like it had to be pretty healthy. The greens were chopped & then wilted in a little olive oil with some garlic. We added a chopped tomato but as they are still greenhouse grown here it didn't have a ton of flavor & next time I'd leave it out & just use a little salsa as a dip. This was a really satisfying meal (I couldn't even finish mine) & quite tasty but we both felt like it was missing something. Matt thought perhaps a little heat would have been good. He thought a little longer & decided what it needed was caramelized onions. He had hit the nail on the head, that touch of sweetness was what was missing.

Beet Green & Amaranth Quesadilla
(You could make this with any green you have that wilts well such as spinach, kale or swiss chard)

1 T olive oil
2 cloves garlic
2 c chopped beet greens & stems
2 c amaranth leaves
8 oz quesadilla cheese (seriously that was what it was called but any melting cheese would be good, it tasted like mozzarella or monterey jack to us.)
1 tomato, seeded & chopped (optional)
1 medium onion, sliced thin & caramelized
4 large tortilla
Olive oil for the tortillas

Sour cream & salsa for serving

Heat the olive oil in a large skillet. Add the garlic, beet greens & amaranth. Stir until the greens are wilted.

Heat a large skillet or griddle. Oil one side of two tortillas, place them oil side down on your work surface. Top with a little cheese, followed by the greens, onions & tomato. Cover with the remaining cheese. Top with the other two tortillas. Carefully place the filled quesadillas on the hot pan with the oiled side down. Cook until brown & crisp, the cheese should be starting to melt. Brush oil on the top of the quesadilla & carefully flip. Cook until that side is brown & crisp. Remove for the pan & cut into triangles to serve.

Serves 2

If you are not reading this post in a feed reader or at http://agoodappetite.blogspot.com OR at http://agoodappetite.com then the site you are reading is illegally publishing copyrighted material. Contact me at katbaro AT yahoo DOT COM. All recipes, text and photographs in this post are the original creations & property of the author unless otherwise noted.
© 2007-2009 Kathy Lewinski

Monday, July 6, 2009

Weekly Menu 7/6 - 7/11

I hope everyone had a great weekend. Ours was unfortunately not the holiday weekend we had hoped for. Matt's been pretty down with a flu or cold since the middle of last week. Our Fourth of July BBQ was rained out. Then I got hit with either a cold or allergies on Sunday. On a good note though I did get some good sewing time in & our rescheduled BBQ on Sunday was really yummy & fun.
Dutch Baby
Despite not feeling well, Matt let me sleep in on Friday while he whipped up with Dutch Baby from Orangette.
Dutch Baby
Warm & puffy he topped it with some fresh strawberry sauce, butter & powdered sugar. Perfect!


Baja Fish Tacos - We have tortilla left over from making quesadillas last week & some cabbage so Matt decided we had all the making except the fish for this.

Smoked Turkey - This was supposed to be our Fourth of July meal but the turkey was still frozen (after a week in the fridge) & we substituted with beer can chicken. We'll serve this with potatoes & beens.

Beer Brats with Kohlrabi Slaw

Turkey, brie & port wine jelly flat bread sandwiches

Beet & Goat Cheese Salad

I'd like to make some cherry jam this week & I've been challenged to make some Oatmeal Stout Ice Cream with Heath Bar Pieces in it.

If you are not reading this post in a feed reader or at http://agoodappetite.blogspot.com OR at http://agoodappetite.com then the site you are reading is illegally publishing copyrighted material. Contact me at katbaro AT yahoo DOT COM. All recipes, text and photographs in this post are the original creations & property of the author unless otherwise noted.
© 2007-2009 Kathy Lewinski
Related Posts with Thumbnails

Get Email Updates!

Enter your email address:

Delivered by FeedBurner

Measurement Abbreviations

T = Tablespoon
t = teaspoon
c = cup
lb = pound
oz - ounce

Labels

Blog Archive

Contributors

Blog Directory for Minneapolis, Minnesota