
I also couldn't find dried chickpeas so I used canned instead & just skipped the overnight soak. I also made the falafel into 2-inch patties rather than walnut-sized balls because I thought they would fit in the pits better.
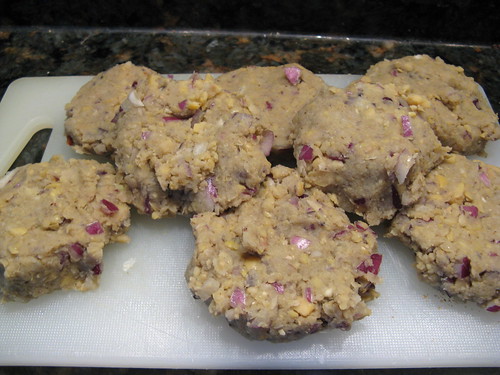
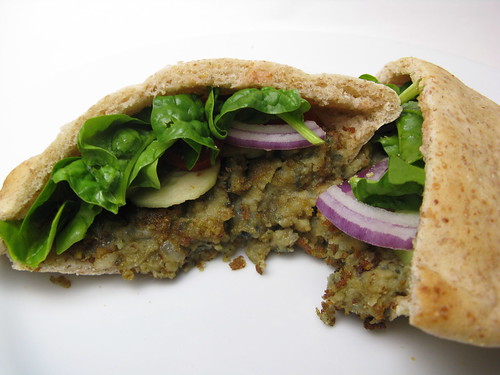
Not that it made a difference as these didn't hold together at all. The recipe was pretty vague in its cooking instructions. I think that the trick is to have really hot oil & fry them so they get a good crispy crust on the outside to hold them together. (After doing some research the issue may have been the canned chickpeas after all.) In the long run it didn't matter though because they tasted fantastic! We topped them with cucumber, tomatoes, spinach & red onion. I dipped mine in some plain yogurt while Matt added some Sirracha.
Falafel: Chickpea Patties
(adapted from Madelian Farah, Lebanese Cuisine, Four Walls Eight Windows)
1 14/5 oz can chickpeas
1/4 c red onion, chopped
1 clove garlic
1/2 T all-purpose flour
1/2 t ground coriander
1/2 t baking soda
1/4 t ground cumin
pinch red paper flakes
salt & pepper
vegetable oil
Drain & rinse the chickpeas. Add to a food processor with the onion & process. Add all remaining ingredients except the oil. Process until you get a slightly chunky paste. Give it a pinch & see if it holds together easily. Form into 8 2-inch patties.
Heat about 1/4 inch oil in a non-stick skillet over high heat until very hot. Add 4 of the patties. Cook until the bottom us very brown & then flip & cook the second side. Remove to a plate covered with a paper towel & cook second set of patties.
Makes 8 patties
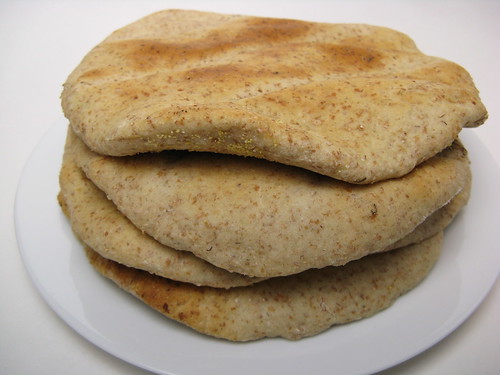
The pitas were really simple to make & really turned out great. This recipe had you cook them right on the oven rack which was a little odd since it kind of hung over the rungs & I think kept it from puffing up completely. Next time I think I'll try cooking them on a baking stone like many of the other recipes I saw called for.
Whole Wheat Pita Bread
(Gourmet May '03)
1 1/4 t active dry yeast
1/2 teaspoon honey
1/2 cup + 2 T warm water (105–115°F)
1 cups bread flour or high-gluten flour, plus additional for kneading
1/2 cup whole-wheat flour
2 T extra-virgin olive oil
1/2 teaspoon salt
Cornmeal for sprinkling baking sheets
Stir together yeast, honey, and 1/2 cup warm water in a large bowl, then let stand until foamy, about 5 minutes. (If mixture doesn't foam, discard and start over with new yeast.)
While yeast mixture stands, stir together flours in another bowl. Whisk 1/2 cup flour mixture into yeast mixture until smooth, then cover with plastic wrap and let stand in a draft-free place at warm room temperature until doubled in bulk and bubbly, about 45 minutes. Stir in oil, salt, remaining 3/4 cup warm water, and remaining 2 1/2 cups flour mixture until a dough forms.
Turn out dough onto a floured surface and knead, working in just enough additional flour to keep dough from sticking, until dough is smooth and elastic, 8 to 10 minutes. Form dough into a ball and put in an oiled large bowl, turning to coat. Cover bowl with plastic wrap and let dough rise in draft-free place at warm room temperature until doubled in bulk, about 1 hour.
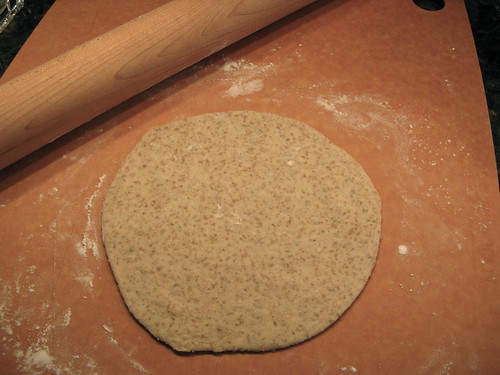
Punch down dough and cut into 4 pieces. Form each piece into a ball. Flatten 1 ball, then roll out into a 6 1/2- to 7-inch round on floured surface with a floured rolling pin.
Transfer round to a baking sheet lightly sprinkled with cornmeal. Make 3 more rounds in same manner, arranging them on baking sheets.

Loosely cover pitas with clean kitchen towels (not terry cloth) and let stand at room temperature 30 minutes.
Set oven rack in lower third of oven and remove other racks. Preheat oven to 500°F.
Transfer 4 pitas, 1 at a time, directly onto oven rack. Bake until just puffed and pale golden, about 2 minutes. Turn over with tongs and bake 1 minute more. Cool pitas on a cooling rack.
Makes 4 6-inch pitas
Note:
Pitas can be baked 1 week ahead and cooled completely, then frozen, wrapped well in foil in a sealed plastic bag. Thaw before reheating, wrapped in foil, 10 to 12 minutes in a 350°F oven.
If you are not reading this post in a feed reader or at http://agoodappetite.blogspot.com OR at http://agoodappetite.com then the site you are reading is illegally publishing copyrighted material. Contact me at katbaro AT yahoo DOT COM. All recipes, text and photographs in this post are the original creations & property of the author unless otherwise noted.
© 2007-2009 Kathy Lewinski
© 2007-2009 Kathy Lewinski


17 comments:
Mine have always fallen apart until this recipe when I saw that you dont cook them. You soak them overnight and then mix them up and fry them. Believe it or not there is no hard parts in there. It tastes perfectly cooked. I like you addition of onions here as I love oniony falafel.
I love making homemade pitas! So delish!
Your pita's look so professional!
great job! they look so yummy!
Kat, everything looks wonderful. You did a really nice job with the challenge.
Hi Kat-- I'm sorry your falafel didn't come out. Falafel is one of the few recipes where you can't substitute canned chickpeas for the dried and soaked ones-- which is always a problem for me too! I haven't found a store that sells dried chickpeas (not even WholeFoods) so I usually end up making falafel mix.
I keep promising myself that I'll make falafel, but haven't yet. I should get ambitious and make this!
I so want to try making my own pitas now!
Who knew pita was so easy to make - why even bother buying them.
I was wondering why they fell apart at first try (added more cornflour to hold later)... your pitas look amazing - i am still psyching myself to make them =)
so you had chickpea crumble instead of chickpea patties. that's okay, the pitas look fabulous. :)
Bravo! You made your own falafels and fantastic looking pita bread - YUM!
Everything looks so good! I've never made falafel, but didn't have the time to do so this month, so I went with the fries. I've seen the garbanzo flour on Amazon, so you might want to check that out, too.
The Pitas look scrumptious! Since falafels always look a bit off putting to me I think the taste is what counts and it certainly sounds like they tasted pretty darn good. So good job!
Great pitas! They look perfect.
I think we all make the same mistake the first time we make falafel, dried really make all the difference.
Your pitas look perfect!
To those of you who say you can't use canned chickpeas. You can definitely use the canned as long as you drain, rinse, and make sure they are very dry. Pat dry or let sit. Add a little extra flour to your mix and make sure your oil is very hot. If you can't find dried chickpeas or don't have the foresight or time to soak, this still works great.
Post a Comment