Tuesday, June 30, 2009

All-Purpose Mustard Vinaigrette

Recently, Matt adapted an Emeril Lagasse recipe for Mustard Vinaigrette to use as a sauce for some grilled shrimp & we both just fell in love with it. He added whole grain mustard to the original recipe which really bumps the flavor up & adds to the look as well. The mixture forms a thick & creamy emulsion which sticks to your food. And the flavor, it is just wonderful. I was worried it would overpower more delicate flavors like that of shrimp but that wasn't a problem at all. It just seems to take a simple quickly grilled meal & make it seem like something really special.
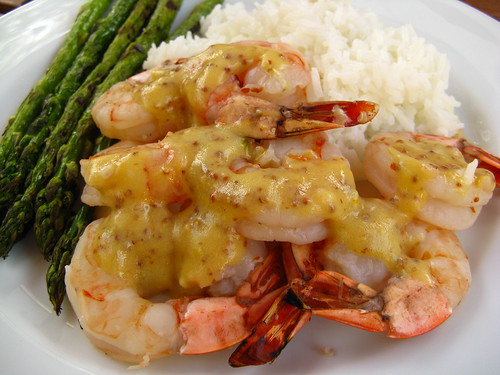
Grilled Shrimp with Mustard Vinegarette
We served the vinaigrette over some grilled shrimp & asparagus. The shrimp was brined in salt, water & red pepper flakes for about one hour before grilling.
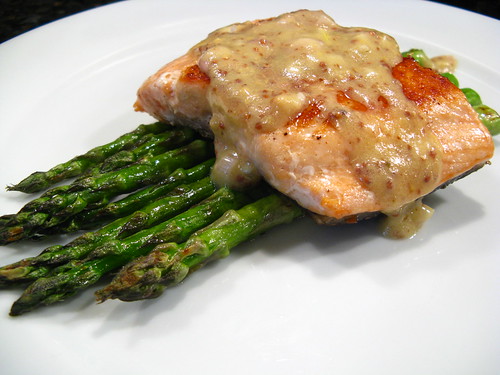
Pan-fried salmon with mustard vinaigrette
Next we served it over some pan fried salmon & more asparagus. Now I'd like to try it on chicken & rice or perhaps some potatoes. Of course, it would be wonderful just on a green salad too.

All-Purpose Mustard Vinaigrette
(adapted from Emeril Lagasse)

1 T Dijon mustard
1 T whole grain mustard
2 shallots, minced
2 t white wine or champagne vinegar
3 T neutral flavored oil
1 T extra virgin olive oil
salt to taste

Whisk all the ingredients together to form an emulsion.

Makes a little less than 1/2 cup

If you are not reading this post in a feed reader or at http://agoodappetite.blogspot.com OR at http://agoodappetite.com then the site you are reading is illegally publishing copyrighted material. Contact me at katbaro AT yahoo DOT COM. All recipes, text and photographs in this post are the original creations & property of the author unless otherwise noted.
© 2007-2009 Kathy Lewinski

Monday, June 29, 2009

Weekly Menu 6/29 - 7/4

Thought I'd give you a little update on how our garden grows. We've had hot weather & some good rain storms so the raised vegetable beds look like a jungle.
IMG_4209
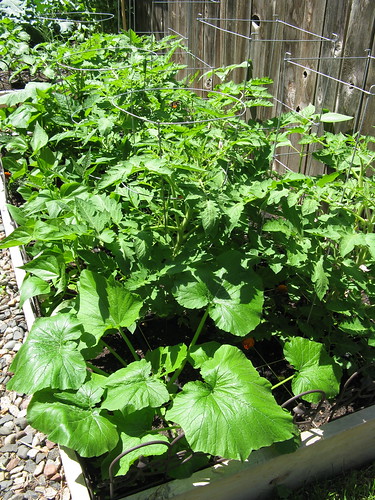
This bed contains Roma tomatoes, zucchini, bush beans & sunflowers. Some of the Romas are an inch long already. The beans are flowering & the zucchini is getting ready to blossom.
IMG_4203
The first planting of the kohlrabi is ready to harvest & Matt is looking forward to kohlrabi slaw.
IMG_4201
All three cherry tomato plants in pots have little tiny green tomatoes on them & lots of flowers.
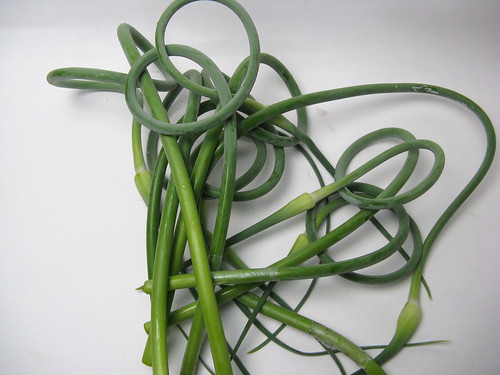
garlic scapes
We picked the garlic scapes from about half the garlic crop. (Garlic with the scape left on will actually store longer.) Some of the garlic plants are looking like they will be ready to harvest & dry the bulbs soon.
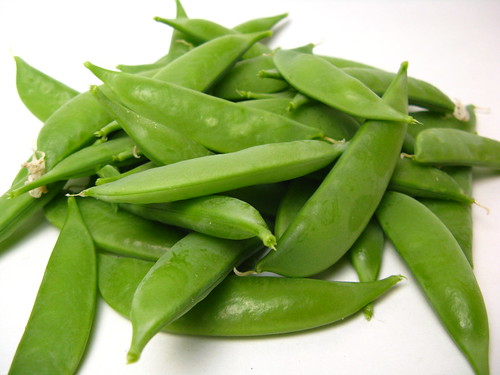
peas from the garden
We had a bumper crop of sweet peas that we finished harvesting last week. We've enjoyed them in salads so far but we'll sauté some up in soy sauce later this week.

On to Menu Planning Monday...

This is a bit of a strange week for us. I am working at the FRESH & Tasty events on Tuesday and Thursday so dinner will be out. Matt has Friday off so we thought we might take a little daytrip somewhere.

Grilled Salmon with Mustard Vinaigrette

Soy Glazed Pork Chops with Sweet Peas

Grilled Turkey - We have turkey for the other big US holiday so why not on the Fourth as well?

We'll also share garlic scape pesto & some uses for it with you this week along with Honeyed Fig & Pig Ice Cream.

If you are not reading this post in a feed reader or at http://agoodappetite.blogspot.com OR at http://agoodappetite.com then the site you are reading is illegally publishing copyrighted material. Contact me at katbaro AT yahoo DOT COM. All recipes, text and photographs in this post are the original creations & property of the author unless otherwise noted.
© 2007-2009 Kathy Lewinski

Saturday, June 27, 2009

Daring Bakers' Challenge - Bakewell Tart

The June Daring Bakers' challenge was hosted by Jasmine of Confessions of a Cardamom Addict and Annemarie of Ambrosia and Nectar. They chose a Traditional (UK) Bakewell Tart... er... pudding that was inspired by a rich baking history dating back to the 1800's in England.
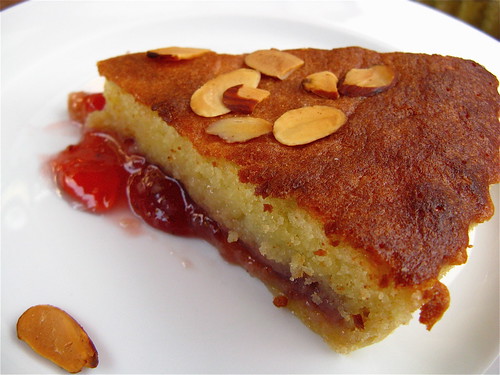
IMG_4224
I was very excited to do this months challenge, if a day late, for two English friends who were here visiting from San Francisco. One asked if there was jam in it & I was happy to answer, "Of course homemade Strawberry Balsamic Jam." The other said it was the best Bakewell Tart he can remember having. Most guest went for seconds & Matt said he would have that again in a second. Plus it was super easy to make , seriously this fabulous a dessert came together like nothing.
IMG_4222
I made the pastry crust the day before & chilled it overnight. I was a bit worried as it took twice the amount of water the recipe called for but it was tender & lovely. It rolled out easily & was tender after cooking. The frangipane was a snap to make (I ground my own almonds the night before) even in 80 degree weather & the almond flavor & scent was heavenly. My tart only took 25 minutes to cook, I was afraid it was overcooked but it turned our soft & spongy & perfect. I'll be making this again & again.

Bakewell Tart…er…pudding
Makes one 23cm (9” tart)
Prep time: less than 10 minutes (plus time for the individual elements)

Resting time: 15 minutes

Baking time: 30 minutes

Equipment needed: 23cm (9”) tart pan or pie tin (preferably with ridged edges), 
rolling pin
One quantity sweet shortcrust pastry (recipe follows)

Bench flour
250ml (1cup (8 US fl. oz)) jam or curd, warmed for spreadability

One quantity frangipane (recipe follows)

One handful blanched, flaked almonds

Assembling the tart
Place the chilled dough disc on a lightly floured surface. If it's overly cold, you will need to let it become acclimatised for about 15 minutes before you roll it out. Flour the rolling pin and roll the pastry to 5mm (1/4”) thickness, by rolling in one direction only (start from the centre and roll away from you), and turning the disc a quarter turn after each roll. When the pastry is to the desired size and thickness, transfer it to the tart pan, press in and trim the excess dough. Patch any holes, fissures or tears with trimmed bits. Chill in the freezer for 15 minutes.

Preheat oven to 200C/400F.

Remove shell from freezer, spread as even a layer as you can of jam onto the pastry base. Top with frangipane, spreading to cover the entire surface of the tart. Smooth the top and pop into the oven for 30 minutes. Five minutes before the tart is done, the top will be poofy and brownish. Remove from oven and strew flaked almonds on top and return to the heat for the last five minutes of baking.

The finished tart will have a golden crust and the frangipane will be tanned, poofy and a bit spongy-looking. Remove from the oven and cool on the counter. Serve warm, with crème fraîche, whipped cream or custard sauce if you wish.

When you slice into the tart, the almond paste will be firm, but slightly squidgy and the crust should be crisp but not tough.

Jasmine’s notes:

• You can use whichever jam you wish, but if you choose something with a lot of seeds, such as raspberry or blackberry, you should sieve them out.
• The jam quantity can be anywhere from 60ml (1/4 cup) to 250ml (1cup), depending upon how “damp” and strongly flavoured your preserves are. I made it with the lesser quantity of home made strawberry jam, while Annemarie made it with the greater quantity of cherry jam; we both had fabulous results. If in doubt, just split the difference and spread 150ml (2/3cup) on the crust.


Annemarie’s notes:
• The excess shortcrust can be rolled out and cut into cookie-shapes (heck, it’s pretty darned close to a shortbread dough).

Sweet shortcrust pastry
Prep time: 15-20 minutes

Resting time: 30 minutes (minimum)

Equipment needed: bowls, box grater, cling film

225g (8oz) all purpose flour

30g (1oz) sugar
2.5ml (½ tsp) salt

110g (4oz) unsalted butter, cold (frozen is better)
2 (2) egg yolks
2.5ml (½ tsp) almond extract (optional)

15-30ml (1-2 Tbsp) cold water (I used 4 T)

Sift together flour, sugar and salt. Grate butter into the flour mixture, using the large hole-side of a box grater. Using your finger tips only, and working very quickly, rub the fat into the flour until the mixture resembles bread crumbs. Set aside.

Lightly beat the egg yolks with the almond extract (if using) and quickly mix into the flour mixture. Keep mixing while dribbling in the water, only adding enough to form a cohesive and slightly sticky dough.

Form the dough into a disc, wrap in cling and refrigerate for at least 30 minutes

Frangipane

Prep time: 10-15 minutes

Equipment needed: bowls, hand mixer, rubber spatula

125g (4.5oz) unsalted butter, softened

125g (4.5oz) icing sugar

3 (3) eggs
2.5ml (½ tsp) almond extract

125g (4.5oz) ground almonds

30g (1oz) all purpose flour

Cream butter and sugar together for about a minute or until the mixture is primrose in colour and very fluffy. Scrape down the side of the bowl and add the eggs, one at a time, beating well after each addition. The batter may appear to curdle. In the words of Douglas Adams: Don’t panic. Really. It’ll be fine. After all three are in, pour in the almond extract and mix for about another 25 - 30 seconds and scrape down the sides again. With the beaters on, spoon in the ground nuts and the flour. Mix well. The mixture will be soft, keep its slightly curdled look (mostly from the almonds) and retain its pallid yellow colour.

If you are not reading this post in a feed reader or at http://agoodappetite.blogspot.com OR at http://agoodappetite.com then the site you are reading is illegally publishing copyrighted material. Contact me at katbaro AT yahoo DOT COM. All recipes, text and photographs in this post are the original creations & property of the author unless otherwise noted.
© 2007-2009 Kathy Lewinski
Radish Tortilla

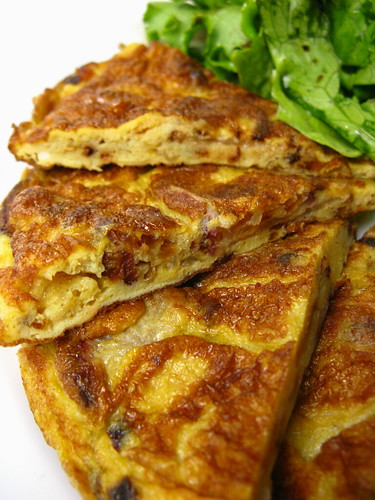
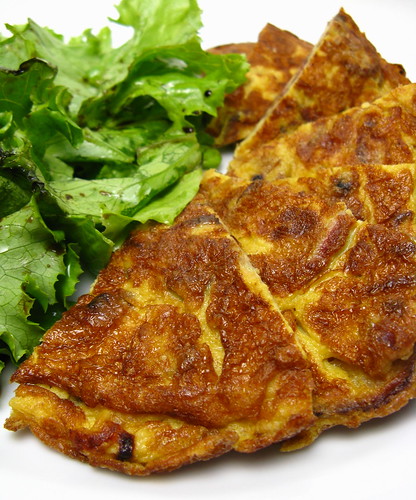
Many, many years ago I visited Spain & while I had so much amazing food I think the thing that stayed in my mind the most was the potato tortilla. Much like an omelet, though much more dense, tortilla slices would often be served at room temperature with a glass of wine in the afternoon or as a tapas. Last year, Tinkering With Dinner experimented with using radishes in place of the potatoes in this type of tortilla & I knew I wanted to try it myself when we started getting radishes from the farm this summer.
radish tortilla
This ended up being a really good experiment. Frying the radishes until brown imparts them with a sweetness a lot like a caramelized onion. It made a wonderful dinner for me on a hot, hot summer night served with a green salad simply tossed with some oil & vinegar.
radish tortilla
Radish Tortilla

1 c radishes, sliced 1/8-in thick
1/2 medium onion, sliced thin
olive oil
salt
3 large eggs

Heat about 1/2-inch of olive oil in a small skillet until very hot. Add the radishes & onion & sprinkle with salt. Fry until golden brown & then drain on a paper towel. (You may need to do this in two batches.) Wipe out the skillet saving about 1 - 1 1/2 tablespoons of the oil.
fried radishes
Whisk the eggs until foamy. Add the radishes & onions making sure they are completely covered. Let sit 15 minutes.

Heat the skillet with the remaining oil over medium-high heat until smoking. Pour in the egg mixture & flatten in the pan. Shake the pan while cooking. Once the bottom is brown flip the tortilla & turn heat to medium-low. Flip a few more time to finished cooking & get a good shape.

Let sit until room temperature before serving.

Makes one 8-in tortilla.

If you are not reading this post in a feed reader or at http://agoodappetite.blogspot.com OR at http://agoodappetite.com then the site you are reading is illegally publishing copyrighted material. Contact me at katbaro AT yahoo DOT COM. All recipes, text and photographs in this post are the original creations & property of the author unless otherwise noted.
© 2007-2009 Kathy Lewinski

Friday, June 26, 2009

Port Wine Jelly

Sunday when we were on our strawberry jam frenzy we were using a recipe that called for sherry but Matt decided he'd rather use a bottle of port that has been sitting in our stash in the basement. That meant we were opening a whole bottle for just 1/2 cup to be used in a recipe. What to do with the rest beyond having a Sunday afternoon drinking spree? Well, port wine jelly of course!
port wine jelly
We canned this into 4-oz jars because we think it will be used more as a condiment than as a jelly. We imagine it as a glaze for pork or ham, served on a bruschetta with blue cheese or on a panini with brie. I've read that this type of jelly used to be served as dessert with a little cream even.

Port Wine Jelly
(from The Complete Book of Small-Batch Preserving)

2 c port wine (this will also work with any robust, dry red wine)
1/4 c lemon juice
3 1/2 c sugar
1 pouch liquid fruit pectin

Prepare the jars & lids for canning. Jars should be boiled in water for 20 minutes & lids for 5 minutes.

Place the wine, lemon juice and sugar in a large stainless steel or enamel saucepan. Bring to a boil over high heat & boil hard for 1 minute while stirring constantly (boiling should not stop when stirred). Remove from the heat & stir in the pectin.

Ladle into 9 hot sterilized 4-oz jars leaving about 1/4-inch headroom. Clean off the tops of the jars & cover with a lid. Close with a neckband & finger-tighten. Process in boiling water for 10 minutes. Turn off heat & let sit for 5 minutes. Remove jars from the water to a heat-proof surface & let cool for 12 - 24 hours (do not dry jars). Check to make sure the top of the jar has been drawn downwards, creating a seal. If it hasn't either reprocess that jar or store it in the fridge to be eaten within 3 weeks. Remove the neckbands & store jam in a cool dark place.

Makes about 36-oz

If you are not reading this post in a feed reader or at http://agoodappetite.blogspot.com OR at http://agoodappetite.com then the site you are reading is illegally publishing copyrighted material. Contact me at katbaro AT yahoo DOT COM. All recipes, text and photographs in this post are the original creations & property of the author unless otherwise noted.
© 2007-2009 Kathy Lewinski
Thursday, June 25, 2009

Lamb Lettuce Wraps

This weekend the local strawberries were finally available at the farmers market so we bought enough to make a few batches of jam. This made for a really busy day in the kitchen & we didn't want to spend a long time making dinner so Matt came up with this quick dish based on the large head of greenleaf lettuce we got in our CSA box.
Lamb Lettuce Wraps
He calls this a "10 Minute Meal" because it took no time at all to make. The seasoning of the lamb was very flavorful & slightly middle eastern. I really enjoyed the texture of the almonds & the saltiness of the olives. The warm filling was really nice against the cool crispness of the lettuce though you could easily serve it in a pita or on top of some couscous or rice.

Lamb Lettuce Wraps

1/2 T olive oil
1/2 medium onion, chopped
1/2 lb ground lamb
1/2 t cumin
1/4 t coriander
1/4 t black pepper
1/4 t turmeric
1/4 c chopped green olives
2 T tomato paste
2 T sliced almonds
6 large lettuce leaves, washed & dried

Heat olive oil in a skillet over medium-high heat. Add the onion & sauté until just tender. Add lamb & cook until brown. Stir in cumin, coriander, pepper, turmeric, olives and tomato paste. Cook for 1 -2 minutes to blend flavors. Stir in almonds. Scoop a little into the middle of each lettuce leaf, wrap & serve.

Makes 6 wraps (which was 2 servings for us with a little pita & hummus on the side.)

If you are not reading this post in a feed reader or at http://agoodappetite.blogspot.com OR at http://agoodappetite.com then the site you are reading is illegally publishing copyrighted material. Contact me at katbaro AT yahoo DOT COM. All recipes, text and photographs in this post are the original creations & property of the author unless otherwise noted.
© 2007-2009 Kathy Lewinski

Wednesday, June 24, 2009

37 Jars and Counting

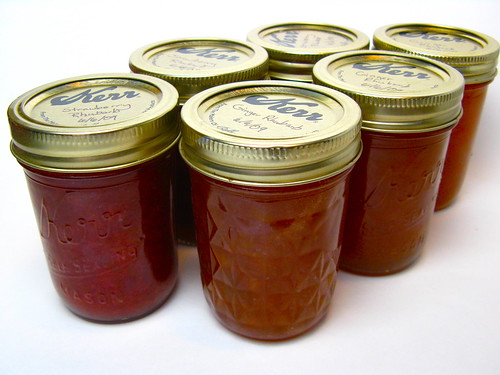
When we started making our own jam this spring Matt told me he had figured out that he eats a jar of jam every 10 days (he eats it on his oatmeal every morning) so if we made 37 jars of jam this summer that will take him through the year. (Have I mentioned he has a degree in math?) Thanks to the local strawberry crop showing up at the farmers market this weekend, we are now up to 34 jars of jam, 9 jars of port jelly & 6 jars of Strawberry Port Sauce.
all in a day's work
(this is just this weekend work, the rest is stored neatly in the basement already.)

We picked up 5 quarts of strawberries plus some of the last to this year's rhubarb, opened all the kitchen windows, turned the fan on high & set about to make Strawberry Balsamic Jam, Strawberry Port Sauce & Strawberry Rhubarb Preserves. These will join the jars of Gingered Rhubarb & Honey Jam, (more) Strawberry Rhubarb Preserves & Strawberry Vanilla Jam we've already put away. Does this mean we are almost done making jam for the year? Oh no, we are having too much fun trying the different flavors & eagerly awaiting blueberry & raspberry seasons. Plus we figure jam & other home canned goods will make good holiday gifts this year.
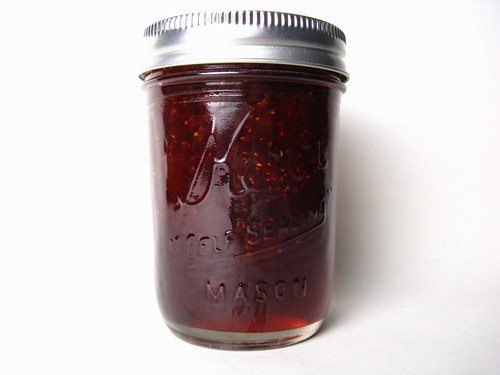
strawberry balsamic jam
The balsamic gave this jam a really rich, deep flavor. Matt says this is his favorite of the strawberry recipes yet.
Strawberry Balsamic Jam
(adapted from Ball Complete Book of Home Preserving)

3 3/4 c crushed hull strawberries (measure them after they are crushed)
4 T balsamic vinegar
7 c sugar
1 pouch liquid pectin

Prepare the jars & lids for canning. Jars should be boiled in water for 20 minutes & lids for 5 minutes.

In a large enamel or stainless steel saucepan combine the strawberries, vinegar & sugar. Turn the heat to high & bring to a full boil while stirring (the jam should continue to boil even while stirring). Stir in pectin. Boil hard while stirring for 1 more minute. Remove from heat & skim of foam.

Ladle into eight hot sterilized half-pint jars leaving about 1/4-inch headroom. Clean off the tops of the jars & cover with a lid. Close with a neckband & finger-tighten. Process in boiling water for 10 minutes. Turn off heat & let sit for 5 minutes. Remove jars from the water to a heat-proof surface & let cool for 12 - 24 hours (do not dry jars). Check to make sure the top of the jar has been drawn downwards, creating a seal. If it hasn't either reprocess that jar or store it in the fridge to be eaten within 3 weeks. Remove the neckbands & store jam in a cool dark place.

Makes 8 cups.
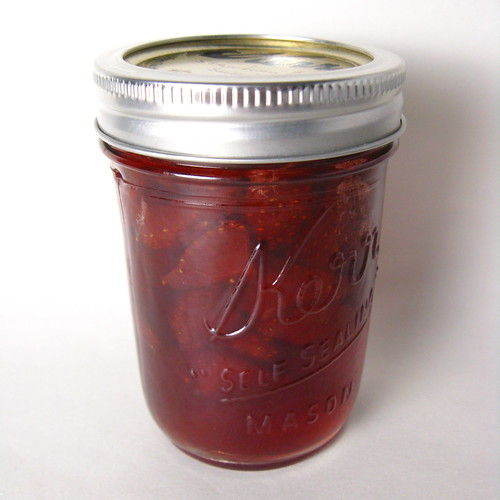
strawberry port sauce
This sauce (Ok, it was supposed to be jam but never set up even with extra pectin so now its sauce. I wonder if a low sugar pectin would have worked better.) has a gorgeous, bright red color & would be great on pancakes, ice cream or shortcake. Matt felt it had just a slight tang from the port. You can replace the port with white wine, red wine or sherry.
Strawberry Port Sauce
(adapted from Small Batch Preserving)

5 c whole small firm strawberries (or large strawberries either halved or quartered depending on size)
4 c sugar
3 T lemon Juice
1 pouch liquid pectin
1/2 port wine

Stir the berries, sugar & lemon juice together in a large bowl. Cover & let stand at room temperature for 4 hours, stirring from time to time.

Prepare the jars & lids for canning. Jars should be boiled in water for 20 minutes & lids for 5 minutes.

Put the berries & sauce into a large enamel or stainless steel saucepan. Bring to a boil over high heat & allow to boil rapidly for 2 minutes while stirring (boiling should continue during stirring). Remove from heat & stir in the pectin & port.

Ladle into six hot sterilized half-pint jars leaving about 1/4-inch headroom. Clean off the tops of the jars & cover with a lid. Close with a neckband & finger-tighten. Process in boiling water for 10 minutes. Turn off heat & let sit for 5 minutes. Remove jars from the water to a heat-proof surface & let cool for 12 - 24 hours (do not dry jars). Check to make sure the top of the jar has been drawn downwards, creating a seal. If it hasn't either reprocess that jar or store it in the fridge to be eaten within 3 weeks. Remove the neckbands & store jam in a cool dark place.

Makes 6 cups

If you are not reading this post in a feed reader or at http://agoodappetite.blogspot.com OR at http://agoodappetite.com then the site you are reading is illegally publishing copyrighted material. Contact me at katbaro AT yahoo DOT COM. All recipes, text and photographs in this post are the original creations & property of the author unless otherwise noted.
© 2007-2009 Kathy Lewinski

Tuesday, June 23, 2009

Chocolate-Covered Bacon Gelato

Ok, you all know how much we love our bacon & think it is perfect for every course including dessert (see our Dark Chocolate & Bacon Cupcakes). Since we got an ice cream maker for Christmas the idea of bacon in ice cream has been running through my head. I decided that coating the bacon in chocolate would only make it better.
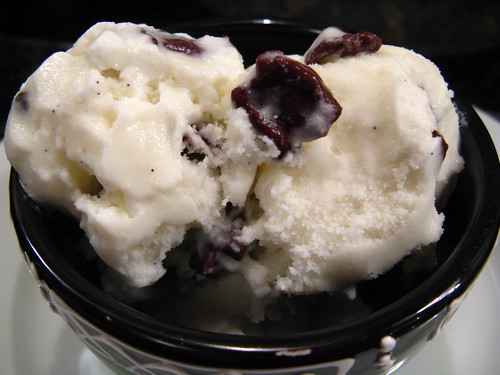
Chocolate Covered Bacon Gelato
I was worried the bacon might get soft in the gelato but it remained really crispy. Use the best bacon you can here (we used Nueske's) & one that isn't cut too thin. The flavor of the bacon is the salty star here making this truly a dessert for the bacon lover. I almost wished for a little more chocolate flavor so if I were making this again I might add a handful of chocolate pieces into the mix as well.
Chocolate Covered Bacon Gelato
We have a few other ideas for flavors around this like a maple flavored gelato with chocolate covered bacon or a honey sweetened gelato with bacon & figs in it that I'm looking forward to trying too.

Chocolate Covered Bacon Gelato
(Gelato recipe from The Ice Cream Bible. We really like this recipe for vanilla gelato & usually make it in place of vanilla ice cream so it became the vehicle for the chocolate bacon addition.)

1 c bacon, chopped into 1/2-inch pieces
1 1/2 - 2 oz semisweet chocolate
1 vanilla bean
2 c milk
1 c heavy cream
3/4 c sugar

Cook the bacon pieces until crisp. Use a slotted spoon to remove the bacon to paper towel to drain away the fat. Let the bacon cool to room temp or put in the refrigerator until ready to use.

Cut the chocolate into small pieces & place in a microwave safe bowl. Microwave on high for one minute. Stir until completely melted. Add the bacon & still until coated. Coat a baking sheet with wax paper. Remove the pieces of chocolate one at a time to the wax paper. (Yeah, you'll get chocolate on your fingers, consider it a snack.) Place into the freezer & let the chocolate set. If not using right away remove the bacon from the wax paper & put into a ziplock bag or plastic container & keep frozen until ready to use.

Split the vanilla bean in half & scrape the beans into a medium sauce pan. Put the rest of the bean, milk, cream & sugar in the saucepan as well. Heat over medium-low until the sugar melts. Strain into another container (mainly your removing the vanilla beans) & chill until completely cold.

Process the gelato mixture according to your ice cream maker's directions. In the last 5 minutes add the chocolate covered bacon in order to mix in.

If you are not reading this post in a feed reader or at http://agoodappetite.blogspot.com OR at http://agoodappetite.com then the site you are reading is illegally publishing copyrighted material. Contact me at katbaro AT yahoo DOT COM. All recipes, text and photographs in this post are the original creations & property of the author unless otherwise noted.
© 2007-2009 Kathy Lewinski
Monday, June 22, 2009

We have a winner!

The random number generator has chosen & the winner of the Muir Glen tomatoes is #23 Former Minnesotan. If that is you please email me at kat at yahoo dot com with your mailing address to get your prize!

Thanks to everyone for all the great ideas on how to use the tomatoes.

If you are not reading this post in a feed reader or at http://agoodappetite.blogspot.com OR at http://agoodappetite.com then the site you are reading is illegally publishing copyrighted material. Contact me at katbaro AT yahoo DOT COM. All recipes, text and photographs in this post are the original creations & property of the author unless otherwise noted.
© 2007-2009 Kathy Lewinski
Weekly Menu 6/22 - 6/27 and Parsnip Muffins

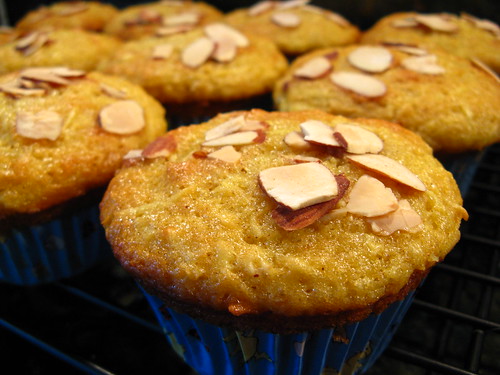
A week or so ago we were watching Good Eats & it was all about using parsnips in recipes kids would like. Now we love parsnips, roasted, mashed and in soups & stews, but I was really intrigued by the idea of using them in muffins.
Parsnip Muffins
Actually, it was almost like an "Ah ha" moment, of course parsnips would be good in a muffin, just like carrots are, especially overwintered parsnips. Apparently, overwintering parsnips increases the natural sugars in parsnips making them perfect for this type of application. Since we had friends in town it seemed like the perfect time to make muffins. They were a big hit even with the Englishman who doesn't like parsnips (or vegetables for that matter).

I made a few changes to this recipe. It originally called for whole milk yogurt, I used non-fat because its what I had & it seemed to work just fine. I changed the seasoning a little too since I thought this recipe would only be improved by the addition of cinnamon. I halved the initial called for amount of nutmeg. The flavor & texture of this muffin are great though I'd add more cinnamon next time & have marked that in the recipe. Now I'm wondering what a parsnip cake would be like.

Parsnip Muffins
(adapted from Alton Brown)

1 oz sliced almonds
8 1/2 oz all-purpose flour
1 t baking powder
3/4 t baking soda
1/4 t grated nutmeg
1/4 - 1/2 t ground cinnamon
1/2 t kosher salt
3 eggs
3/4 c plain non-fat yogurt
1/4 c olive oil
8 oz sugar
10 oz grated parsnips ( about 3 parsnips)

Heat the oven to 375 F. Place the almonds in a single layer on a baking sheet & allow to toast while the oven is heating. Keep & eye to not let them burn.

Spray 12 muffin tins with a non-stick spray or use paper liners.

Combine the flour, baking powder, baking soda, nutmeg, cinnamon & salt together. Mix well.

In a large bowl whisk the eggs yogurt, olive oil & sugar together. Add the flour & parsnips & fold until just blended. Do not over mix. Divide among the muffin tins, they will be quite full. Sprinkle the toasted almonds on top. Bake for 20 - 25 minutes until golden brown. Remove to a rack & allow to cool.

Makes 12 muffins

On to Menu Planning Monday...

Chicken Salad

Lamb Lettuce Wraps

Radish Tortilla - This is a real experiment, hope it works out

Spinach Tart

Barbecued Chicken with Garlic Scape Pesto

Saturday we're kind of playing by ear as we aren't sure if we have guests or not yet.

If you are not reading this post in a feed reader or at http://agoodappetite.blogspot.com OR at http://agoodappetite.com then the site you are reading is illegally publishing copyrighted material. Contact me at katbaro AT yahoo DOT COM. All recipes, text and photographs in this post are the original creations & property of the author unless otherwise noted.
© 2007-2009 Kathy Lewinski

Saturday, June 20, 2009

What we did with CSA box #3 and what's in #4

I've joined Cooking Away My CSA this year which is a group of people around the country sharing how they use their CSA boxes.

What we did with CSA box #3
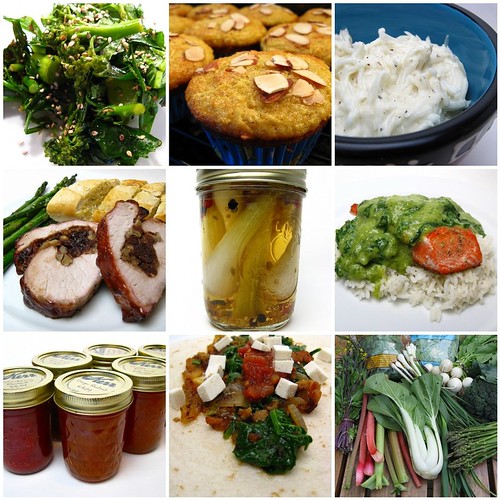
1. Broccoli Sesame Salad 2. Parsnips Muffins (recipe to come) 3. Baby Turnip Slaw 4. Grilled Asparagus 5. Pickled Spring Onions 6. Seared Salmon with Creamy Green & Roasted Pepper Sauce 7. Strawberry Rhubarb and Gingered Honey Rhubarb Jams 8. Spinach, Bacon and Onion Tacos 9. The box

What's in box 4...
What's in CSA box #4
Strawberries - These are always the best & sweetest strawberries of the year. I'm thinking of using then in ice cream or just on top of shortcake.

Red Radish - These make a great sandwich. I also heard they are good in frittatas instead on potato so I may try that this week.

Spinach - With so many greens in this box I may just blanch this bag & freeze it for later use.

Salad Mix 

Greenleaf Lettuce - I want to make lettuce wraps with this over the weekend

Kohlrabi - Matt loves the root julienned & used in slaw.

Napa Cabbage - Stir fry perhaps, maybe cut some up to use in steamed bun filling.

Garlic Scapes - We used half of this as a grilled pizza topping last night. We've also used it to replace garlic in other recipes. I think the rest will become pesto.

Scallions - All of these have already been used on pizza.

Broccoli - This was a pretty small amount of broccoli. We steamed the florets & put them on pizza.

(In case you are wondering our CSA is Harmony Valley Farm.)

If you are not reading this post in a feed reader or at http://agoodappetite.blogspot.com OR at http://agoodappetite.com then the site you are reading is illegally publishing copyrighted material. Contact me at katbaro AT yahoo DOT COM. All recipes, text and photographs in this post are the original creations & property of the author unless otherwise noted.
© 2007-2009 Kathy Lewinski

Friday, June 19, 2009

Ricotta Gelato

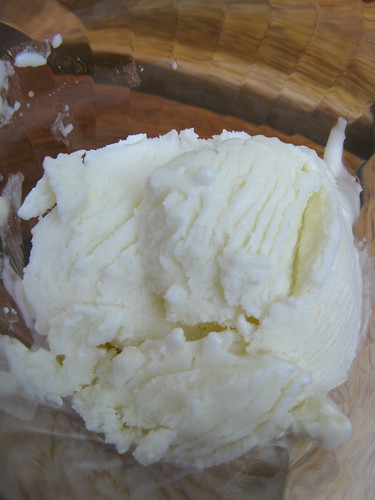
Last week I was looking for interesting recipes using ricotta for our cheesemaking day with Cooking Minnesota when I stumbled across this recipe on Epicurious. I was very intrigued by the idea of making an ice cream type dessert with cheese, would it be good or would it be gross.
IMG_3996 
It was very simple to but the base together & when I tasted it before freezing I was really happy with the flavor, sweet with just a subtle cheese taste (ricotta doesn't have a strong flavor to start with). I think it's really important to get the base really smooth (which is why I used a blender & not a food processor), I think chunks of cheese curd in this would not have been good. This gelato froze really quickly in the ice cream maker & froze very hard in the freezer. It needs a little time at room temperature before serving.

The final result was a hit. The cheese flavor remained really subtle. The thing that really strikes you as different is the mouth-feel, the best way to describe it is slightly sticky which is unexpected but not unpleasant. We served it with a fresh strawberry balsamic sauce which was a great pairing. I think a strawberry red wine sauce would be wonderful too. I don't think I'd necessarily rush to make this again but it was fun to try & I think my guests over this past weekend have enjoyed trying it too.

Ricotta Gelato 
(from Bon Appetit Sept' 07) 

4 c fresh whole-milk ricotta 
1/2 c whole milk 
1 1/2 c chilled simple syrup** 

Put the ricotta & milk in a blender & process until smooth. Add the simple syrup and continue to process until completely smooth. Put in an airtight container & chill. Transfer to an ice cream maker & process according to the machine's directions. Put into an airtight container & freeze until firm, about 3 hours. Can be keep for 2 days.

** Simple Syrup
1 1/2 c water
1 1/2 c sugar
Put the sugar & water into a saucepan & bring to a boil to dissolve sugar. Turn down to simmer. Let simmer for 3 minutes. Chill. Can be kept in an airtight container in the refrigerator for 1 week.

If you are not reading this post in a feed reader or at http://agoodappetite.blogspot.com OR at http://agoodappetite.com then the site you are reading is illegally publishing copyrighted material. Contact me at katbaro AT yahoo DOT COM. All recipes, text and photographs in this post are the original creations & property of the author unless otherwise noted.
© 2007-2009 Kathy Lewinski
Thursday, June 18, 2009

Fresh Chive Cheese

Matt printed out this recipe when we first started getting into making our own soft cheeses. We had done mozzarella & ricotta so he wanted to see what else was out there to expand our repertoire. Based on Indian chenna, this cheese log is full of the flavor of chive & a touch of lemon. It was super easy to make especially with a stand mixer with a dough hook. 
IMG_3984
As we were making it we had a hard time believing this mass of cheese curd was going to turn into a dough like texture but we let the dough hook do its work & like magic the curds became a soft dough. The final chilled texture comes out beautifully firm yet creamy. I was pretty proud to bring this lovely appetizer out & be able to say we'd made it from scratch. Matt absolutely loved it & is ready to make more right away. I think the possible additions for flavoring it are pretty wide though I'd stay away from anything oily (like sundried tomatoes packed in oil) as it will effect the texture of the cheese.

Fresh Chive Cheese
(from Sunset Magazine)

1 gallon whole milk
1/2 c lemon juice
1/2 t salt
2 T fresh chives, chopped

In a large pan heat the milk over medium-high heat until boiling, stirring frequently to prevent scorching. (This will take a long time, it took us close to 45 minutes.) Once the milk is boiling remove it from the heat & stir in the lemon juice. Stir until the white curds separate from the green whey. Let sit for 10 minutes while the curds settle to the bottom of the pan.

Line a large colander with four layers of cheesecloth. Pour the curds & whey into the colander. Rinse with lukewarm water for 5 seconds. Bring the corners of the cheesecloth together & tie them in a knot. Squeeze the curds to form a ball pushing out the whey (be careful not to burn yourself, gloves work good here. Place the cheesecloth wrapped curds back into the colander & top with a plate. Set a 5 pound weight on top (we used a brick). Let sit for 45 minutes.

Unwrap the curd & place in the bowl of a stand mixer with a dough hook. Knead for 10 - 15 minutes until the curds become dough-like, silky & not grainy at all. (You can also do this part by hand though it might take a little longer.) Add the salt & chives & blend to combine. Roll the cheese into a 2-inch log. Wrap in wax paper & chill for at least two hours up to 3 days. Slice to serve

If you are not reading this post in a feed reader or at http://agoodappetite.blogspot.com OR at http://agoodappetite.com then the site you are reading is illegally publishing copyrighted material. Contact me at katbaro AT yahoo DOT COM. All recipes, text and photographs in this post are the original creations & property of the author unless otherwise noted.
© 2007-2009 Kathy Lewinski
Wednesday, June 17, 2009

Baby Turnip Slaw

When I mentioned I had baby turnips in my current CSA box a couple people told me I had to try them raw. I gave them a taste & they are quite good raw, with a peppery flavor similar to a mild radish. I thought that flavor would play well in a coleslaw.
Baby Turnip Slaw
I was right this did make a nice crunchy slaw & was a great side with some brats on the grill.

Baby Turnip Slaw

12 baby turnips, julienned
3 T mayonnaise
1 t Dijon mustard
1/2 t white wine vinegar
salt & pepper

Stir turnips, mayo, mustard & vinegar together. Season generously with salt & pepper. Chill for at lease an hour before serving to allow flavors to meld.

2 - 3 servings

If you are not reading this post in a feed reader or at http://agoodappetite.blogspot.com OR at http://agoodappetite.com then the site you are reading is illegally publishing copyrighted material. Contact me at katbaro AT yahoo DOT COM. All recipes, text and photographs in this post are the original creations & property of the author unless otherwise noted.
© 2007-2009 Kathy Lewinski

Tuesday, June 16, 2009

Pickled Spring Onions

I'm seeing pickled ramps everywhere this year but didn't have a chance to try my hand at them before the short ramp season was over. What I do have is lots of spring onions plus there are piles of them at the farmers market for $1.00 a bunch so I decided to try pickling them.
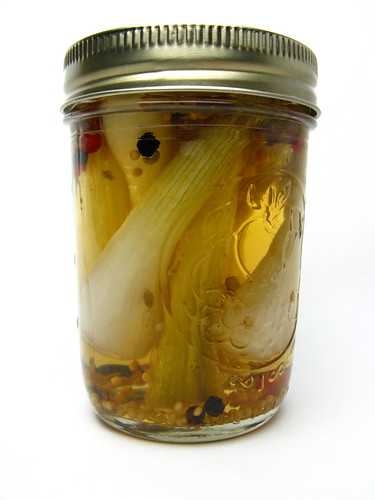
Pickled Spring Onions
I used Tom Colicchio's spice & brine recipe for pickled ramps just substituting with the onions. The recipe said you could store the pickles in the fridge to use right away or use proper canning techniques & store them for months. I decided to try canning them since we wouldn't need 4 jars of these right away. I referenced some of my preserving books for the proper timing to process pickled onions. I didn't have the red & white peppercorns the recipe called for so I substituted pink & black, I think you can use whatever you have.

Pickled Spring Onions
(adapted from Tom Colicchio Think Like a Chef)

2 pounds spring onions
salt for blanching
1 c white wine vinegar
1 c sugar
1 c water
1 T salt
1 t mustard seed
1 t coriander seed
1 t fennel seed
1 t pink peppercorn
1 t black peppercorn
1 bay leaf, cut into 4 pieces

While you are preparing the brine & onions sterilize four 1/2-pint jars & lids in boiling water.

Clean & trim the spring onions. Cut down the green until the onions are about 3/4 to 1 inch shorter than the jars. (You'll end up with mostly the whites & just a little of the greens.) Bring a pot of water to a boil. Salt & add the onions. Boil for 1 minute & them quickly move the onions to an ice water bath. Drain.

Divide the onions between the four sterilized jars. Add 1/4 teaspoon each of the mustard seeds, coriander seeds, fennel seeds, pink & black peppercorns to each jar. Add a piece of bay leaf to each jar.

Put the vinegar, sugar, water and salt into a saucepan & bring to a boil. Pour the hot liquid into each jar leaving about 1/2-inch headroom. Top with the sterilized jar lids. Put neckbands on & hand tighten. Place the jars into a pot of boiling water about 1-inch above the top of the jars. Cover & boil for 10 minutes. Carefully remove to a heatproof surface, do not top the seals or dry. Let sit for 12 to 24 hours to cool. Store in a cool, dark area.

Skip the whole canning step & just place onions, spices & brine in clean jars & keep in the fridge to use within a few weeks.

If you are not reading this post in a feed reader or at http://agoodappetite.blogspot.com OR at http://agoodappetite.com then the site you are reading is illegally publishing copyrighted material. Contact me at katbaro AT yahoo DOT COM. All recipes, text and photographs in this post are the original creations & property of the author unless otherwise noted.
© 2007-2009 Kathy Lewinski

Monday, June 15, 2009

Weekly Menu 6/14 - 6/20/09 + a giveaway

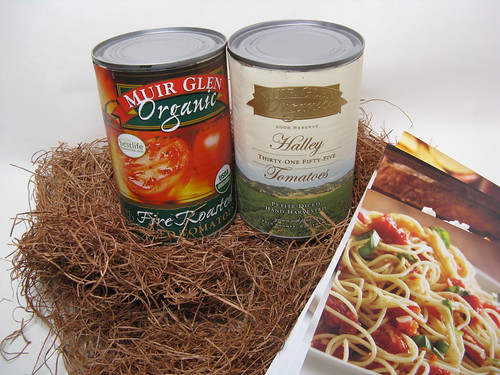
If you've followed our blog for any length of time you may have noticed when we use canned tomatoes we often recommend Muir Glen. They are organic & we like their taste much better than other canned tomatoes on the market, we are especially fond of their Fire Roasted Tomatoes & Pizza Sauce. So when they offered to send us their 2008 Reserve that was especially made for their Connisseurs' Club we were thrilled.
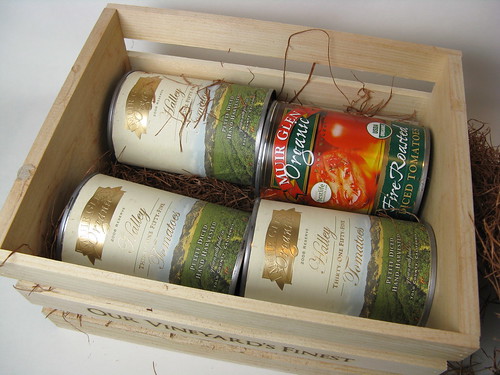
2008 Reserve: The Halley Thirty-One Fifty-Five
Look at that packaging, you would almost think this crate contained a special wine but inside were cradled four canned of tomatoes.
2008 Reserve: The Halley Thirty-One Fifty-Five
Only a small number of these Halley Thirty-One Fifty-Five Tomatoes were grown. This varietal is very prized for its flavor. Then they were hand harvested & canned. Well, we want to share our bounty with you. Leave a comment on this post telling us what you've make with these tomatoes & your email. On Monday the 21st we'll randomly pick a winner. That person will receive a can of the 2008 Reserve & a can of the Fire Roasted Tomatoes plus recipe cards with ideas on how to use them. We can only ship to winners in the US & Canada, sorry.
2008 Reserve: The Halley Thirty-One Fifty-Five

On to Menu Planning Monday...

We don't have plans to do much of anything new this week. We have friends visiting from San Francisco & want to spend our time visiting with them so we are going for the tried & true.

Pork Souvlaki - A favorite of ours from Kalofagas
Peanut Turkey Burgers with a Broccoli Sesame Salad
Rotisserie Chicken with Grilled Asparagus & Roasted Potatoes
Brats - We picked up three flavors of brats at the Kingfield Farmers Market
Grilled Pizza Party
Chicken Fajitas

What we will have for you during this week are lots of cheese recipes. We hosted Cooking Minnesota at our house this past Saturday & taught everyone how to make mozzarella & ricotta. I made a few appetizers & desserts with the ricotta so I'll be sharing those with you as well as a great fresh chive cheese.

If you are not reading this post in a feed reader or at http://agoodappetite.blogspot.com OR at http://agoodappetite.com then the site you are reading is illegally publishing copyrighted material. Contact me at katbaro AT yahoo DOT COM. All recipes, text and photographs in this post are the original creations & property of the author unless otherwise noted.
© 2007-2009 Kathy Lewinski

Saturday, June 13, 2009

FRESH and Tasty (Dinner + Movie)

The cooking group I belong to, Cooking Minnesota, is hosting a three-night event featuring the movie FRESH at the end of this month. If you live in the Twin Cities area, I highly encourage you to join us for an evening of great food, an intriguing film & hopefully some great discussion.
------------------------------------------------------------------------------------
FRESH celebrates the farmers, thinkers and business people across America who are re-inventing our food system. Each has witnessed the rapid transformation of our agriculture into an industrial model, and confronted the consequences: food contamination, environmental pollution, depletion of natural resources, and morbid obesity. Forging healthier, sustainable alternatives, they offer a practical vision for a future of our food and our planet.

Among several main characters, FRESH features urban farmer and activist, Will Allen, the recipient of MacArthur’s 2008 Genius Award; sustainable farmer and entrepreneur, Joel Salatin, made famous by Michael Pollan’s book, The Omnivore’s Dilemma; and supermarket owner, David Ball, challenging our Wal-Mart dominated economy.
------------------------------------------------------------------------------------
Award winning restaurant, Corner Table, and cooking group, Cooking Minnesota, have paired up to do 3 nights of dinner + movie at Corner Table. The dinners will be 3 course meals featuring the best that harvest season has to offer, served family style. Beer and wine will be available for purchase.

After dinner we will be moving outside to watch FRESH: New thinking on what we're eating. The movie takes on the large subject on reinventing our food system. It's already sold out 3 showings in Minneapolis.

Beer and popcorn, both locally produced, will be available while we watch the movie and facilitate a discussion about how home cooks can incorporate conscientious food choices for our families, health and planet.

The cost for the whole evening is $55 (dinner, movie & popcorn.)
Dates are June 30, July 1 & July 2.
Dinner at 6:30 and move at 9:00 PM
Seats are limited to 40 each night.
Tickets will also be available for just viewing the movie at $15.
Tickets will be available through Corner Table or Cooking MN

If you are not reading this post in a feed reader or at http://agoodappetite.blogspot.com OR at http://agoodappetite.com then the site you are reading is illegally publishing copyrighted material. Contact me at katbaro AT yahoo DOT COM. All recipes, text and photographs in this post are the original creations & property of the author unless otherwise noted.
© 2007-2009 Kathy Lewinski

Friday, June 12, 2009

Cherry-Stuffed Smoked Pork Loin

When we were in Michigan recently we had to stock up on dried cherries. Matt loves them on his oatmeal in the morning, they are great to use in baked goods & then Matt came up with this awesome pork dish where he stiffed the pork with cherries & smoked in on the grill.
Cherry-stuffed Smoked Pork Loin
The slow cooked pork loin came out juicy and tender. The tanginess of the dried sour cherries & mustard really pairs well with it. The walnuts he threw in on a whim but they gave the stuffing a nice texture as well as adding a nutty flavor.
Cherry-stuffed Smoked Pork Loin
The cherry mustard we used was one we also picked up in Michigan from American Spoon. It has a lovely reddish hue & tastes so good.


Cherry-Stuffed Smoked Pork Loin

2 T walnuts, chopped
2 T dried cherries, chopped
2 T cherry mustard
1 1/2 - 1 3/4 lb pork loin
1/4 c cherry mustard
1 T honey

Place a smoker box filled with soaked wood chips over direct heat on one side of your grill. Close cover & allow a smoke to build up. Refill smoker box with wood chips as needed throughout cooking.

Mix the walnuts, cherries & 2 tablespoons of cherry mustard together. Butterfly the pork loin. Put the cherry mixture in the center of the pork & roll it up. Tie together with twine or use soaked skewers.

Place the pork on the side of the grill that is not turned on (indirect heat). Allow to cook for 2 hours.

Mix the 1/4 cup cherry mustard & honey together. Brush on the pork & continue cooking for 1/2 hour more or until desired doneness.

Let rest 5 - 10 minutes. Remove twine or skewers & slice.

Serves 4


If you are not reading this post in a feed reader or at http://agoodappetite.blogspot.com OR at http://agoodappetite.com then the site you are reading is illegally publishing copyrighted material. Contact me at katbaro AT yahoo DOT COM. All recipes, text and photographs in this post are the original creations & property of the author unless otherwise noted.
© 2007-2009 Kathy Lewinski
Thursday, June 11, 2009

Seared Salmon with Creamy Greens and Roasted Pepper Sauce

Woohoo! I think this is week four of trying to eat fish at least once a week plus I made Matt happy with another Mexican dish. Our grocery store had some beautiful Copper River Salmon this week so we went with a salmon recipe.
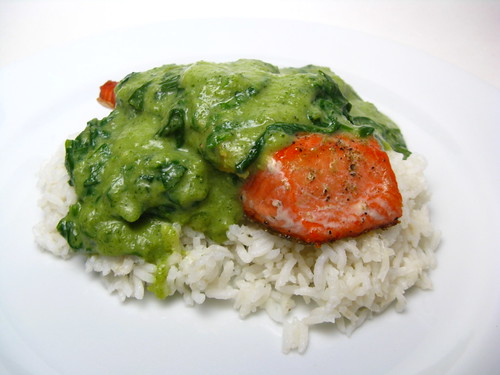
Seared salmon with Creamy Spinach & Pepper Sauce
I think this dish turned out really stunning with the creamy green sauce against the pink of the salmon. And let me tell you it tasted even better than it looked. The roasted poblano chile is the ingredient that really gives this dish the most of its flavors. Poblanos are quickly becoming a favorite of mine because of their wonderful flavor & no heat (yes, I'm a wimp.). The original recipe didn't mention serving the fish on rice but we enjoyed the addition, I liked to break up the fish & mix everything together in one bite.

Seared Salmon with Creamy Greens & Roasted Pepper Sauce
(adapted from Rick Bayless Mexican Everyday )

1 fresh poblano chile
5 oz greens, cleaned (we used a mix of spinach, arugula & hon tsai tai)
1 1/2 T olive oil
2 cloves garlic, peeled & halved
1 T masa flour
3/4 c milk
2 four ounce salmon fillets (the recipe called for skinless but ours had skin & it was no problem to remove after cooking)

Roast the poblano over an open flame or in the broiler until blackened all over. Let sit in a covered bowl until cool enough to handle. Under running water rub off all the blacked skin. Removed the stem & seeds then roughly chop.

Heat the oil in a large nonstick skillet over medium. Add the garlic & cook until lightly browned. Use a slotted spoon to remove the garlic but leave the oil in the pan for cooking the fish.

Put the poblano, garlic, masa & milk in a food processor or blender & process until very smooth. Set aside.

Put the greens in a microwave safe bowl & cover with plastic wrap. Poke a few holes in the wrap. Microwave on high until wilted, 1 -2 minutes. Set aside.

Preheat the oven to its lowest setting. Heat the skillet with the oil in it to medium-high. Season the salmon with salt & pepper. Lay the fish in the hot oil & cook until nicely browned, about 2 to 3 minutes. Flip & cook until barely done (it will finished cooking in the oven). Transfer the fish to an ovenproof plate & put in the oven to keep warm.

Add the poblano mixture to the hot skillet & whisk until it comes to a boil & thickens. Reduce the heat & let simmer for about 5 minutes. If it gets thicker than a cream soup add a little more milk. Season with salt. Add the wilted greens & stir until just warm.

Remove the fish from the oven & serve with the sauce.

Serves 2

If you are not reading this post in a feed reader or at http://agoodappetite.blogspot.com OR at http://agoodappetite.com then the site you are reading is illegally publishing copyrighted material. Contact me at katbaro AT yahoo DOT COM. All recipes, text and photographs in this post are the original creations & property of the author unless otherwise noted.
© 2007-2009 Kathy Lewinski
Wednesday, June 10, 2009

Fruits of Our Labor

We had such a cold, dreary weekend it seemed like the perfect time to heat up the kitchen & make some jam with all our lovely spring rhubarb.
Fruits of Our Labors
Matt loves jam on his oatmeal in the morning & those with rhubarb in them are some of his favorites. We decided to try two different flavors of jam; the classic Strawberry Rhubarb & something a little more exotic Gingered Rhubarb and Honey. This as the first time canning for either of us. It did take us about two hours (once the strawberries had sat for 3 hours) but we were pretty thrilled with the results. (It was such a thrill to hear the the lids of the cans making a popping noise as the sucked in showing the processing had worked.)
Strawberry Rhubarb on Toast
Both jams tasted really good. I really liked the Strawberry Rhubarb which tasted like the inside of a pie. Matt thought the Gingered Rhubarb and Honey was the best with its strong gingery flavor & rhubarb tartness.

Strawberry Rhubarb Preserves
(from Preserving Summer's Bounty)

1 1/3 c honey
4 c strawberries, washed, stemmed & thickly sliced
4 c rhubarb, washed and sliced
3 T lemon juice

Place the strawberries in a medium enamel or stainless steel saucepan. Drizzle 1/3 cup of the honey over them & let sit at room temperature for 3 - 4 hours.

Add the rhubarb, remaining 1 cup of honey & lemon juice to the saucepan. Slowly bring to a boil stirring from time to time. Cook at a rapid boil for 15 - 20 minutes or until berries are clear & the sauce has thickened. (This actually took closer to 30 minutes for us to get the sauce to just about gel stage**) Stir frequently to prevent sticking. Remove from heat & skim off the foam.
Strawberry Rhubarb
Ladle into four hot sterilized half-pint jars leaving about 1/4-inch headroom. Clean off the tops of the jars & cover with a lid. Close with a neckband & finger-tighten. Process in boiling water for 10 minutes. Turn off heat & let sit for 5 minutes. Remove jars from the water to a heat-proof surface & let cool for 12 - 24 hours (do not dry jars). Check to make sure the top of the jar has been drawn downwards, creating a seal. If it hasn't either reprocess that jar or store it in the fridge to be eaten within 3 weeks. Remove the neckbands & store jam in a cool dark place.

Makes 4 half-pints
Two-handed jam making (look at that two-handed jam making!)

Gingered Rhubarb & Honey Jam
(from The Complete Book of Small-Batch Preserving)

1 lemon
2 c rhubarb, washed & chopped
1 large tart apple (we used Granny Smith), peeled, cored & finely chopped
1/2 water
1 1/2 c granulated sugar
1 c honey
1 1/2 T candied or crystallized ginger, chopped

Zest the lemon. Put the zest into a medium enamel or stainless steel saucepan. Squeeze the juice from the lemon. Measure out 1 T of the juice & set it aside then add the rest to the saucepan.

Add the rhubarb, apple & water to the saucepan. Bring to a boil over high heat. Cover, reduce heat & allow to boil gently for 15 minutes until the fruit is tender.

Add the sugar, honey, ginger & reserved lemon juice to the pan. Return to a rapid boil, stirring frequently, about 8 - 10 minutes until it reaches gel stage**. Remove from heat & skim off any foam.
Filled & ready for processing(ready to process)
Ladle into three hot sterilized half-pint jars leaving about 1/4-inch headroom. Clean off the tops of the jars & cover with a lid. Close with a neckband & finger-tighten. Process in boiling water for 10 minutes. Turn off heat & let sit for 5 minutes. Remove jars from the water to a heat-proof surface & let cool for 12 - 24 hours (do not dry jars). Check to make sure the top of the jar has been drawn downwards, creating a seal. If it hasn't either reprocess that jar or store it in the fridge to be eaten within 3 weeks. Remove the neckbands & store jam in a cool dark place.

Makes 3 half-pints

**How to tell if your jam has reached gel stage. Put a couple of spoons the the freezer when you start cooking your jam. When you are ready to test the jam dip one of the cold spoons into it. When the jam "sheets" off the spoon (the drops become very thick & two drops run together before dripping off) it has reached gel stage. The jam will now form a gel when cooled & requires no further cooking.

If you are not reading this post in a feed reader or at http://agoodappetite.blogspot.com OR at http://agoodappetite.com then the site you are reading is illegally publishing copyrighted material. Contact me at katbaro AT yahoo DOT COM. All recipes, text and photographs in this post are the original creations & property of the author unless otherwise noted.
© 2007-2009 Kathy Lewinski

Tuesday, June 9, 2009

Spinach, Bacon and Onion Tacos

This dish is not at all what I normally think of when I think of tacos, there's no ground beef or sour cream, but oh, what a great change of pace.
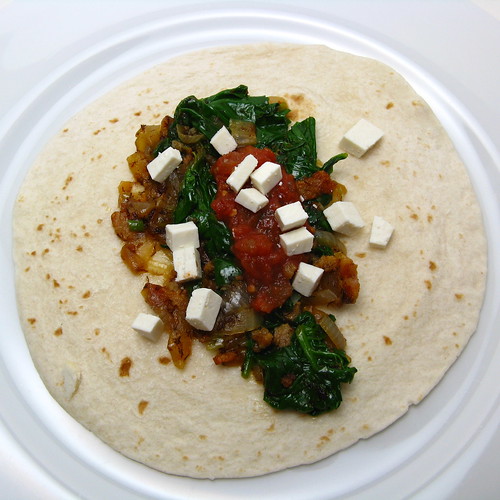
Spinach, Bacon & Onion Taco
The filling was really flavorful & satisfying (and actually probably pretty good for you). The original recipe did not include bacon. It had you cook the onions in olive oil or bacon fat & we thought, well why not just include the bacon the fat came from? (Because really bacon makes everything better right?! Ok, if you are vegetarian leave the bacon out & just use some olive oil, it'll still be good.) This is also one of those dishes that comes together pretty quickly so it would be perfect for a busy day.
Spinach, Bacon & Onion Taco
Spinach, Bacon and Onion Tacos
(adapted from Rick Bayless Mexican Everyday)

2.5 oz bacon, cut into large pieces
1/2 T olive oil
1 medium onion, sliced 1/4-inch thick
2 green garlics, white & light green parts finely minced
1/4 t crushed red chili flakes
1/4 c water
1/4 t salt
5 oz spinach
6 taco-sized tortillas
salsa
1/2 c crumbly cheese like queso fresca (we used ricotta salada)

Add the bacon & olive oil to a large skillet over medium-high heat. Cook for a few minutes allowing the bacon to render some of its fat. Add the onion. Cook, stirring occasionally, until browned about 8 - 10 minutes. Stir in garlic & chili flakes & cook until just fragrant. Add the water, salt & spinach. Cover the pan & reduce the heat to medium-low. Cook until the spinach is just tender about 2 minutes. Remove lid & stir until the filling is nearly dry.

Heat the tortillas. Top with the spinach filling, salsa & cheese.

Makes 6 tacos (2 servings)

If you are not reading this post in a feed reader or at http://agoodappetite.blogspot.com OR at http://agoodappetite.com then the site you are reading is illegally publishing copyrighted material. Contact me at katbaro AT yahoo DOT COM. All recipes, text and photographs in this post are the original creations & property of the author unless otherwise noted.
© 2007-2009 Kathy Lewinski
Monday, June 8, 2009

Weekly Menu 6/8 - 6/13/10

It was quite cold & rainy this weekend in Minneapolis. We decided to make the best of it & heat things up in the kitchen.
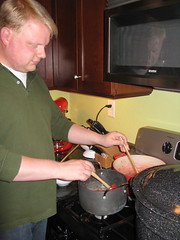
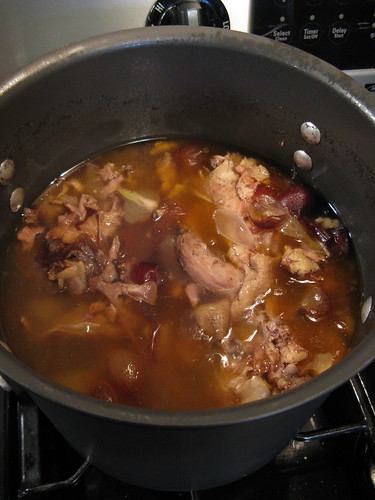
Boiling down for stock
Bag of frozen chicken & turkey bones were boiled up for stock.
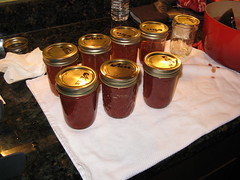
Filled & ready for processing
Strawberries, rhubarb, ginger & lemon were cooked down & made into jam. There is something wonderful about stocking the pantry & freezer with things you've made yourself! Jam recipes to come later this week.

One other quick thing, those of you who follow me through an RSS feed may have noticed that you no longer receive the whole post in your feed. Unfortunately, some thieves have been stealing all my blog posts through the feeds so I've had to change to the short feed. 

Menu Planning Monday...

Cherry Stuffed Pork Loin with Cherry Mustard Sauce - Matt was going to make this last week but we ended up going out for burgers.

New England Style Brats with a Grilled Asparagus Salad & Roasted Baby Turnips

Grilled Flat Iron Steak with Roasted Pepper Salad

Asparagus Risotto

Seared Salmon with Greens and Creamy Roasted Peppers

I want to try my hand at making a chocolate covered bacon gelato or ice cream this week.

If you are not reading this post in a feed reader or at http://agoodappetite.blogspot.com OR at http://agoodappetite.com then the site you are reading is illegally publishing copyrighted material. Contact me at katbaro AT yahoo DOT COM. All recipes, text and photographs in this post are the original creations & property of the author unless otherwise noted.
© 2007-2009 Kathy Lewinski
Saturday, June 6, 2009

What we did with CSA box #2 and what's in #3

We ended up taking most of box #2 to Matt's parents so it wouldn't go bad while we were out of town so I only have a few things to show for this box.
What we did with CSA box #2 '09
1. Cardamom Rhubarb Sorbet 2. Spicy Sunchoke Dip 3. Grilled Duck with Wild Rice Cakes 4. Apple Rhubarb Strudel 5. Turkey Yakitori Burgers 6. Grilled Asparagus Pizzas
And here's box #3
What's in CSA Box #3 '09
Spinach - Much of that will go into tonight's Spinach & Caramelized Onion Tacos

Arugula - No plans for this yet beyond salads

Baby Turnips - I want to use the greens in stir-fry along with some of the turnips. They rest I may roast or just sauté

Baby Broccoli - I'm thinking a salad with broccoli, sunflower seeds & raisins

Asparagus - This is the best looking batch yet. We just love it grilled with a little olive oil & salt, the perfect finger food

Green Garlic - Also in tonight's tacos

Potato Onions - These would be great grilled but I'm thinking some sort of spring onion tart might be nice.

Bok Choy - Headed to a stir-fry

Rhubarb - If we can find some fresh strawberries we plan on canning some rhubarb strawberry jam this weekend.

Hon Tsai Tai - Also stir-fry bound


If you are not reading this post in a feed reader or at http://agoodappetite.blogspot.com OR at http://agoodappetite.com then the site you are reading is illegally publishing copyrighted material. Contact me at katbaro AT yahoo DOT COM. All recipes, text and photographs in this post are the original creations & property of the author unless otherwise noted.
© 2007-2009 Kathy Lewinski
Related Posts with Thumbnails

Get Email Updates!

Enter your email address:

Delivered by FeedBurner

Measurement Abbreviations

T = Tablespoon
t = teaspoon
c = cup
lb = pound
oz - ounce

Labels

Blog Archive

Contributors

Blog Directory for Minneapolis, Minnesota