
This month's hosts were Debyi of Healthy Vegan Kitchen & Lori of Lip Smacking Goodness. They challenged us with tamales, something I've never made before & kind of always assumed were really hard to do. It turns out I was so wrong. Once you have the filling & the masa paste made they really go together quite quickly.
I used the Basic Tamale Recipe we were given for the masa paste though I used chicken stock instead of water of vegetables stock because its what I had. I also didn't bother to heat my stock because it was at room temperature, I had read that you have to be careful not to add stock that was too hot or it would cook the masa flour. I ended up making a half batch of the paste (actually I made two 1/4 batches two different days) which made about 24 tamales all together.

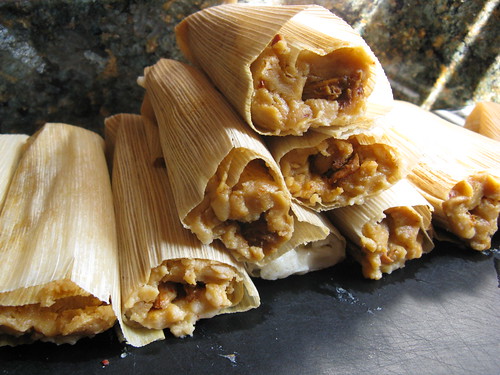
(Tamale with Corn & Cheese Filling)
We were allowed to pick any fillings we wanted for a tamales. I love the sweet corn tamales that I get locally at La Loma & since sweet corn is in season I knew I wanted to make those. Matt, on the other hand, likes a pork filling with a little spice. So we decided to go with two fillings.

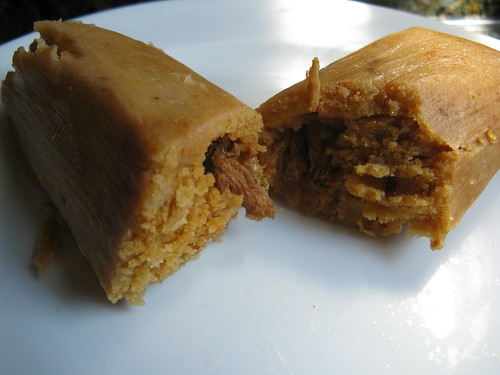
(Tamale with pork filling)
The corn filling is super simple with the only cooking required being to cook the corn. Other than that its just some chopping & you are ready to start filling.
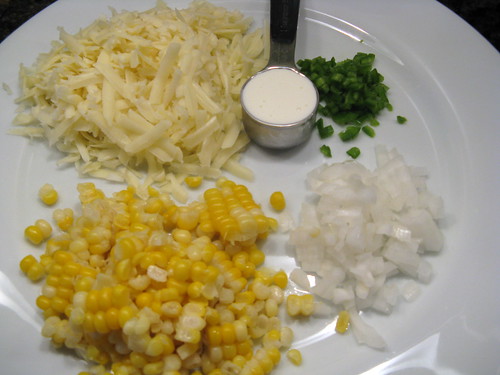
Corn & Cheese Tamale Filling
from azcentral.com
1 c corn kernels (I cooked one large ear of corn & then cut the kernels off it)
1/3 c onion, chopped
1 jalapeno, seeded & chopped
1 1/2 c grated Monterey Jack
2 T heavy cream
Mix everything together. Use right away or refrigerate for 1 day.
Makes enough for 12 tamales
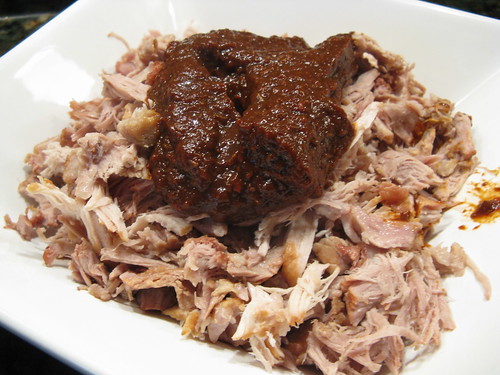
The red chile & shredded pork filling took a little more time because the pork needs to braise for about an hour & a half. The red chile sauce was so fragrant & tasty.
Red Chile & Shredded Pork Tamale Filling
adapted from azcentral.com
Red Chile Sauce
2 1/2 oz whole dried ancho chiles
boiling water to cover chiles
1/2 t ground oregano
1 T onion, chopped
1 clove garlic, peeled
1 c chicken broth
1/2 T vegetable oil
1 t flour
1/4 t salt
Remove the stems & seeds from the dried chiles while rinsing them under cold water. Place the chiles on a skillet that has been preheated over medium-high heat. Toast the chiles for about a minute until they are aromatic. Place them in a bowl & cover them with boiling water & soak for about 10 minutes. Drain the chiles setting aside the liquid for later use.
Place the chiles, oregano, garlic clove, onion & stock in a blender, process until smooth. Add more liquid if its too thick.
Heat the vegetable oil in a saucepan over medium-high heat. Add the flour & stir constantly until golden. Add the chile paste & salt then reduce the heat to low. Stir often & cook for about 10 minutes.
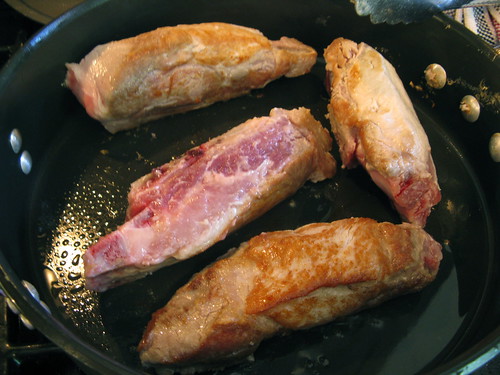
Pork
1 T olive oil
1 - 1 1/4 lb boneless pork butt (we actually used country style pork ribs & they worked perfectly)
1 garlic clove, peeled
2 bay leaves
10 peppercorns
In a large pan with a lid heat the olive oil over medium-high. Add the meat & sear on all sides.
Add the water used to soak the chiles for the sauce. Add more water if needed until the meat is almost but not quite covered. Add the whole garlic clove, bay leaves & peppercorns. Bring to a boil. Reduce heat & cover. Allow to cook for about 1 1/2 hours until the meat is extremely tender & can be easily shredded.
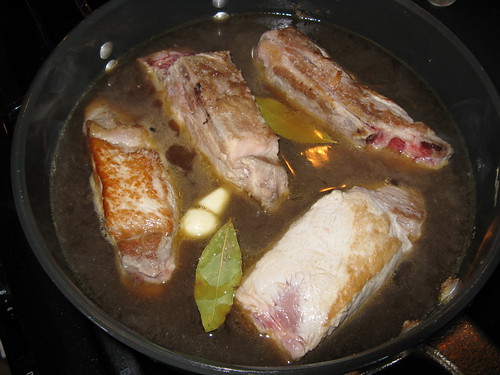
Allow the meat to cool & shred it with your hands or a fork. Mix in as much chile sauce as you'd like. We didn't want the filling too runny so we used about half the sauce in the meat.
I added another 1/4 cup of the sauce to the masa paste when I was making the pork tamales & it was fabulous.
(Tamales with red chile sauce in the masa paste)
Fills about 12 - 15 tamales
Making the Tamales
Before you can start making the tamales you have to soak your corn husks. We soaked ours in hot water for about 1/2 hour. Then we rinsed them to make sure there was no corn silk left. We kept them in a pan of warm water while we worked.

(I found a pan lid helped keep the husks in the water while they soaked)
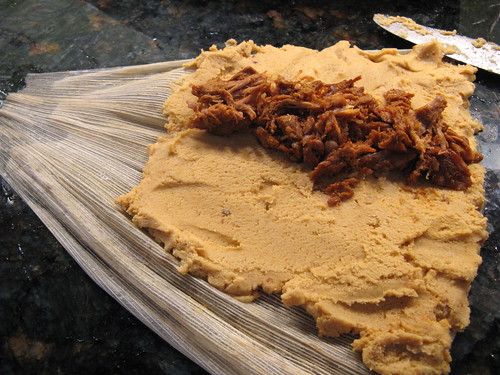
Putting together the tamales wasn't that hard once we got the hang of it. Using a knife or your fingers (my preferred method) you spread some masa paste on the the corn husk starting on the wide edge. We spread it about 2/3 down the length of the husk & left about an inch on the edge. Matt did this right in the palm of his hand, I found it easier to do on the counter. Then we added filling down the center of the masa paste. Finally the whole thing was rolled from the side with the masa to the inch that was left empty & the bottom was folded up over the seam.
We steamed our tamales vertically but putting them in a steamer basket inside a large pasta pot. I put a ball of tin foil in the center to help them stand up since they didn't quite fill the basket. We let them steam for about 45 minutes, refilling the water about halfway through. Then we had finished tamales for dinner.

(This pot wasn't tall enough & I ended up switching to a bigger pasta pot)
They turned out pretty good & the batch I made the second day was better. I think I was going a little heavy on the masa & a little light on the fillings for the first batch. Matt really liked them with some green salsa on top & I like them just plain.

We freeze them in the corn husks in packages of two. When we want to eat them we just open the bag for a vent & then microwave them on high for 3 minutes. They come out perfectly steamed & ready to eat.
I think both Matt & I are really happy we got to try our hand at making these. We have a lot of corn husks & masa flour left so I'm sure we'll be doing this again.


33 comments:
Oh my goodness. I have never made tamales either...but you make it look so rewarding and easy.
YUM.
Megan of Bit of Nutmeg
You have made a really delicious looking dinner here & the stages photographs make it look so easy too!
Yum! For real! I've never made tamales. I've only eaten them in restaurants. Whenever I go to buy flour, I brush the bag of masa, but decide that it's too big, and I'll never use all of it before it spoils. Maybe I'll rethink this...
Do you know how many of these I would eat? Not just two, noooooo. These look so darn good. I love food that has it's own cover, an adventure of sorts.
Your pictures are wonderful! And You definitly made me rethink doing a sweet corn filling, I just wasn't sure how it would turn out, but yours look nummy.
Nice job, they look beautiful. They are yummy arent they?
Your tamales look great!!!Fantastic job. I'm so glad you enjoyed them.
Very cool. I had no idea how they were made! And I really like the idea of a savory Daring Bakers. Maybe once I get a handle on school, I'll join as well!
I love tamales! I've only had them a few times ever though since they're not really available around here.
These look delicious!
I have never made tamales, but I love them. I just had some killer ones at the Ferry Building...I have been craving them ever since. I will have to attempt making them. Yours look so good!
Ive never made tamales either. They look fab. Will have to attempt some day...
WOW! I have to say your blog is the BEST out there! The pictures are fantastic and the food looks absolutely yummy! I'm getting ready to make the bread right now! Yeah! I can't wait to see what you post next. Thank you again!
Making tamales was a first for me. I loved the sweet corn filling we used roasted pork. Your pictures are fantastic, great job!
Ohhhh the corn filling. I used to get it at Mexican place her in Tampa..YUM!!!
amazing... thanks for sharing a very clear step by step procedure of making this wonderful dish... i hope i can be courageous enough to make this... :)
wow! Great job! I'm going to have to try the corn and cheese filling!
Love tamales! Glad to find another food blogger in the Minneapolis area!
yum!
Your photos are fabulous. I agree, tamales are a keeper recipe (especially because of all the leftover resources!)and they store so well.
Great job!
Oh my goodness! Your photos are incredible! And that fresh Minnesota sweet corn is making my mouth water...what a great filling! Nice step by steps, too. :)
Beautiful looking tamales! I'm going to try the corn filling next. :)
good heavens to betsy! you really went all out, and rightly so! i'm not sure which filling i'd enjoy more, and it'd take at least three of each for me to decide. :)
This looks great! I'm glad I dropped by! never heard of tamales before though... sometimes we are all so sheltered from what is out there!
they look lovely- i'll have to try that filling. welcome to the group!
I've always wanted to make tamales. The corn ones look so good! And it's good to know that they freeze so well.
I loved your post because homemade tamales are so important to our culinary lifestyle.
My wife is a native of San Antonio (from five generations of San Antonio Texans, and a relative of Sam Houston).
However, we moved to Maryland so that she could earn her medical degree from Johns Hopkins University.
Believe me, there are NO tamales in this area worth eating, so she has to make (despite her crazy busy schedule) our tamales.
Her recipe is somewhat different than yours, but we REALLY appreciate the fact that there are other folks out there who appreciate homemade tamales.
Thanks for the great post!
The kids love tamales (ah, who are we kidding, we love them too). But we've been too chicken to do them ourselves. Thanks for doing this!
I love tamales and order them often when I go to Mexican restaurants. Yours look yummy!
I love eating tamales but like so many others that commented above, have not made them myself. I have thought about it many times, but havent done it yet. I loved the pictures you included with the instructions. I am a picture kinda gal when it comes to trying new recipes, I like to see what it "should" look like first. Thanks for sharing, I am going to try these out in my kitchen!
Beautiful eclairs. Great job!
Your tamales look great!
What I forgot to mention is that I was born and raised in Minneapolis.
On Harriet Ave near Washburn High School (WHS Class of '54, to be exact).
Which makes it even more amazing that I have embraced the cusine of my much younger wife and her family.
Though I am PROUD to be a Yankee, I have fallen in love with the food of the South and Southwest.
Cheers, Chuck Treuter
I've been making tamales for the past 6 months, but I kind of have a slight short cut. Living in Los Angeles area we can get freshly mixed masa. I tried your corn filling, added cilantro, and boy did they turn out great. Another great filling is red, yellow, and orange sweet peppers,with onions and cheese. Thanks for the great recipe. COOK ON!
Post a Comment