Last week Allen at Eating Out Loud featured a recipe for Sigara Boregi with Minced Meat. As I read the recipe I realized that it sounded a lot like the phyllo rolls that I used to get at La Mediterranee in San Francisco. They were always a favorite of mine so I knew I had to try my hand at making them.
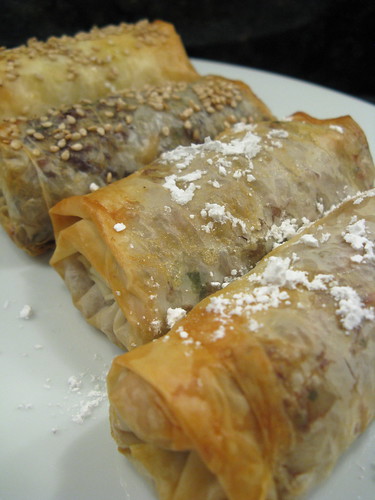
La Mediterranee served the rolls with a choice of three fillings, beef, chicken or cheese. My favorites were always the beef & chicken rolls both flavored with cinnamon. The beef is left savory while the chicken is sweetened with golden raisins & powdered sugar. I thought Allen's recipe for the beef sounded spot on so that left me to play with the chicken.
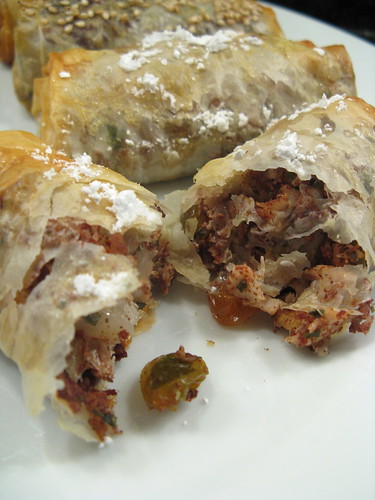
These were so good! I love the flavor of the cinnamon with the meat. Matt & I both really liked the chicken with the sweetness from the raisins & the powdered sugar. It was like being back in San Francisco & eating at La Mediterranee again. I don't usually cook with phyllo because I think its fussy but once I got the technique down (& ripped the first two rolls) these came together really easily.
Chicken Filling for Phyllo Rolls
2 T olive oil
1 medium onion, chopped
2 clove garlic, minced
4 T pine nuts
12 oz cooked chicken, chopped
4 t ground cinnamon
1 t ground coriander
1 t dried oregano
4 T golden raisins
salt & pepper
Heat the oil in a skillet over medium-high heat. Add the onions and cook until beginning to soften. Add the garlic & pine nuts & cook another 2 - 3 minutes. Remove from the heat & allow to cool. Stir all remaining ingredients together with the onion mixture.
Enough filling for 10 rolls
Since both the beef & chicken filling start with the sautéed onions, garlic & pinenuts, I made that then split it in half. That way I was able to make a half batch of the chicken filling & a half batch of the beef filling.
How to make the Phyllo Rolls
Mix together in a small bowl
1 egg
2 T milk
1/4 c oil (Allen called for 1/2 c but I decided to try a little less & it worked just fine)
Lay a piece of phyllo dough out with the long side facing you. (Make sure to keep a damp cloth over the phyllo dough you aren't working with.)
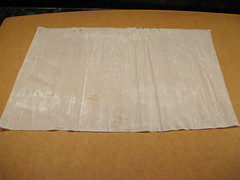
Lightly brush one half of the dough with the egg mixture. Fold the dry side over the wet.
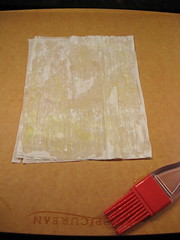
Brush egg mixture down the two long sides & the bottom short side. I tried brushing the whole square with it but then the rolls ripped when I tried to roll them. (If you do have a roll that rips like I did, just wrap another piece of phyllo around it that has been brushed with the egg mixture. I tried taking a broken roll apart & it just made a mess. Adding another sheet of phyllo just made for a little crustier finished roll.)
Put 1/4 cup of filling in the middle of the dough leaving about 2 inches on each side.
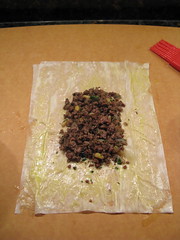
Fold the top long sides over the filling.
Fold the bottom up & begin rolling filling up like a cigarette.
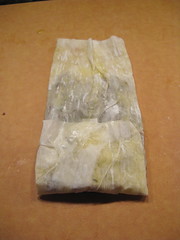
Brush the top 2 inches with egg mixture & finish the roll.
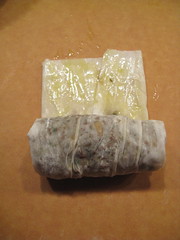
Place on a baking sheet with the seam side down. Brush the rolls on the tops & sides with the egg mixture. Sprinkle the beef rolls with sesame seeds.
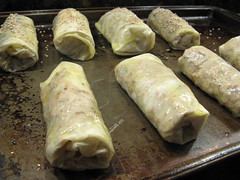
Bake at 350 F for 20 - 25 minutes until the rolls are golden brown. Sprinkle the chicken rolls with powdered sugar (Don't skip the powdered sugar, it really makes these rolls) before serving.
Tuesday, September 30, 2008
Monday, September 29, 2008
Chicken & White Bean Stew
We bought some chicken thighs on sale last week & I got it into my head that I wanted to make some sort of stew using them with white beans. When I told Matt my idea he was very skeptical, he didn't feel like chicken was something that should be stewed in beans. I, on the other hand, thought the heartier flavor of the thighs would stand up well to stewing. Let me just say that this dish made Matt take back all his doubts.
I started with this recipe from Blue Kitchen. Not only did I change the cut of chicken from boneless breasts to thighs but I also added fennel & spinach (ok, the spinach was Matt's idea). The final product was rich & flavorful, a wonderful cold weather one pot meal. I want to imagine with its flavors of thyme & fennel that this is what I'd eat in Provence during winter (sure I've never been there but a girl can dream). The only thing we would change next time, and there will be a next time, is we'd add more carrots which I've noted in the recipe.
Chicken & White Bean Stew
4 slices of bacon, chopped
4 chicken thighs, on the bone with the skin removed
salt
pepper
4 - 6 small carrots, sliced into 1/2-inch slices
1 medium onion, chopped
1 fennel bulb, chopped
1 large garlic clove, minced
leaves from 4 sprigs of thyme, chopped
2/3 c white wine
1 c chicken broth
2 cans white beans, drained & rinsed
3 c spinach, large stems removed & roughly torn
Cook the bacon in a large soup pot over medium heat until crisp. Remove to a paper towel to drain.
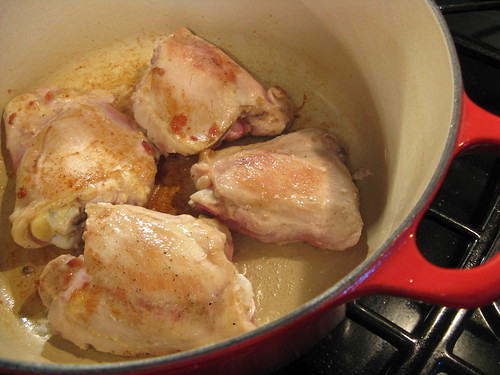
Salt & pepper the chicken thighs on both sides & add to the pot with the bacon fat. Cook for 10 minutes turning over halfway through. Remove the chicken to a plate & set aside.
Add the carrots to the pot & cook until beginning to soften, about 5 minutes. Add the onions & fennel & cook another 5 minutes. Next add the garlic & thyme cook briefly, about a minute.
Add the wine & broth, scrapping up any brown bits from the bottom of the pan. Add 2/3 of the beans. Using a fork, roughly mash the other 1/3 of the beans & add then as well. Bring to a boil.
Return the chicken & bacon to the pot. Turn down the heat, cover & simmer for 25 minutes. Remove the cover & stir in the spinach. Cook until the spinach is wilted. Check seasoning & add salt & pepper as needed. Serve with crusty bread in a shallow bowl.
4 servings
Weekly Menu 9/29 - 10/3/08
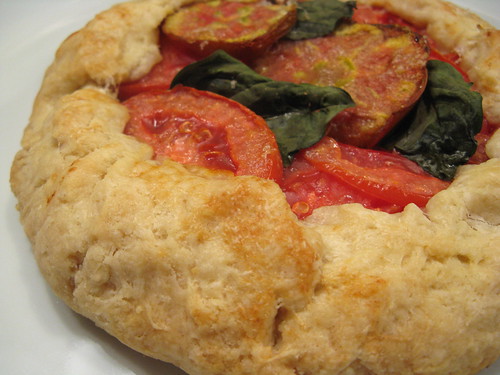
Last week while Matt was traveling I made myself a beautiful Tomato Galette for dinner one night. I'm really getting addicted to these rustic little tarts. They are so easy to make & the filling ideas are endless.
For this one I used the crust recipe from the Zucchini Galettes. Then I added a layer of caramelized onion followed by a little grated mozzarella & some basil leaves. That was topped by slices of sweet heirloom tomato, a drizzle of olive oil, salt & pepper & a little parmesan. The whole thing was baked for about 30 -35 minutes at 375 F & I had a perfect little dinner. The one hint I would give about this dish is to use the best seasonal tomatoes you can find, anything else will leave this tasteless.
Now on to Menu Planning Monday...
Beef & Chicken Phyllo Rolls - Allen at Eating Out Loud made the beef version of these last week that sounded so much like one of my favorite dishes at La Mediterranee in San Francisco so I had to try it. I'm going to do a few beef ones & a few chicken ones (since I have some roasted chicken in the fridge).
Lentil & Bacon Soup - Matt has been hinting about this soup since we got the book Soup's On!: 75 Soul-Satisfying Recipes from Your Favorite Chefs.
Indian Butter Chicken with Roasted Cauliflower - When I made curry last week Matt said he really wanted to learn how to make Butter Chicken so we're gonna give it a try.
Pasta with Roasted Red Pepper Sauce - We used to buy a red pepper sauce that we really liked but I never see it in stores anymore so I thought I'd making it.
Beef Chili - One of Matt's famous on-the-fly chilis. I don't know how he does it but he always makes a fabulous chili throwing in a bit or this & a bit of that.
This week's cupcake will be Banana, Chocolate, Caramel. I'm playing with these Kraft Caramel Bits that I found last week at Target. They are made to be used in baking so we'll see how that goes.
Labels:
weekly menu
Saturday, September 27, 2008
We have a winner!
Thanks to everyone who entered in our little contest this week, its so nice to get all those comments. We consulted the random number generator & it picked #6. So, that means Elle of Elle's New England Kitchen is our winner. Congrats Elle, look for an email from me soon.
Crackers for the Daring Bakers (& Dip Too)
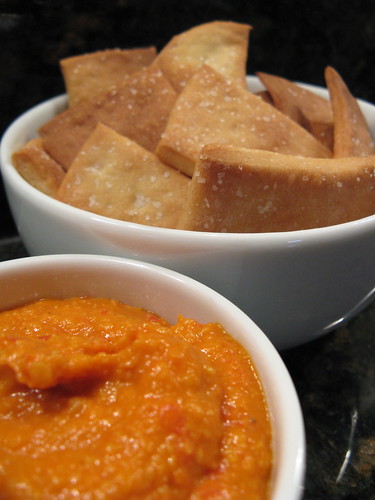
This month's Daring Bakers challenge was an interesting change from the sweets we've done in the recent past. Not only were we doing something that leaned more towards the savory in the crackers but since this challenge was hosted by two alternative bakers, Natalie from Gluten a Go Go & Shel from Musings from the Fishbowl , we were also asked to create a vegan dip to go with them.
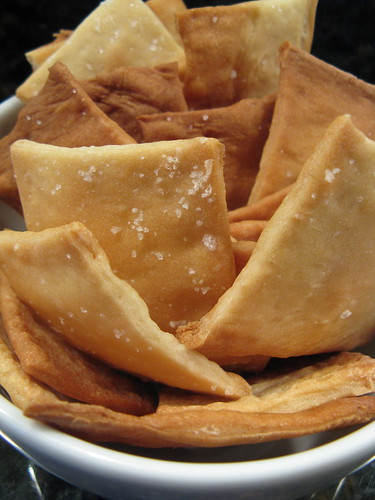
I decided to bake crackers with gluten instead of trying gluten-free since I already had everything to make them. The recipe called for ten minutes of kneading, I decided to give myself a break & use my Kitchen Aid. That really made these crackers a snap to make & other than the resting time they came together very quickly. The trick really is to make sure to roll the dough out very thin before baking (some people even used a pasta roller). I found that if I rolled the dough out on the silicone pad I was going to bake it on I could get it really thin easily & then didn't have to move it.
I kept the crackers simple & only seasoned them with a little fleur de sel (I tend to be a basic flavors girl when it comes to things like crackers). I made one batch to take to the Cookin' Minnesota event & then seemed to go over really well. I read that this is the same dough made to make pita bread which makes total sense, these crackers taste just like pita chips. This are chips that really stand up to a dip.
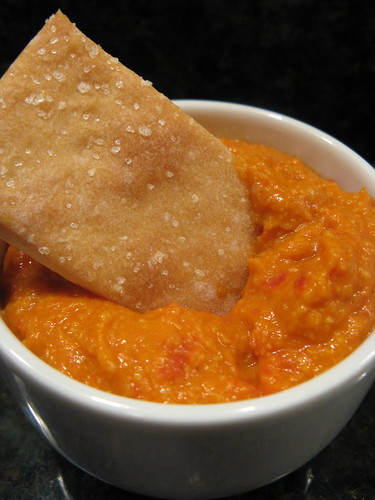
I made a second batch just flavored just as simply & served them with a Chickpea & Roasted Red Pepper Dip. I decided I was was going to make my dip with only things I had in the house (like my own little challenge within the challenge). I found a can of chickpeas in the pantry & part of a jar a roasted red peppers in the fridge so I went with that. The addition of lemon juice & red wine vinegar really make the flavors pop in the dip.
Lavash Crackers
from The Bread Baker's Apprentice
(This is the gluten version as I made it)
1 1/2 c all-purpose flour
1/2 t salt
1/2 t instant yeast
1 T sugar
1 T vegetable oil
1/3 to 1/2 c +2 T water at room temp
Put all the ingredients in to the bowl of your mixer starting with the smallest amount of water. Mix on the lowest setting until the dough comes together. If it is too dry add more water (I found I needed 1/2 c for mine). Using the bread hook of your mixer knead the dough on setting 2 for 6 to 10 minutes. Stop kneading when the dough when it is firm & satiny to the touch. It should pass the windowpane test (thanks Alton Brown for teaching me about this on your pizza dough episode!). Lightly oil a bowl & roll the dough in it to coat all sides. Cover with plastic wrap & let it sit a room temperature for 90 minutes.
Preheat oven to 350 F. Split the dough into two pieces & work with one at a time. On a lightly oiled surface or the silicone pad you plan to cook on shape the dough into a rectangle. Lightly dust with flour & roll out as thin as possible to get a nice crisp cracker, mine was almost translucent. If the dough keeps bouncing back let it rest covered for a few minutes. Sprinkle the dough with seasoning & lightly press in with rolling pin. Place dough on a parchment covered baking sheet or move the silicone pad onto a baking sheet. Score to the shape of your crackers if you wish (I used a pizza cutter). Bake for 20 - 35 minutes, turning halfway through (mine took closer to 35 to get a nice dark brown which I found made for a crispy cracker).
(Don't worry about cutting them all they way through, they'll snap apart after baking).
Allow to cool for 5 minutes on the baking sheet.
Chickpea & Roasted Red Pepper Dip
1/2 - 3/4 c roasted red pepper
2 cloves garlic
1 14-oz can chickpeas
1 t olive oil
1 t lemon juice
1 t red wine vinegar
salt
pepper
In a food processor or blender process the red pepper, garlic & chickpeas until a thick paste, it'll be a little chunk. Drizzle in the olive oil, lemon juice & vinegar & continue to process until smooth. If too thick add more olive oil. Season with salt & pepper.
Makes about 1 1/2 c
Labels:
appetizers,
bread,
challenges,
recipes
Asian Plum Cupcakes
Last week Matt & I went to a monthly Meet-up called Cookin' Minnesota. The theme of the September event was Preserving Summer.
We made Hibiscus Apple Sauce (that Matt has been eating a jar at a time) & talked about canning safety as well as met a lot of other great Twin Cities foodies. Kris, the event coordinator, even made Pumpkin Butter & Plum Jam for all of us to take home. Lucky us!
Well of course, my head started working around how I could work some of these goodies into a cupcake. I decided I wanted to try something with an Asian twist using the plum jam. The idea first started generating from remembering the plum seasoned popcorn I had in Hawaii & then I thought about the flavors of Asian plum sauce & I was off.
I have to say I was a little afraid of how this cupcake would turn out but when it was done I absolutely loved it. The cake has a wonderful texture, moist but not heavy (it could be one of the best cupcakes I've ever made). The brown sugar gives it a warmer, almost molasses type flavor when compared to cupcakes made with white sugar. The ginger makes these smell heavenly & really adds the Asian flavor. The plum jam in the cake & icing gives a fruity sweetness.
I decided to go with a very simple icing for these cupcakes that just adds some sweetness & more plum flavor. I do think this cupcake would also be wonderful with a cream cheese frosting. I garnished the cupcakes with a few slivers of crystallized ginger.
Asian Plum Cupcakes
1/2 c flour
1/8 t baking soda
pinch of salt
1 egg yolk, from a large egg
6 T packed light brown sugar
3 T buttermilk
1 T plum jam + extra to put in middle
2 t grated fresh ginger (or 1 t dried ground ginger)
2 T unsalted butter, room temperature
Preheat oven to 350 F. Prepare 4 muffin tins.
In a medium bowl whisk together the flour, baking soda & salt. Set aside.
In a small bowl whisk together the egg yolk, brown sugar, buttermilk, jam & ginger. Add 1/2 of this mixture & the butter to the flour mixture. Beat on low until the dry mixture is wet then turn up to medium & beat for about a minute until light. Add the remaining wet mixture & beat for another 30 seconds.
Fill each tin about 1/4 full. Spoon a dab of jam on top of the batter in each tin then top with more batter until each tin is 1/2 full. Bake for 20 minutes. Cool completely on a rack.
Makes 4 cupcakes
Plum Icing
1/2 c powdered sugar
2 t plum jam
Mix the sugar & jam together to form icing. If its too thick add a little more jam or some milk. Ice cupcakes & allow to sit for 15 - 30 minutes to set.
Enough to ice 4 cupcakes
Thursday, September 25, 2008
What's in CSA box #11
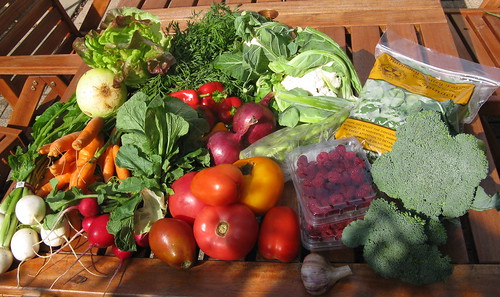
Look at this amazingly beautiful haul from the CSA this week. The colors just blew me away.
Here's what we got & a few of our plans...
* Baby Turnips - Some I'll roast & some will probably go into a soup.
* Carrots - One will go in my pot pie tonight, some into soup.
* Radishes - I'm planning on a radish sandwich for lunch tomorrow. Matt isn't a huge radish fan but I'll eat a couple everyday just sprinkled with a little salt.
* Tomatoes - We haven't gotten many tomatoes this year because of hail & flooding in the spring. I'm eying that big yellow one for a tart for my dinner tomorrow night.
* Garlic - I think we are going to plant most of this bulb in the garden. We use so much of it that Matt would like to try his hand at growing our own, plus this way we'll also get more garlic ramps in the spring!
* Raspberries - We may have to make some jam this weekend because we can't seem to eat these fast enough. The newsletter mentioned raspberry jalapeno jam & this sounds good to me or can you imagine a raspberry jalapeno cupcake?
* Broccoli - I think this is our favorite veggie. We'll eat it steamed & in some pasta.
* Spinach - I think I may steam & then freeze this to use in lasagna later.
* Edamame - This week's newsletter gave instructions on freezing these. Those of you who suggested blanching them & then freezing them flat on a baking sheet were right about that being the correct method. I'm pretty sure we'll freeze these.
* Cauliflower - I think we'll have some "Indian" bbq next week using these.
* Red Onions - Always a staple for us
* Variety of Peppers - There are some sweet & mild red & orange peppers here & one jalapeno. I think I'll roast some of these for a dip.
* Leaf Lettuce - no big plans, I love this lettuce on sandwiches
* Melon - Not sure if this is a French Orange or a Serenade. It'll be part of our Sunday breakfast. I love the small size of the melons we get, its so perfect for the two of us.
Labels:
csa
What we did with CSA box #10
We stared out using this box with a very basic stir-fry. We find that's one of the best ways to compliment the vegetables at their freshest. The melon & the raspberries we eat fresh for breakfast.
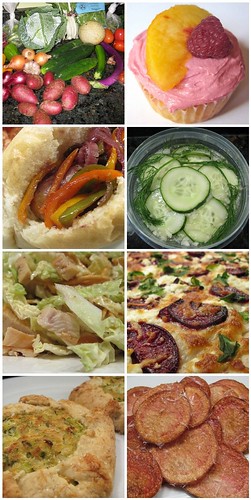
1. the box 2. peach melba cupcakes 3. sausage & peppers 4. freezer pickles 5. Asian chicken salad 6. roasted beet, goat cheese & arugula pizza 7. zucchini galette 8. homemade potato chips
Labels:
csa
Wednesday, September 24, 2008
Cooking around the web
Most Saturday or Sunday mornings I sit down & write my menu for the week ahead to create a shopping list. Typically, Matt or I have a few ideas of things we want to make based on recipes we've bookmarked or just what's in the freezer or fridge. This weekend I was working on this week's menu but it was all very vague. I just couldn't pull anything creative together. But then I went & checked some of my favorite food blogs & it was like they knew exactly what I needed.
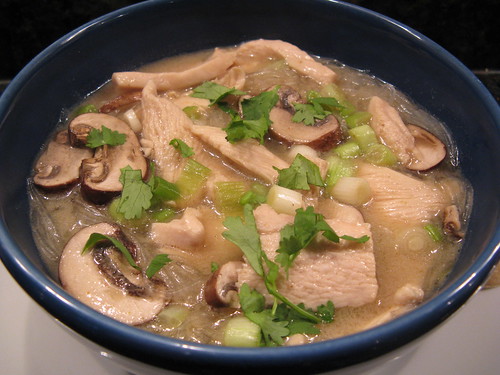
First, as you know I've been down hard with a head cold. Saturday I really wanted soup. What a really, really wanted was a curry soup like I used to get at the Citrus Club on Haight Street in San Francisco whenever I had a cold. The chicken broth is the perfect cold medicine & the little bit of spice sweats all the bad stuff out of you. We couldn't find what I wanted in any of our cookbooks so we had settled on just chicken noddle. Then I checked the latest post from Culinary Adventures of a New Wife & there it was, the chicken curry soup I was dreaming of.
We even had the green curry paste in the house needed to make it. Matt was very skeptical because we hadn't liked curry made with green curry paste in the past. Oh, but this soup was perfect. Just eating that big steaming bowl of it made me feel so much better. This will be a soup I make over & over again all winter long. The only thing we changed in the recipe was we left out the shrimp.
Then for Sunday I was defrosting a pork tenderloin from the freezer. We knew we were going to grill it but had no special plans for it at all. When up popped the latest post of Dinners for a Year and Beyond for Pork Tenderloin with Balsamic Fresh Fig Sauce. It sounded perfect, we love figs, we love balsamic. The question was, could we get figs? I'd never seen them in my market. I didn't see any at the store but decided to ask someone. Lo & behold, he has a box in the back, not only that but he'd just told two other customers they didn't have any & then he found this shipment (apparently they get shipments of figs year round into MN but the figs often don't come in good enough shape to sell).
We stuck pretty close to the original recipe except we grilled our pork & we added all the figs to the sauce. The flavor was amazing. The wonderful flavor of figs blended so well with the balsamic.
It seems when my creative culinary juices are down someone on the internet seems to know just what I want to cook!
Playing With Savory Bread Pudding
Last week I made the delicious Leek & Blue Cheese Bread Pudding from Beth's recipe on Jam & Clotted Cream. Ever since then I've been thinking about other flavor combinations that could be used. It seemed to me this technique could be used to compliment a variety of meals or just use up what's in the house. Last night I decided to try my hand at it with some leftovers we had around.
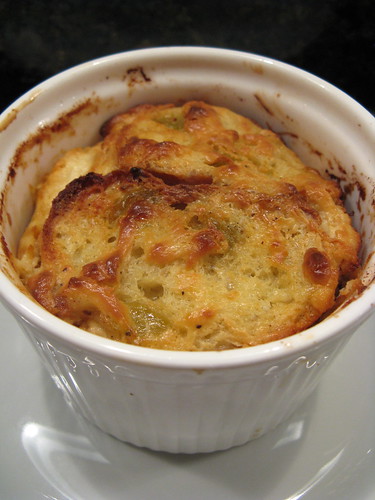
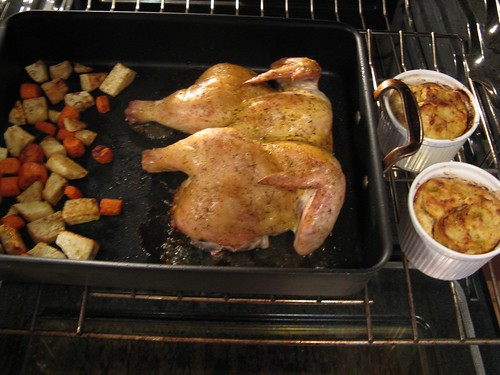
We had half a semolina fennel baguette & some fig goat cheese so that was my starting point. The baguette was 3 days old, quite past the point of soft but I figured it would be perfect soaked in the custard. I caramelized an onion to throw in because I thought the sweetness of it would compliment both the fennel & fig. I kept the custard simple & used Parmesan as my second cheese. It cooked in the oven for about 35 minutes while Matt was roasting a chicken at 400 F. Boy, was this great. I love they way it puffs up like a little souffle while cooking & that cheese bread texture. Goat cheese was great in this & add a nice tartness. The fennel flavor in the bread really came through in the final taste, actually more than it did when eating the bread fresh. Matt really liked this combination quite a bit.
I think I'll find myself making a lot more of these puddings throughout the winter to play with different combinations. Here's the basic recipe for you to play with. What flavor combinations do you think would be good in it?
Basic Savory Bread Pudding
(adapted from Jam & Clotted Cream)
6 1/2-inch or thinner slices of bread, cut to fit your ramekins
butter
mustard or spread of choice such as mustard (optional)
vegetable of choice (onions, leek, fennel), sautéed until softened
2-2.5 oz cheese (or mixture of cheeses)
1 egg
2/3 c milk
seasonings of choice
Two 1 1/2 c ramekins
Spread one side of the bread slices with butter & spread if using one.
Beat egg & milk together. Season with salt & pepper plus other herbs or spices of your choice.
Lay one slice bread with the butter side up on the bottom of each ramekin. Top with 1/3 of the vegetable. Sprinkle 1/3 of cheese on top. Spoon 1/3 of egg mixture over that. Repeat two more times until all ingredients are used.
Let sit for about 20 minutes so the bread can soak up the egg mixture. This is especially important if you are using stale bread.
This can be baked anywhere from 325 - 400 F along with whatever else you are cooking. It should take 30 - 45 minutes. Its done with the top is brown & all the cheese is melted.
Makes 2 individual puddings
Now I'm wondering how it would be with some fig jam spread on the bread or how about using a garlic rosemary bread, oh the options....
Tuesday, September 23, 2008
Chicken Curry
Typically chicken curry is a quicky meal for us that we make using a sauce from a jar. We've found some good ones that we like at World Market & usually keep a few in the pantry. As good as these jarred sauces are I still feel like I should be able to make it myself. I've tried a couple recipes over the past year with some disappointing results (usually they are just too bland).
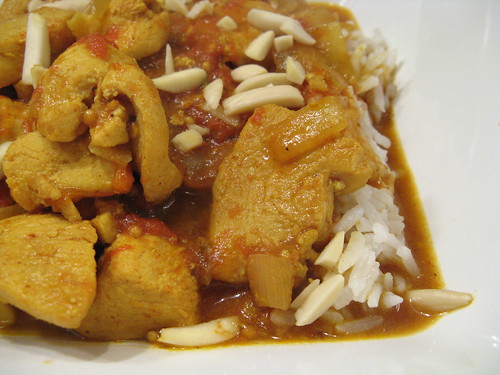
This time I seem to be on the right path. I started with a a few different ideas from recipes around the web & then used what I had in the house. The flavor of this curry turned out really good, the mixture of seasonings seems to be the one we've been looking for & it smells absolutely fabulous. I like the smoothness the coconut milk adds to it. This curry is quite mild so Matt added a little Sriracha to his, next time I think I'll add a little to the whole batch to give it that extra bite. I added some golden raisins & almonds to mine & really liked the sweetness of the raisins & the crunch of the almonds with it.
Now before anyone says anything, I'm sure this is not a true curry by any means, its probably more like a curry you'd get in England, but it is the type of curry we like.
Chicken Curry
1 t vegetable oil
2 boneless skinless chicken breasts, cut into bite-sized pieces
1 c onions, chopped
2 cloves garlic, minced
1 T fresh ginger, minced
1 c tomato, chopped (you can use fresh of canned, I used some fresh that I had frozen)
1 T tomato paste
1/2 t mustard seeds
1/2 t cumin powder
1/2 t tumeric
1 t curry powder (we use a red curry powder)
1/4 t cinnamon
1/2 c chicken broth or stock
1/2 c coconut milk
chili garlic paste, such as Sriracha (optional, use as little or as much as you like depending on how much heat you want)
1/2 t gharum masala
slivered almonds (optional)
golden raisins (optional)
In a soup pot heat the oil over medium-high heat. Add the chicken & cook until just browned. Remove the chicken & set it aside. Add the onion & sauté until soft & translucent. Turn the heat down to medium-low & add the mustard seeds. Cook the seed until the soften a little. Add the cumin, tumeric, curry & cinnamon. Stir constantly until it becomes fragrant, this should only take about a minute. Add the tomatoes & tomato paste. Stir until the tomatoes break down to sauce like consistency. Add the chicken, chicken broth, coconut milk & Sriracha & bring to a simmer. Cover & simmer for about 30 minutes. Stir in the gharum masala. Serve over rice. Top with almonds & raisins.
Serves 2
Sunday, September 21, 2008
Weekly Menu 9/22 - 9/27/08 & A Giveaway!
It's hard to believe but this is the 300th post on A Good Appetite. The past year & a half of cooking, tasting & writing for this blog has been such fun for Matt & me. But what's really keeps the blog interesting for us & pushes us to keep posting is all of you who read it & especially all of you that comment. With that in mind, we've decided it was time for a little giveaway as a way to say thanks.
We've put together this little package of treats from here in Minnesota.
* Wild Rice - This is the real stuff folks, naturally grown & hand harvested.
* Wee Willy's Barbecue Sauce - I know a barbecue sauce from MN?! But this one is so good Bon Appetit wrote it up in their barbecue issue this year.
* Scandinavian Blend Coffee from European Roasterie - Even though the beans aren't grown locally the roster is in MN yet has a wonderful global view.
* B.T. McElrath Harvest Moon Truffles - Handcrafted chocolates from a company housed in the original Betty Crocker R&D space.
Just leave a comment on this post including an email address where we can reach you. On Saturday we'll use the random number generator to pick a winner. (Sorry, we can only ship to the US & Canada.)
Now on to Menu Planning Monday....
This head cold I've had since last Tuesday night continues to linger & has really sucked all of my creativity in the kitchen away. Its also seems to make me craze chicken dishes...
Chicken Curry - I think we're going to try making up our own version of curry this week, we'll see how it goes. - RESULT - I think I might finally be on the right track when it comes to making my own curry.
Roast Chicken - I need some cooked chicken later in the week so that's the perfect excuse to have Matt roast one for dinner.
Chicken Fennel Pot Pie - Matt is traveling part of this week & I thought I'd use some leftover chicken to make myself a little pie.
Vegetable Tart - Looks like this week's CSA box is going to have lots of good things for me to put in a tart.
White Bean & Chicken Stew - Something I have in my head based on some chicken thighs we got on sale. I'm thinking a nice slow long cooker here.
I want to experiment some more with savory bread pudding & am thinking of a fennel, fig & goat cheese version (basically because I have fennel bread & goat cheese with figs in it). We'll thaw one of the containers of freezer pickles later in the week & report of how they turned out.
This weeks cupcake flavor is still a bit up in the air but I'm leaning to an Asian Plum flavor.
Labels:
weekly menu
Saturday, September 20, 2008
Matt's Mom's Freezer Pickles
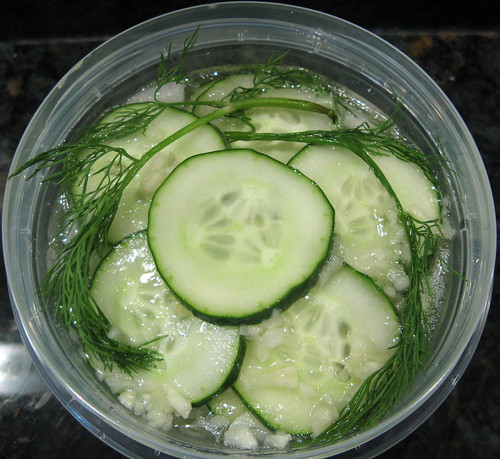
Matt's Mom sent us a recipe for freezer pickles to help us use up all the cucumber we've gotten from our CSA (I still had 5 huge ones in the fridge). The nice thing about freezer pickles is Matt will be able to have homemade pickles as a snack long after the cucumbers are out of season. He's been known to eat a jar of my refrigerator pickles in one sitting.
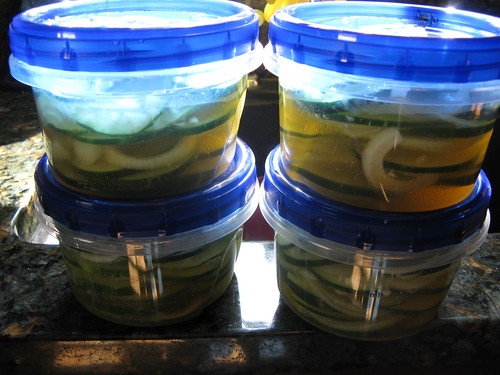
This recipe makes a garlic dill pickle which is something Matt had been asking for as well. The recipe calls for the pickles to be frozen in two 1-quart freezer containers. We decided to use four 2-cup containers so we could just thaw a little at a time when we wanted them. Its a super simple recipe with the only time consuming thing being the slicing. I can't wait to thaw some out & see how they taste. Knowing how good a cook Matt's mom is I bet they'll be great.
Freezer Pickles
5 small cucumbers, washed & thinly sliced (I used 2 big cucumbers)
1 large onion, peeled & thinly sliced
1/2 c vegetable oil
1 1/2 c cider vinegar
1/2 t salt
1/2 c honey
1/2 c water
2 cloves of garlic (crushed)
8 sprigs of fresh dill
Layer the cucumbers & onions in freezer containers. Whisk together the oil, vinegar, salt, honey, water & garlic until well combined. Pour over the cucumbers & onions leaving about 1 inch of headroom (it will expand when it freezes). Top with the sprigs of dill. Cover & freeze.
Update 10/1: Here's how the pickles turned out.
Friday, September 19, 2008
Leek & Blue Cheese Bread Pudding
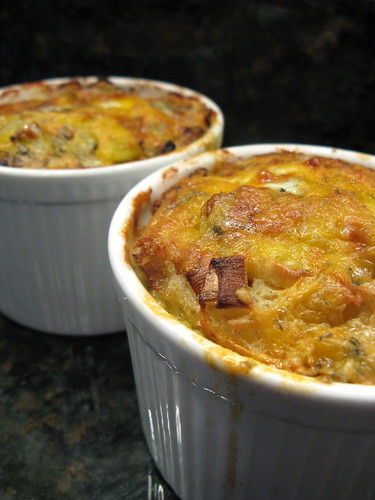
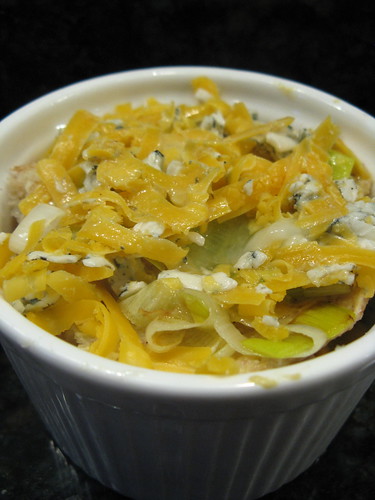
Last week Beth over at Jam and Clotted Cream posted a recipe for Leek & Stilton Bread & Butter Pudding that sounded so good I knew I needed to make it right away. She made a big dish of it & served it as an entrée. I decided to make it into individual side dishes & serve it alongside a grilled steak, it felt like a fancy steakhouse dish to me.
Matt & I both love leeks, bread puddings & cheese so we knew this would be right up our alley. This is a really warm satisfying dish though I was a little heavy-handed with the Danish blue cheese & it was a bit overpowering, part of that may be when I did the conversion from grams to ounces I rounded up, so I've slightly changed the quantity in the recipe below. Matt thought I made it with a little too much bread & would have liked it more custardy. I personally really liked the bread texture to mine. We'd like to try making this again though next time we may use all gruyere instead of the blue cheese & cheddar.
Beth used granary bread in hers something I've never seen around here &, after some research, discovered I'd would need to buy a few things to make. I asked her what would be a good substitute & she said wheat bread or white bread would work just fine. I ended up using some homemade white bread enriched with wheat bran & it worked great.
Individual Leek & Blue Cheese Bread Puddings
(adapted from Jam and Clotted Cream)
1 teaspoon olive oil
1 leek, cleaned & sliced, white & light green parts only
6 1/2-inch thick slices of bread (or only use 4 slices & do two layer if you want it to be less bready)
Dijon Mustard
butter
1 large egg
2/3 c milk
salt & pepper
1 oz blue cheese, grated
1.5 oz cheddar, grated
2 1 & 1/2 c oven-safe ramekins
Preheat oven to 375 F.
Heat the olive oil in a small sauté pan over medium-high heat. Add the leeks & cook until they are soft. Set aside.
Cut circles from your bread just big enough to sit inside your ramekins. Coat one side of each slice with a little butter & them mustard.
Whisk the egg & milk together until well blended. Season with salt & pepper.
Lay one slice of bread in the bottom of each ramekin with the butter & mustard side up. Top with 1/3 of the leeks & cheeses. Pour about 1/3 of the egg mixture on top (for me this was about 4 soup spoons worth). Repeat two more times using up all the ingredients. Allow the ramekins to rest for 20 minutes so all the egg mixture gets soaked into the bread.
Place the ramekins on a baking sheet (the cheese oozes over the side & this will save your oven bottom). Bake for 30 - 40 minutes or until the cheeses are brown & bubbly.
Serves 2
Thursday, September 18, 2008
Roasted Beet, Goat Cheese & Arugula Pizza
I've come down with a nasty little summer cold so dinner last night was in Matt's capable hands. He had come up with the idea for this pizza so it made perfect sense for him to make it anyway. He was looking for a good use for the beets & arugula we had gotten in our CSA box. We knew the flavors of beet & goat cheese were good in a tart so why not on a pizza.
It was very good, well at least from what I could tell with my nose stuffed up. The sweetness of the roasted beets goes so well with the tartness of the goat cheese. The only change we would make to this dish is the next time we'll roast the onion with the beets to caramelize it & at the same time roast some garlic & add a little thyme.
We did a little twist on our favorite pizza dough & added some wheat bran to it, just to make it a little healthier. It really made a nice addition to the crust's texture. We've been noticing lately that the pizza dough we use seems to require more flour than the original recipe calls for, especially when we are halving it to make only one pizza, so this revised version accounts for that.
Wheat Bran Pizza Dough
adapted from Wise Bread
3/4 c warm water, about 110 F
1/2 t rapid-rise yeast
1 T olive oil, plus more for greasing the bowl
1/3 c wheat bran
1 t kosher salt
1 1/2 - 2 C all-purpose flour
In a mixing bowl combine the warm water, yeast & olive oil. Stir to combine. Mix in the wheat bran & salt & stir. Add the 1 1/2 c of flour a half cup at a time stirring with each addition. Once you can't stir the dough anymore begin kneading it. It it is sticky add more flour about a tablespoon at a time. Knead until you have a smooth dough. Coat the inside of the bowl with a little olive oil. Turn the dough in it to cover all sides. Cover the bowl with a dishtowel & allow the dough to rise for about 2 hours or until doubled in size. The dough is now ready to use.
Makes 1 pizza
Roast Beet, Goat Cheese & Arugula Pizza
2 beets, peeled, halved & then cut into 1/8-inch slices
1 T olive oil plus more for greasing the pan
kosher salt
1 small onion, thinly sliced
1 1/2 c grated mozzarella
2 oz goat cheese
handful of arugula, stems removed
Preheat oven to 400 F. Place the beets in a baking pan & drizzle with the olive oil, stir to coat. Sprinkle with salt. Roast the beets for 20 - 25 minutes until soft & browning. Set aside.
Turn the oven up to 450 F. Grease a baking sheet with little olive oil. Spread the pizza dough out to the desired size & thickness with oiled hands. Sprinkle the pizza with the mozzarella. Top with beets, onions & arugula. Crumble goat cheese over the top. Bake for 15 minutes or until the cheese is bubbly & brown & the bottom of the crust is browned.
Other ways to use beets
Roasted Beet & Goat Cheese Tart with Polenta Crust
Roasted Vegetable Salad
Beef, Beer & Blue Cheese Pot Pie
Tuesday, September 16, 2008
Peach Melba Cupcakes
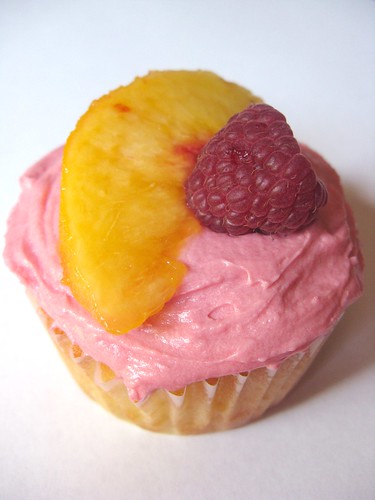
Peaches are in season & we got raspberries in our last CSA delivery so Matt suggested I make a cupcake showcasing those flavors.
I've had trouble getting a good flavored peach cupcake in the past so I searched the web to see what others had done. 52 Cupcakes used a recipe from 125 Best Cupcake Recipes that sounded like it would be perfect so I used that. The only changes I made were to size it down & to use Peach Schnapps instead of vanilla.
(Doesn't the peach on here look like its had one too many?)
The cupcakes come out pretty interesting. They are very moist & have a lot of peach flavor thanks to the peach pieces in it. The peaches tended to sink to the bottom & made the cupcakes fall apart a bit when you are eating them. 52 Cupcakes said they are better the next day when the juices have really sunk in (we ate some this evening & they were better after sitting).
The frosting is just a basic buttercream flavored & colored with raspberry coulis. The raspberry flavor is nice in this & the fresh raspberry on top really adds to the flavor as well.
Peach Melba Cupcake
Peach Cupcake
(adapted from 125 Best Cupcake Recipes)
1/2 c all-purpose flour
1/2 t baking powder
1/8 t grated nutmeg
pinch of salt
7 T white sugar
2 1/2 T unsalted butter, at room temperature
1 egg
1/2 t peach schnapps
1/4 c milk
2/3 of a peach, peeled, pitted, thinly sliced & cut into small chunks (save the rest of the peach to put on top of the cupcakes)
Preheat oven to 350 F. Prepare 6 muffin tins.
Mix together the flour, baking powder, nutmeg & salt. Set aside.
In a medium bowl beat the sugar & butter together. Add the egg & beat until light & fluffy. Add the peach schnapps & blend. Alternately beat in the flour mixture & the milk, making 3 additions of flour & 2 of the milk. Fold in the chunks of peach.
Split the batter evenly between the tins. Bake for 35 - 28 minutes. The cupcakes will be very golden brown & the top should spring back when touched. Allow to cool on a rack completely before frosting.
Makes 6 cupcakes
Raspberry Buttercream
heaping 1/4 c of raspberries, about 6 T
2 1/2 T unsalted butter, at room temperature
1/2 t salt
1 1/2 c powdered sugar, sifted
1/4 t vanilla
Put the raspberries into a fine sieve & push them through over a bowl. Leave seeds in the sieve. Scrap the bottom of the sieve to get any juice & pulp from it.
In a small bowl cream the butter & salt until smooth. Alternately blend in the sugar & raspberry juices, beat until well combined. Beat in vanilla.
Makes enough to frost 6 cupcakes
Decorate with a slice of fresh peach & a raspberry.
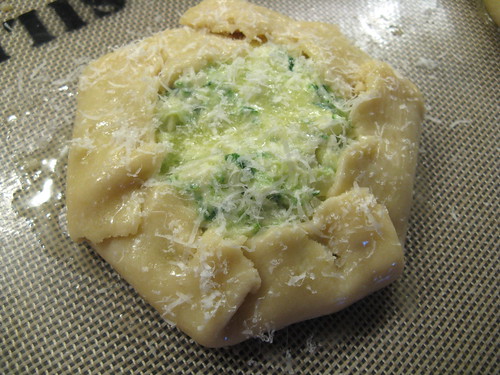
Zucchini Galette
According to the newsletter we get from the farm with each box, this last week looked to be the end of the summer squash. In some ways I'm not overly sad since we seemed to have a glut of zucchini this summer between what we grew in a pot on the patio & what we got in the CSA box. That said though I wanted to do something a little special with that last zucchini of the summer. Well talk about perfect timing, along comes the new issue of Bon Appétit with a recipe for individual zucchini galettes. We loved the Summer Garden Galette I made earlier this summer so I was betting this would be a hit too.
Of course, I made a few changes from the original recipe. I sized it to make 2 instead of 6, used goat cheese instead of ricotta, upped the amount of onion & garlic, left out the lemon & so on. The results were really tasty, though really what isn't there to like about cheese, garlic & flaky pastry. Plus they are awful pretty to look at.
Zucchini Galettes
Crust
2/3 c all-purpose flour
1/8 t salt
4 T cold unsalted butter, cut into chunks
1 T + 1 t (or more) cold water
Filling
1 3/4 c roughly grated zucchini
2 T butter
1 T olive oil
1 small onion, chopped
1 clove garlic, minced
2 oz goat cheese
1 T grated Parmesan + extra from sprinkling at the end
1 T beaten egg
pepper
kosher salt
Making the crust: Place the flour & salt into a food processor & pulse a few times to mix. Add in the butter & pulse until the mixture looks like a coarse meal. Add water & pulse. Squeeze the dough to see if it comes together, if its still dry add another 1 teaspoon. Spilt the dough into two balls & flatten them into discs. Wrap in plastic wrap & chill for 1/2 hour.
Making the filling: Put the zucchini in a colander & sprinkle with 1/4 t salt. Let sit for 1/2 hour. Wrap the zucchini in a clean dish towel & squeeze to get most of the water out.
In a sauté pan heat 1 T butter with the olive oil over medium-high heat. Add the onion & cook until translucent, about 5 minutes. Add the garlic & stir briefly. Add the zucchini & turn the heat down to medium-low. Cook for about 10 minutes until the zucchini is tender, stirring from time to time. Allow to cool to almost room temperature.
Whisk the goat cheese, Parmesan, egg together with a pinch of salt & pepper. Add to the zucchini mixture & stir to combine.
Assembly: Preheat the oven to 425 F. Remove the dough from the fridge & roll each disc into a 6-inch circle about 1/8-inch thick. Place the dough circles on a baking sheet covered with parchment paper or a silicone mat. Put about 1/2 c of filling in the center of each dough circle leaving a 1 1/2 - 1 1/4-inch edge. Fold the edge up around the filling, pleating as you go. Melt the remaining 1 T of butter & brush the dough with it. Pour any remaining melted better over the filling. Grate a little Parmesan over each tart & then sprinkle with a little salt.
Bake for 15 minutes then reduced the heat to 375 F and bake another 25 minutes. The crust should be golden while the filling is set & brown on top. Let sit 5 minutes before serving.
Makes 2 individual galettes
We ate these as a side dish with grilled pork chops but they would also make a great lunch or light meal.
Sunday, September 14, 2008
Weekly Menu 9/15 - 9/19/08
Its the last week of summer & it looks like its going to be a beautiful one here in Minnesota (we deserve it after a weekend of rain). Since cold weather is probably much closer than we'd like to think we'll take advantage of these warm days & be using the grill a lot.
On to Menu Planning Monday....
Grilled Steak with Leek & Blue Cheese Bread Pudding - I saw this side dish this week on Jam & Clotted Cream & knew it sounded right up our alley. Instead of serving it as a entrée I'll be making individual side dish versions.
Grilled Asian Chicken Salad - A request from Matt, who is going to make up an orange Asian dressing for it.
Grilled Pork Chops with Zucchini Galettes - We're still working through all the zucchini we got from the farm & this recipe from the latest Bon Appetite sounded perfect.
Roasted Beet, Goat Cheese & Arugula Pizza - Matt came up with this idea to use up a couple beets we have in the fridge. He was afraid it sounded a little out there but I bet it'll be great.
Hamburgers with Roasted Potatoes - Just a simple Friday night meal before we head off to a Minneapolis Foodie's Meet-up to learn how to make some preserves.
This week's cupcake flavor will be Peach Melba, I'm look forward to this one!
We'll also be making pickles that you can keep in the freezer to eat throughout the winter thanks to a recipe from Matt's mom.
Labels:
weekly menu
Homemade Potato Chips
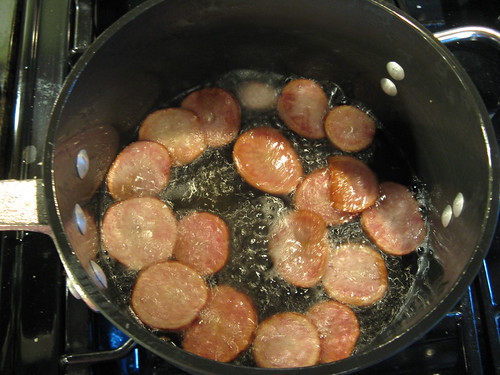
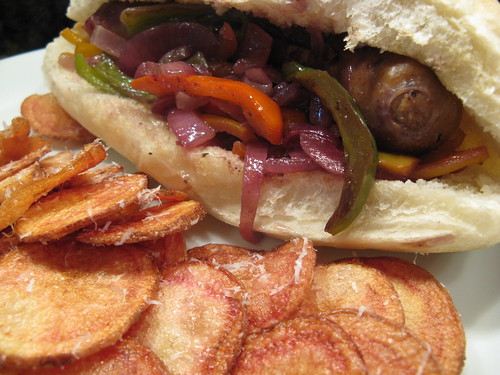
The other night we made Sausage & Pepper Sandwiches for dinner & I was having a hard time coming up with what to serve for a side. I just kept coming back to wanting potato chips with my sandwich. We'd gotten some beautiful Adirondack Red Potatoes from the farm this week so we decided to try our hand at frying our own chips.
It was our first time frying our own chips so we thought we'd share what we learned...
1. Cutting the potato into the thinnest slices you can will give you the crispiest chips.
2. Try to keep all the slices the same thickness so they all cook evenly.
3. You don't need to use a huge amount of oil, we had a little less than an inch in our pot.
4. Heat the oil to at least 350 F so the chips cook quickly without absorbing a ton of grease.
5. Cook the chips in batches a little at a time.
6. Let the chips get really dark brown, almost to where you think they are burning, before removing them from the oil.
7. When you put the chips on paper towels to drain salt them right away.
8. We grated a little Parmesan cheese on the chips while they were still hot so it melted right on to them but you could add any seasoning.
9. Be careful, the oil is hot. (That's Matt's tip)
These were such a treat still a slightly warm from cooking. Sure the house smells of frying but it was so worth it.
It was our first time frying our own chips so we thought we'd share what we learned...
1. Cutting the potato into the thinnest slices you can will give you the crispiest chips.
2. Try to keep all the slices the same thickness so they all cook evenly.
3. You don't need to use a huge amount of oil, we had a little less than an inch in our pot.
4. Heat the oil to at least 350 F so the chips cook quickly without absorbing a ton of grease.
5. Cook the chips in batches a little at a time.
6. Let the chips get really dark brown, almost to where you think they are burning, before removing them from the oil.
7. When you put the chips on paper towels to drain salt them right away.
8. We grated a little Parmesan cheese on the chips while they were still hot so it melted right on to them but you could add any seasoning.
9. Be careful, the oil is hot. (That's Matt's tip)
These were such a treat still a slightly warm from cooking. Sure the house smells of frying but it was so worth it.
More side dishes
Labels:
sides
Saturday, September 13, 2008
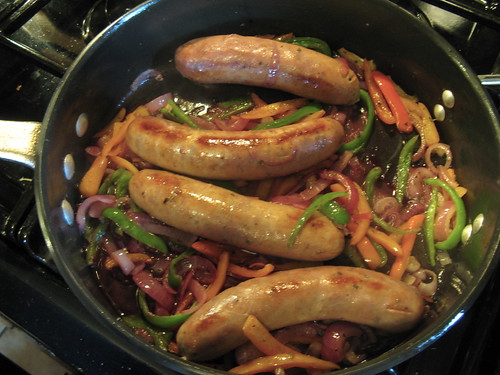
Sausage & Peppers
We've gotten quite a few peppers from our CSA in the last couple of weeks. Until this week most of them were green & I've always strongly believed I don't like green peppers. Well, Matt has been "sneaking" them in our stir-fries lately & it turns out I do like them as long as they are well cooked (I still think I'll avoid them raw). Its a good thing I discovered this or I would have never tried sausage & peppers & oh was it good.
The flavors of the onions & peppers cooked in a little red wine with a good Italian sausage make for a perfect sandwich; a little sweet, a little savory & just rich enough. The peppers & onions are quite mild from their sauté & match up well with the slight spiciness of the sausage we used. We served this on hoagie rolls as a sandwich but you could also cut up the sausages & serve it with pasta.
Sausage & Peppers
1 T olive oil
4 link Italian Sausages, fully cooked
1 T unsalted butter
2 c red onions, sliced
3 c mixed peppers, cored, seeded & sliced (we used a mixture of sweet yellow & orange peppers & Italia green peppers)
1/4 t dried oregano
1/4 t dried basil
salt & pepper
1/4 c red wine
4 soft hoagie rolls
Heat the oil in a skillet over medium-high heat. Add the sausages & brown on all sides. Remove the sausages from the pan & set aside.
Melt the butter in the skillet. Add the peppers, onions, oregano & basil plus salt & pepper to taste. Sauté for 5 minutes until the onions are translucent & the peppers & onions are soft. Pour the wine into the pan. Add the sausages back to the pan. Cover & turn down the heat to low. Allow to simmer for 15 minutes or until the sausages are heated through.
Serve the sausages on split hoagie rolls topped with the peppers & onions.
Serves 4
Other recipes using Italian sausage
Friday, September 12, 2008
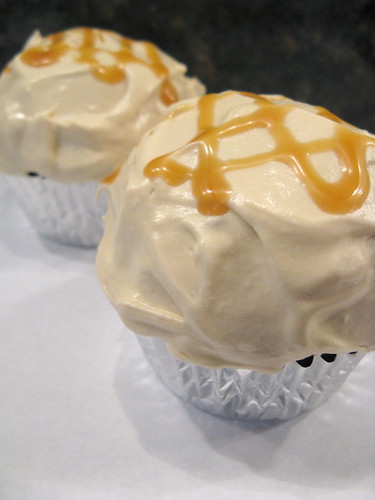
Caramel Apple Cupcakes
I'm a little late posting my cupcake this week because my first version of these came out like little apple rocks & the frosting was too runny. I must have been having a bad day in the kitchen. So, I decided to start over.
I used the apple cupcake recipe from Chockylit with a few changes. She bakes apples to make an apple mash but I had some all natural (meaning it only contained apples, sugar & cinnamon) apple jam in the house so I decided to use that instead. I also left out the apple juice since I didn't want to buy it for 2 tablespoons, I added buttermilk instead. This new version created a nice high cupcake that didn't fall once taken from the oven. The flavor & texture were quite a bit like a carrot cake, I actually wish it had been a bit more appley, perhaps it needed that extra apple juice.
For the frosting I made caramel cream cheese, I thought the tartness of the cream cheese would be a nice flavor against the sweetness of the caramel. The first version came out too runny & never hardened up in the fridge. I think my ratio of caramel sauce versus butter & cream cheese was too high. For the second version I added more of both & the frosting had a nice whipped cream texture to it & it does stiffen up a little in the fridge. I recommend using a butterscotch caramel sauce if you can find it, we liked the flavor better than the plain caramel in the frosting.
Apple Cupcakes
(adapted from Chockylit)
1 c flour
1/4 c sugar
1/2 t ground ginger
1/4 t cinnamon
pinch of nutmeg
1/2 t baking soda
1/8 t salt
1/2 c apple jam
1 large egg
1/4 c oil
2 T buttermilk
1/2 t vanilla
Preheat oven to 350 F. Prepare 4 - 5 muffin tins.
Mix all the dry ingredients together & set them aside.
In another bowl beat the egg. Add oil, apple jam, milk & vanilla. Whisk to combine. Add the dry ingredients & stir until just combines.
Fill the muffin tins 3/4 full for a high rounded cupcake or 1/2 full for a flatter version.
Bake for 20 - 22 minutes or until a toothpick inserted into the center comes out clean.
Allow to cool before frosting.
Caramel Cream Cheese Frosting
3 T unsalted butter, at room temperature
3 oz cream cheese
3 T caramel sauce
6 T powdered sugar
Beat the butter & cream cheese together until smooth. Add the caramel sauce & beat until incorporated. Shift the sugar into the bowl & beat until blended.
Makes enough to frost 6 - 8 cupcakes
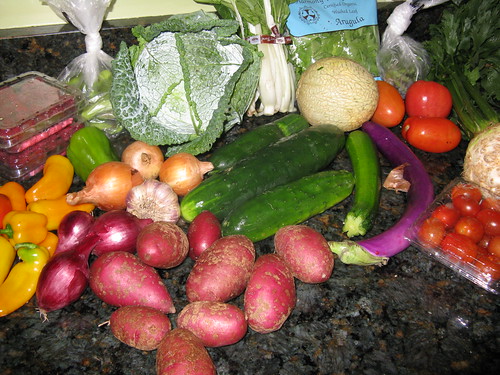
What's in CSA box #10
Raspberries - I think I'll freeze some of these to use later.
Mini Sweet Peppers - Some will go into stir-fry, others into tonight's dinner of sausage & peppers, not sure about the rest yet.
Edamame - I really like them boiled as a snack. We are thinking of buying 10 pounds from the farm to freeze for the winter has anyone ever frozen edamame?
Yellow & Red Onions - Seems we use garlic & onions in almost everything. The red onions will go in sausage & peppers.
Adirondack Red Potatoes - Most likely I 'll roast some of these & a few others I'll mash with the Celeriac
Garlic - I'm thinking of using some of the garlic we've gotten to plant in my own garden for next year.
Green Savoy Cabbage - we'll use this in stir-fries & salads
Baby Bok Choy - Stir-fry
Cucumbers - Matt wants me to make up some more pickles.
French Orange Melon - We'll have it for breakfast with some mini cinnamon rolls
Zucchini - They say this is close to the last of the season for these. This one is destine for stir-fry
Japanese eggplant - This was our choice vegetable this week, we took one just for stir-fry.
Arugula - Some for salads & some for on pizza. I may blanch some to freeze.
Green Beans - Perhaps I'll pickle some of these.
Tomatoes - Perhaps a homemade pizza sauce one night.
Celeriac - I love this in a mash
Labels:
csa
Subscribe to:
Posts (Atom)